PORTER INLAY CUTTING TECHNIQUE
I have used a variety of tools and techniques to cut inlays using a
regular
jeweler's saw frame which I started out with and found out very
quickly that it was far too slow for selling inlays to the custom shops and
Craftsmen via a mail order business. C.E. Ward was one of the first
post-war Craftsmen to
use a power driven scroll saw to cut inlays, however he used metal templates
to transfer the pattern to the peghead and fingerboard like Gibson and/or
their vendors did which left
much to be desired, but it was pretty close to the tolerances that Gibson
and/or their vendors used on their inlays. CE Ward also used photocopies of tracings from
original designs which duplicated the errors and cutting imperfections. My method of transferring an accurate pattern
via the double stick method is more time consuming but yields a greater
degree of accuracy especially when you have multiple cut inlay patterns of the same
design to choose from. I purchased a Nikon F2AS SLR 35MM camera
body and a Nikon Nikkor 55MM lenses for 1:1 capture of original inlay
designs on slide media and it worked great. Still have that ole
clunker today which was replaced with a couple digital cameras.
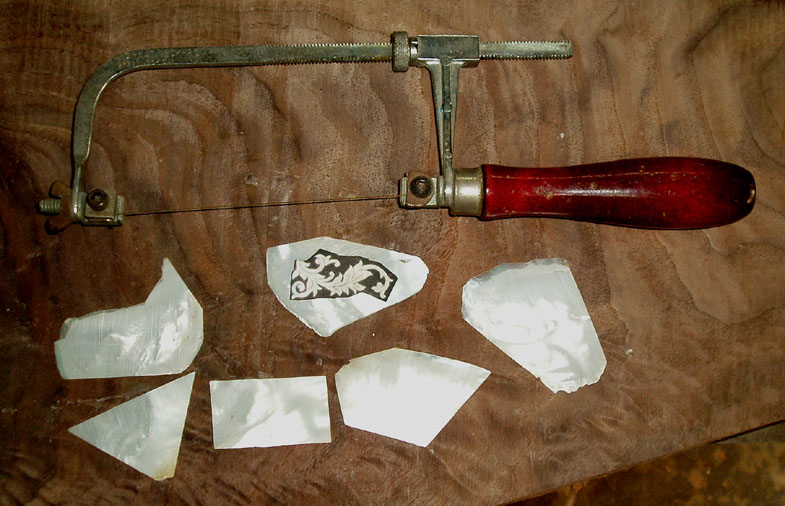
I have used the lapidary type rock saw
with a diamond blade and pantograph type machines for cutting inlays and
engraving but used the lapidary saw for straight or angular cuts such as
strips, diamonds and squares. Dusted diamond wire worked but was far too
expensive in the 1970s for cutting inlays. The down side to this technique; if you are sloppy and
inlays are a noticeable variance from your cutting pattern, you will have
excessive filler around the inlays as most of the pre-war Gibson stuff was!
The advantage of hand routing is that you can scribe and route to the actual
piece of inlay that you have cut. I had the advantage of having about
twenty (20) complete inlay patterns of each pattern on hand and was able to
choose an individual inlay piece that matched the space I cut out of the
fingerboard and peghead with a high degree of precision. With
this single inlay pattern, I am sure I will have to do a little filing of
the fingerboard unless I cut a little plus tolerance for the inlays but
ebony wood does take and hide filler real well and hope I can still maintain
very close tolerances.
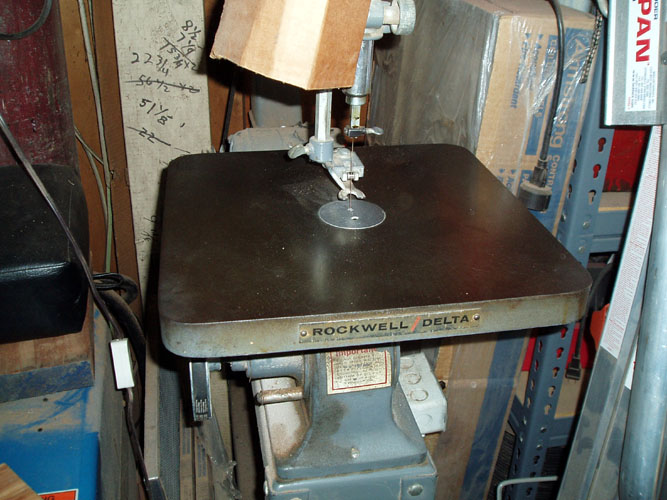
I have used the Delta and Rockwell/Delta brand of scroll
saws since late 1968 to cut inlays with. There are other excellent
brands of heavy duty scroll saws available but the small, light duty
hobby type are a no no! My preferred jewelers saw blade was Vigor
brand made in Germany or Sweden, can't remember which but they are no longer
available or at least none of the places I use to purchase them from has
access to them. I used the # 6 size width blade for cutting all
the standard Gibson stock patterns except I used the # 4 size width
blade for cutting the script Gibson name and other small logos. Also,
I used .040 thick mother of pearl for years and it simply cut like butter
using the # 6 blade and later went to the .050 thick mother of pearl because
the major suppliers mother of pearl blanks were prone to have a taper from
the center outward and would get real thin toward the edge. When I
went to the .050 thick mother of pearl, the saw cutting time increased and
blade life diminished as well. When using the .050 thick mother of
pearl, script names such as Gibson did not break as often though.
Currently I am using Laser Blades
brand blades that are much smaller in width than what Gibson used
in the pre-war days and using a # 4 blade which has a width of around
.016 inches and manufactured and/or sold by
Rio Grande, 7500 Bluewater Road
NW, Albuquerque, NW 87121-1962 Telephone: 800-545-6566.
You can also get them from David Nichols at
Custom Pearl Inlay, 177 Low
Road, Malone, NY 12953 Telephone: 518-483-7685. David
Nichols in my opinion is at the top without equal when it comes to cutting
inlays by hand! I believe I could have given him a run for his money
in the mid 1970s only on Gibson pre-war inlay designs but cannot hold a
candle to him today! His cutting experience and artistic work has far
exceeded my own and I certainly give homage to him! I have
examples of his work for master patterns for custom box calls that are as
near perfect as can be done!
Note:
David Nichols uses the much smaller blades the 3/0 versus the size 3 blade and
a hand
powered jewelers saw frame!
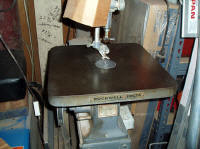

I have used the above Rockwell/Delta 24" scroll since around 1980 being
the third one that I have owned. John Bowles of Advance, NC purchased
the first one I used for around 10 years and Jim Yarboro of Gun Barrel City,
Texas purchased the second one I purchased from an auction sale in Morven,
NC which had a broken motor and he replaced the motor. The standard
saw above came with a a four speed step pulley and I use it at a fairly high
rate of speed....by looking at the pulley ratio, I don't think it is a one
to one transfer of the 1725 rpm mother but may be on the too fast side if
any. In the "ole days", I had the legs of the scroll saw base secured
to the floor to help absorb the vibrations and there are specialized
materials to place on the base of the saw for the saw purpose but can't
remember if I used any back then...so much for the CRS disease (can't
remember sometimes) is the clean version.
An essential item to use when cutting mother of pearl and abalone is to
use a dust mask, preferably the dual canister type and have the saw small
air blower tip positioned to where it will blow the dust away from you.
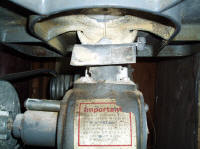
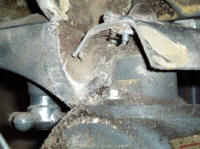
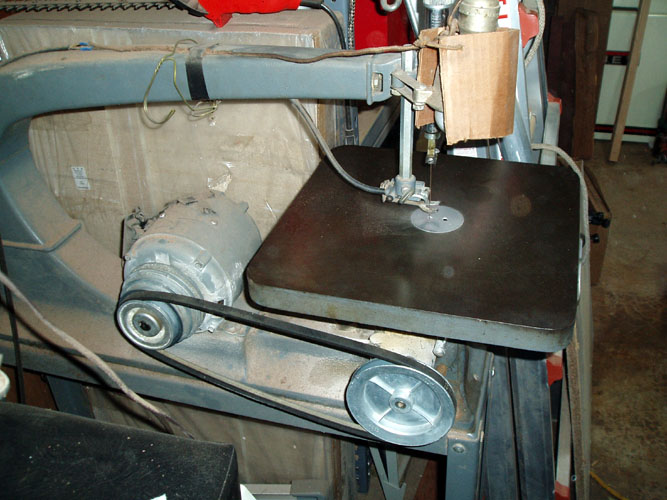
I made a modification to the above saw by putting an aluminum
shield plate right below the lower chuck for the blade and it is right at
the top of the hollow spindle that connects to the internal cam of the
machine. This keeps the pearl dust from getting between the bronze
lower bushing which has a felt sleeve above it but it will help keep the
abrasive pearl dust from getting between the shaft/spindle and bronze
bushing. The felt dust shield does a poor job and it will allow the
pearl dust to wear the spindle which is a thin piece of hollow steel
tubing in short order if you are cutting 40 hours or more a week. Pixs
below:
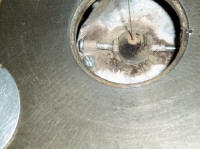
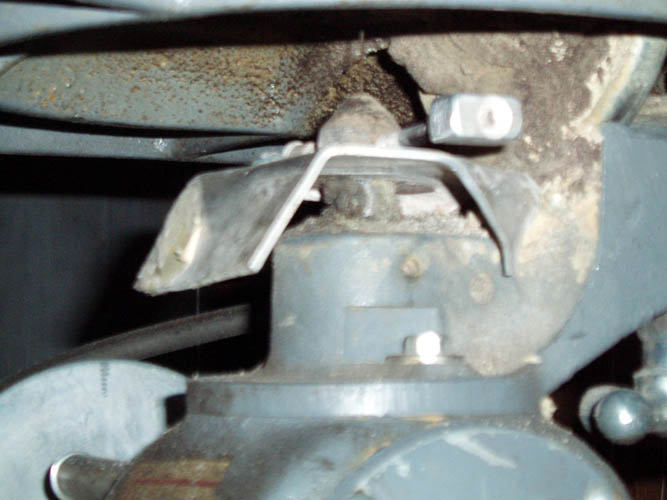
The above dust guard was made from a flat piece of aluminum about .060
inches in thickness with a hole drilled in the center that matched the
diameter of the hollow steel spindle. The rear corners of the aluminum
guard were bent downward to keep from hitting the saw frame and the front
was bent downward also. It was secured in place by the self-centering
chuck above it which screwed into the hollow spindle. Also, a couple
screws were used to keep the dust guard from vibrating or moving around
while the saw was in usage. One of the screws held a screw that
attached to the self-centering blade chuck which can be seen in the last pix
above on the right. I drilled and tapped the left side of the
self-centering chuck for the 8-32 tpi screw/bolt and locked it with a nut
against the chuck. The guard was further secured to the screw with
another screw/nut and cable clamp. A "jerry rig"
but it worked.
NOTE: Chuck Erikson aka The Duke of Pearl has recently
written a treatise about some of the myths about the dangers of working with
inlays. Click on this
link to
open the document
in Microsoft Word .DOC file.
Click on this
link to open the document in Adobe Acrobat .PDF file.
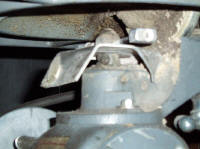
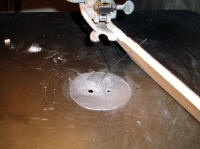
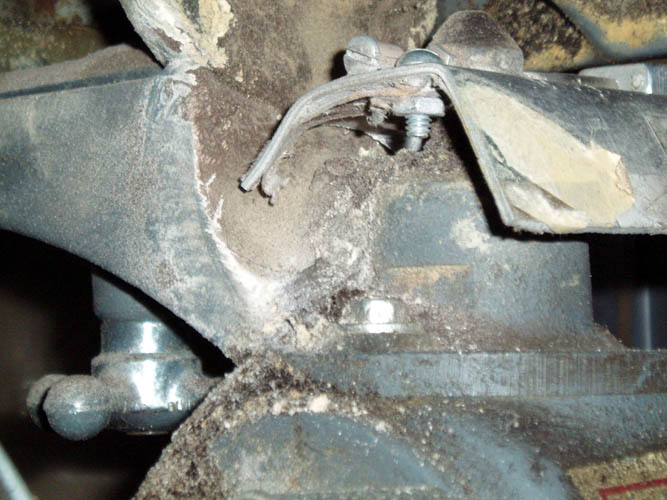
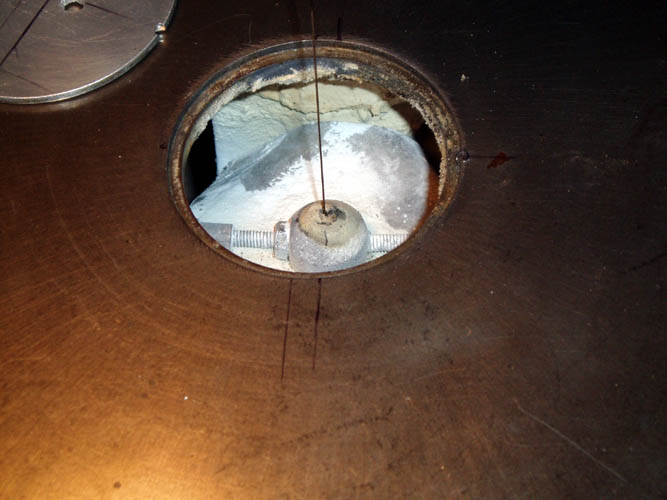
Another modification was to change the round table insert which had a
large slot in it to one without anything and drilled a small hole
large enough to accept the blade; no more than 1/16 inch in diameter.
The more support you have directly under the material you are cutting,
yields less mother of pearl breakage; especially on very fragile designs and
materials.
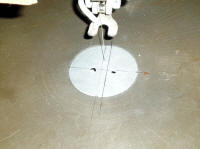
The camera flash washed out the detail in the above pix but you can see
where I have drilled two holes in the insert over the years and after a few
years of usage, the jewelers saw blade will "wallow" aka enlarge the hole to
where you need to relocate the insert and drill another hole. I just
recently drilled a small hole in the above insert. If you are using a
hand powered jewelers saw frame, you need to do the same thing with the
support means underneath the mother of pearl and again use a small hole and
access slot. To decrease the probability of breaking an inlay while cutting,
you can add a 1/4 inch thick piece of clear Plexiglas material to the
underside of the "foot" and drill and countersink small screws securing
them through a couple holes drilled in each leg of the horseshoe shaped
foot. Saw a small slot at least 1/16 inch wide allowing the blade to
come through but in this case with a much larger supporting area of the
foot. I break more mother of pearl when the blade breaks and the
broken blade hits the
bottom of the inlay you are cutting driving the piece upward allowing the
design to try and go through the large horseshoe opening of the foot.
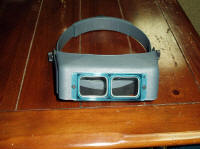
When I cut inlays in the late 60's through 1979 on a regular basis, I did not use any
magnification but those days are long gone! Grin if you must! I
now have to use a pair of progressive glasses with the help of a +2.5
magnification Opti-Visor to be able to cut inlays. With the Opti-Visor
or any type of magnification, you have a certain working distance that will
remain in focus; the more magnification, the closer you have to get to your
material.
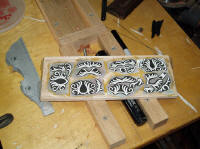
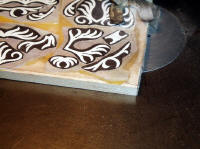

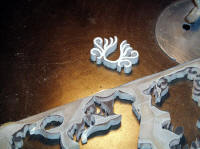
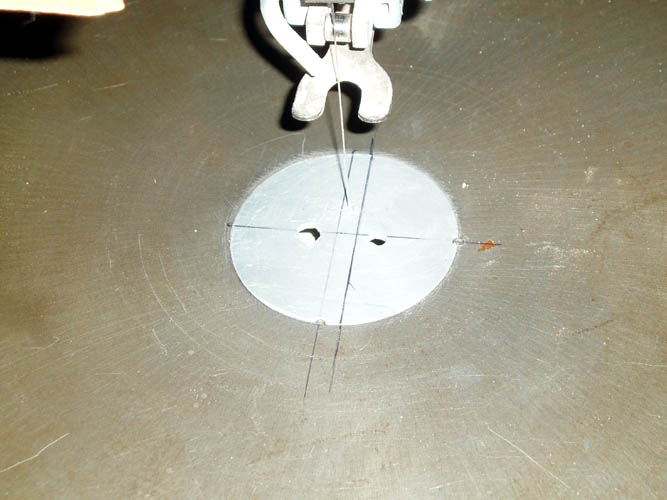
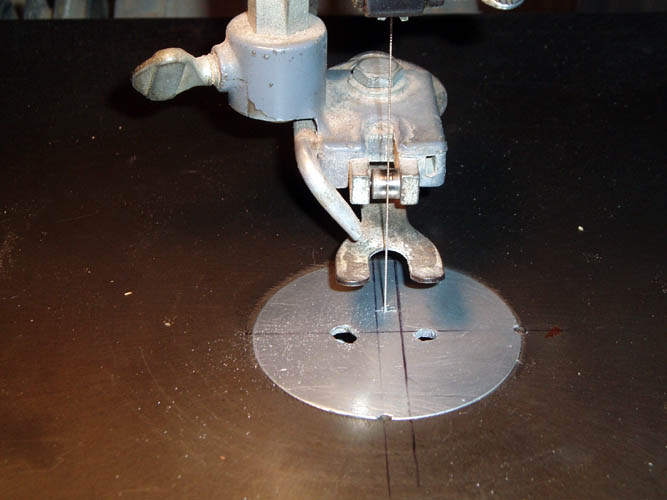
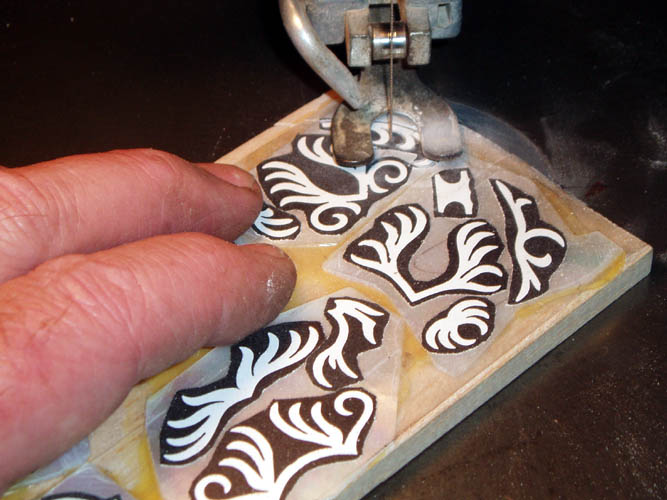
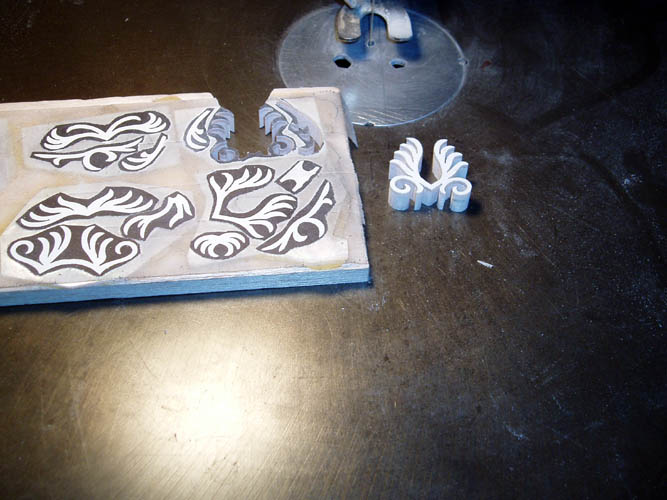
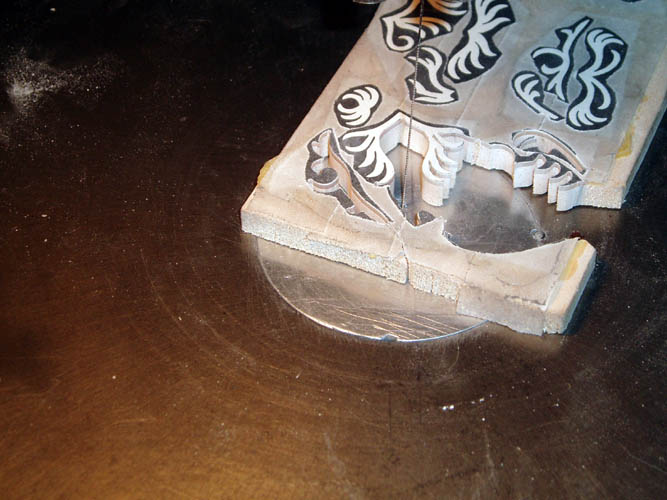
Now to the inlay cutting starting with the pix on the left. I
looked at the layout of the mother of pearl pattern and decided to start
cutting from the upper right and work my way through the pattern. This
is necessary in order to keep from "painting or cutting yourself into a
corner" so to speak. Exactly where to start on the inlay comes from
experience but you want to have the most fragile part of the pattern
surrounded by as much mother of pearl as you can. I try and start the
cut at a place where the exit cut for the pattern will leave as little a
burr as possible, however sometimes you have to start away from a good exit
point which is a little more difficult to have your starting and ending saw
cut meet perfectly. Click on each thumbnail pix and see where I
started and ended.
Another important point, especially on Gibson type
designs and on the above design, you have many examples where your saw blade
will enter the pattern between specific design elements and there is no way
to turn around and exit back out of the cut you just made without enlarging
the saw cut. On those cuts, you want the saw blade cut detail to have
a clean stopping point into the design and the only way you can achieve this
is by backing out of the cut and finding an area nearby in the unused design
portion of the pattern that will allow you to make a saw cut into and
enlarge the cut and then turn your material around 180 degrees and enter
the saw cut you just made with the back of the saw blade butting against the
cut you must made. You then proceed to move forward and then continue
your cutting, repeating this back cutting technique until you have your
pattern cut. Many patterns will allow you to simply turn around in the
cut but most of the Gibson designs and the above pattern required such a
back cutting technique. Words and pixs simply doesn't
adequately describe what is taking place and a video clip would be much
better.


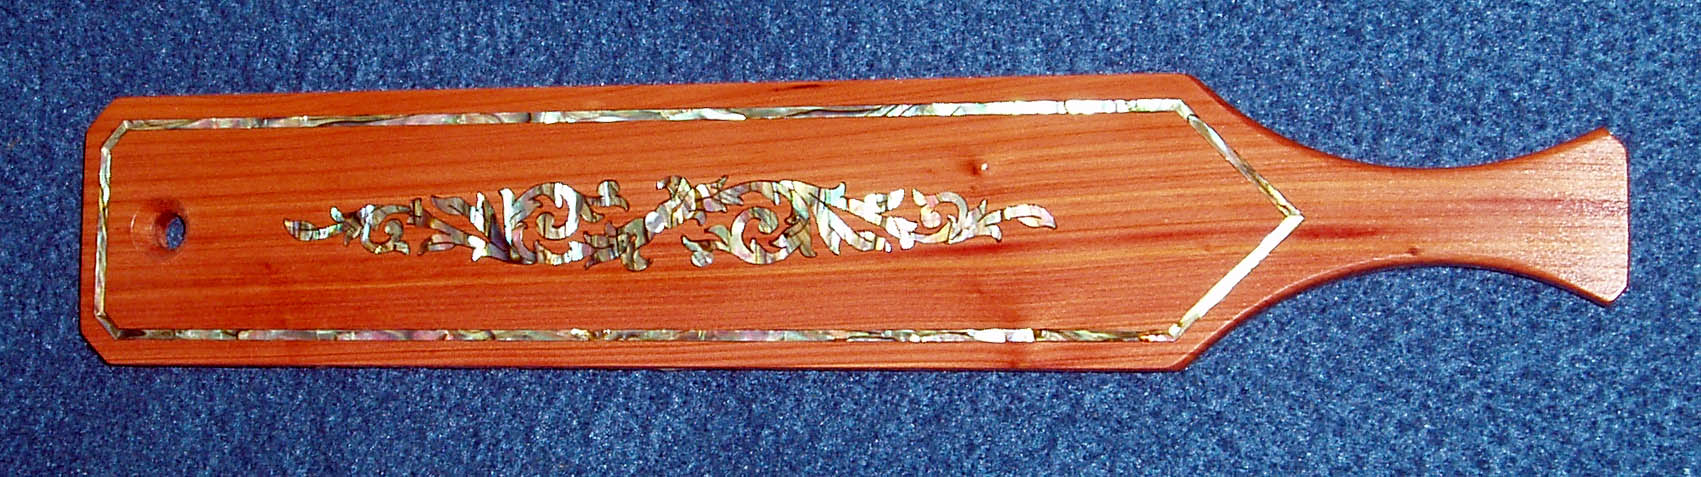
The first inlay I cut from this pattern reflects that I haven't cut
inlays in a good while of this type and you can see just a little of the
black border outside the actual white inlay pattern. As I continued to
cut, the saw blade stayed next to the white pattern much closer but this is
hand cutting inlays although you are using a machine to power the saw blade,
it is still the hand to eye coordination that is making it possible.
The current blades running at the higher rate of speed doesn't last but a
short while, maybe one small inlay design before it becomes dull requiring
more pressure to be exerted which will distort the bottom of the pattern a
little from the original top surface but most of the time is nil. You
will see a difference on the bottom of the 1/4 inch thick balsa wood
reflecting such abnormal pressure used. When a blade becomes too dull
to cut or breaks, disengage the blade from the upper saw blade spring loaded
plunger by
loosing the adjustment thumbscrew and lifting the entire foot support upward
and lock it in place with the thumbscrew. Using the motor pulley,
rotate the lower power shaft (plunger) of the jig saw until it is down as
far as it will go and release the lower jaw chuck pressure by turning the
thumbscrew counterclockwise and remove the jewelers saw blade. Install
a new blade making certain that the teeth are pointing downward
and you do not have it so deep that the self-centering chuck
will be gripping the cutting portion of the blade which is weaker and
tighten the chuck by turning the thumbscrew clockwise. Place the
circular table insert back into the channel being sure that it is flush with
the table top and no sawdust or debris is underneath it causing it to be
"proud" above the table which can interfere with your cutting by hanging
your substrate material against the elevated portion of the insert causing
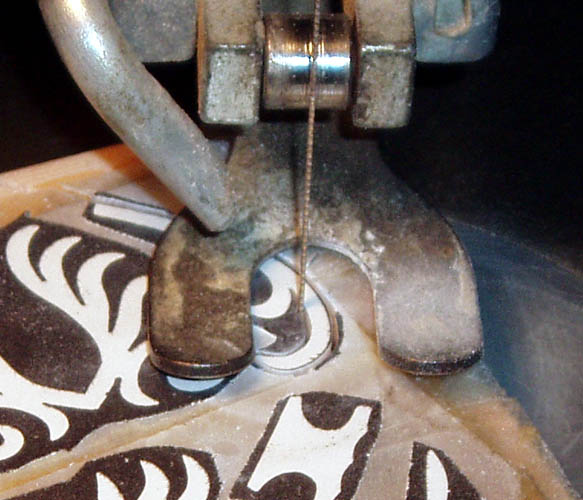
mother of pearl breakage and/or saw blade breakage. Insert the saw blade back into your mother of pearl substrate material and
slowly lower the pressure foot onto the material. Rotate the motor
pulley and cam the blade upward as far as it will go and lower the upper
spring plunger tube downward and center the jewelers saw blade in the chuck and tighten the
thumbscrew securing the blade. Remember, adjust the foot pressure
where it just barely contacts the mother of pearl/substrate material.
If it is adjusted too high, the material will make a "flopping" sound and if
it is too tight, you run the risk of breaking a very delicate inlay by
putting it into a bind.
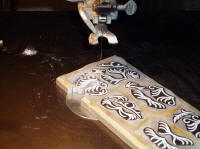


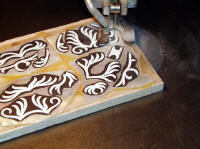
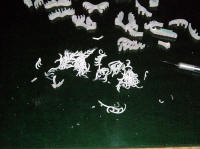
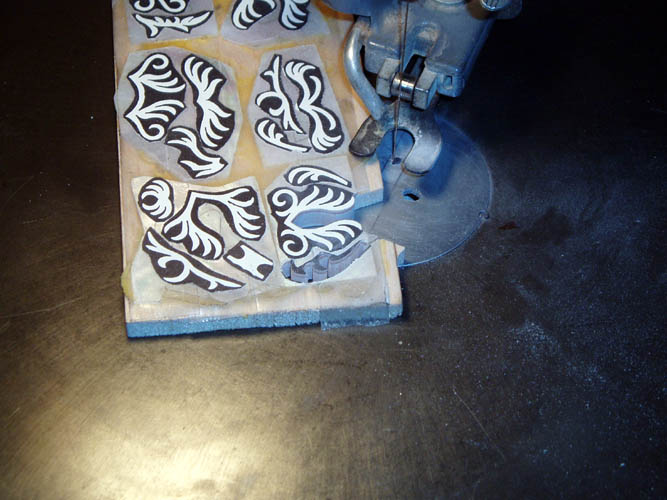
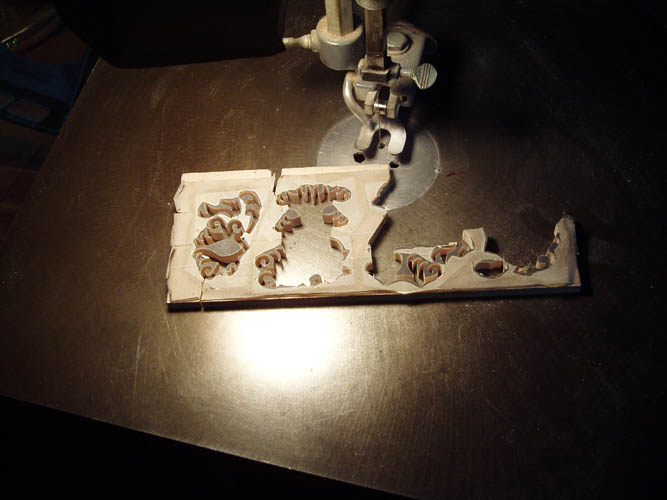
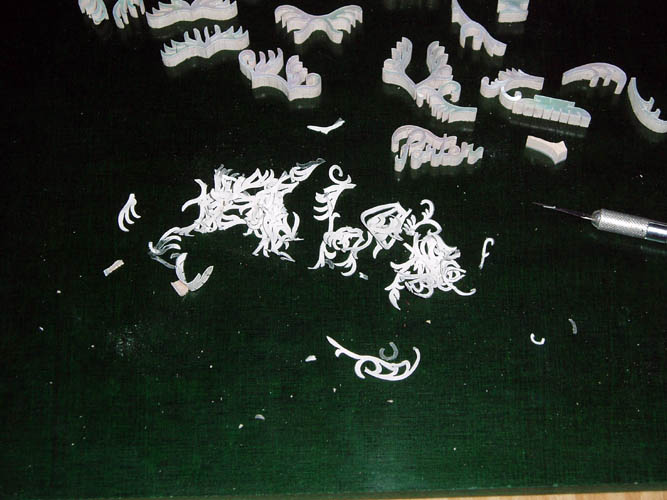
The above pixs show myself working my way cutting each inlay design.
With the current blades, the process is very slow due to their cutting
ability not lasting very long and/or breaking too soon. The cut
designs are looking much cleaner as I am staying with the pattern much
closer getting cutting confidence built back up and not afraid to
aggressively engage the design!


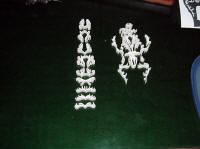
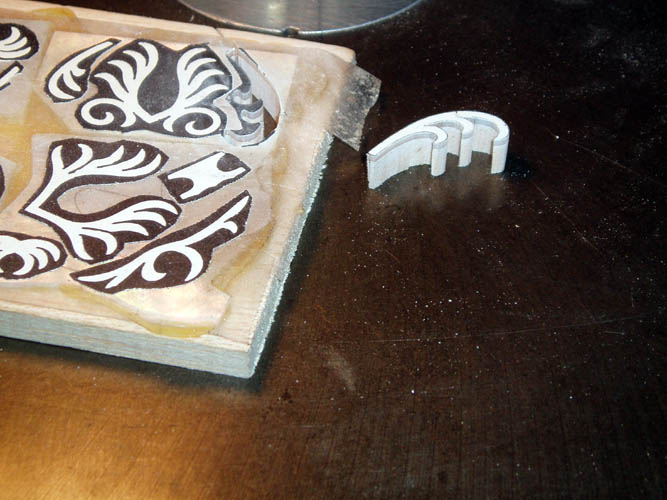
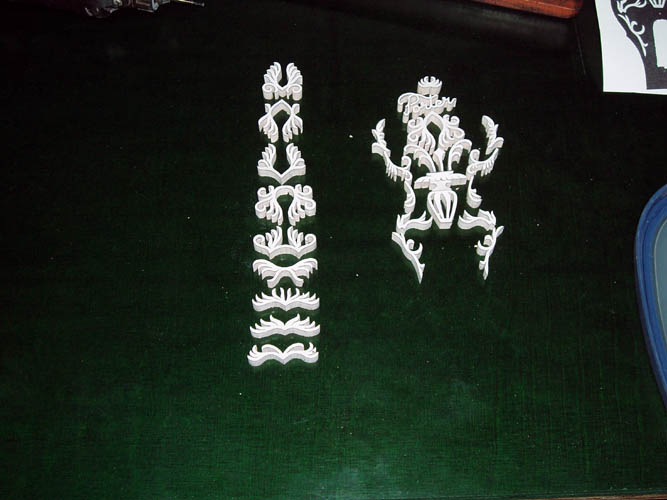
The left pix shows nothing but scrap material from the first mother of
pearl substrate layout. The second pix from the left, I choose to start
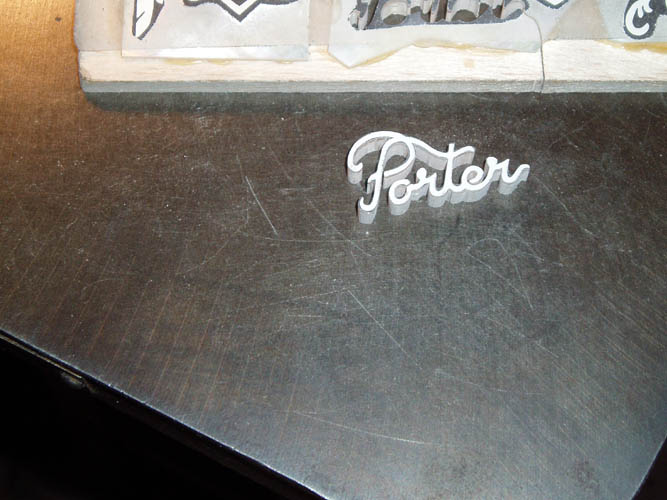
cutting my script Porter logo and started on the left of the pattern and
worked around until I got to the lower portion of the letter P. I then
cut from the left side; tail of the letter R and finished up at the lower
portion of the letter P. This design similar to the script Gibson logo
has open areas of mother of pearl that is left more or less hanging such as
the letter E and the letter O which will break if you are not very careful.
I haven't cut a script Porter since the year 2000 and I could have cut it
from another direction...so much for memory fading.....grin if you must.
A much safer approach would have been to drill a small hole into the center
of the letter O and cut the inside shape out first and proceed as mentioned
above but I guess my confidence level was high enough to risk it! You must be able to cut
both clockwise and counterclockwise as dictated by the
pattern and the complexity of the design. Also, one portion of the
base of the flowerpot design in the peghead required drilling a small hole
through the mother of pearl blank and the balsa wood substrate material
since the cuts were inside the design and not able to access by the standard
method and had to thread the jewelers saw blade at least three times in that
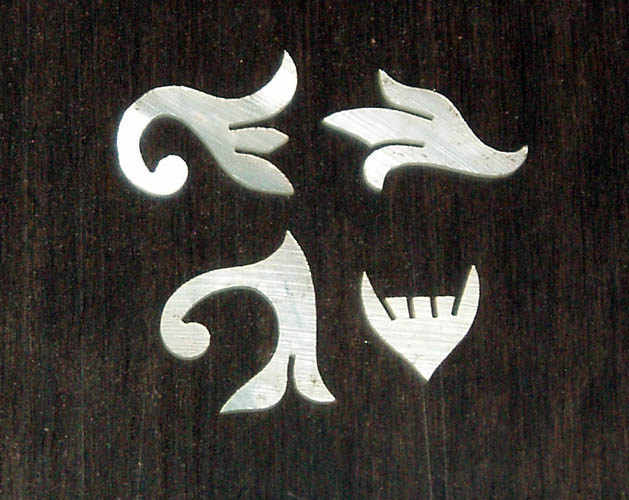
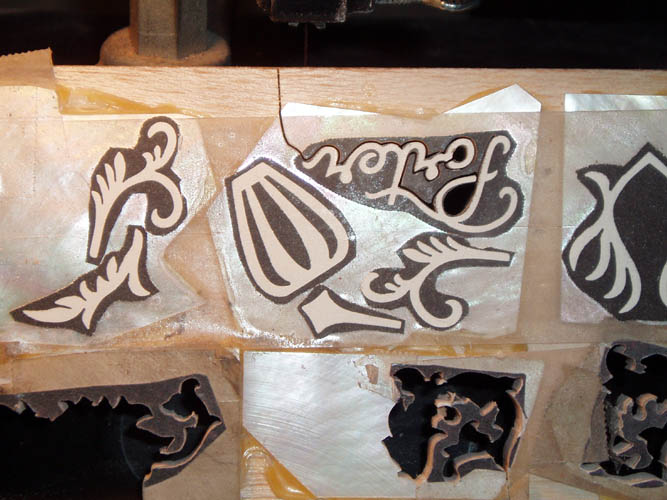
design piece alone. Pix on the right is the cut mother of pearl pattern with
the paper pattern still double stick taped to the mother of pearl which is
best to remove before inlaying and gives a better view of any detail that
needs to be corrected such as burrs or cuts that are way outside of being
symmetrical that may be corrected at the risk of breaking the inlay.
The same basic technique as far as maneuvering the mother of pearl material
into the saw blade and back cutting works the same when using the hand
powered jewelers saw frame, You need to control the speed of your saw
blade especially in tight turns when using the hand powered jewelers saw
frame and the difference with the scroll saw, you learn to control the
speed and pressure that you are feeding the material into the saw blade and
don't have the luxury of controlling the saw blade speed although you could
put an auxiliary speed foot controlled device on your scroll saw if you
really felt a need for it.
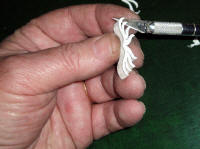
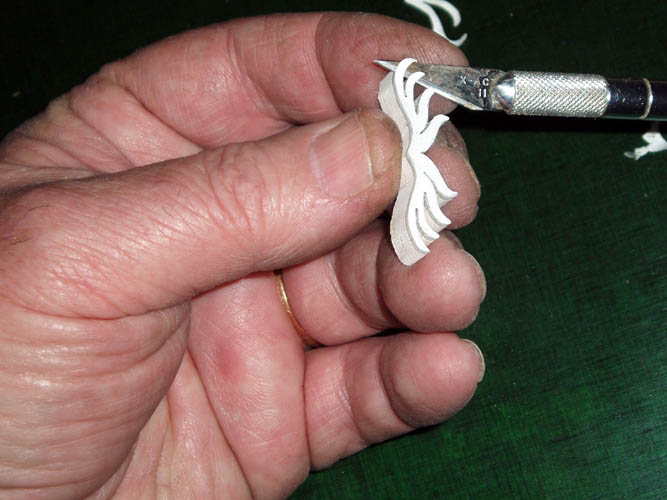
It takes a very light touch to remove the double stick patterns from the
precut mother of pearl inlays without breaking the inlay. I use a very
thin X-Acto knife blade and grip the inlay piece with as much support from
the fingers as possible and very gingerly start at one side and only lift
the tape and pattern from the inlay to get it started and try and peel and
roll if off the design. After the cutting pattern is removed from the
inlays, inspect each piece for any exit burr that needs removing and/or any
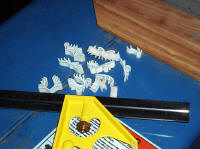
inlay that needs correcting to make it more symmetrical. I used a
small 1 inch diameter Dremel abrasive cutting disk for straight de-burring
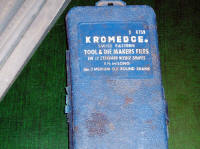
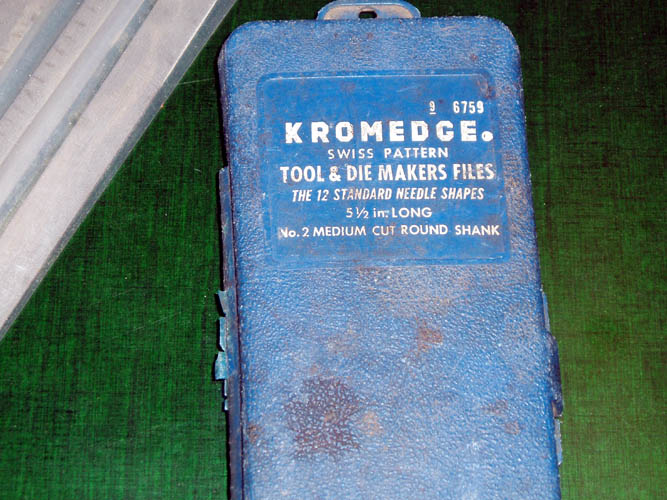
and on outside contours. I used the tool and die makers files aka
needle files for
inside de-burring which this kit has an assortment of different shapes but
missing about half them and the rest are ready to be trashed due to being in
use for 41 years off and on....talk about being frugal;....grin if you
must!.
I used a total of 38 # 4 jewelers saw blades to cut the above pattern
which is more than twice or more what it should have taken. I owe this to the
quality of the blades and the user's cutting skills not up to full
potential. If you don't use it, you loose it!
In closing this segment out, it took the entire afternoon of cutting,
etc, off and on and about 3/4 of the way through the cutting, I realized
that I didn't need the Opti-Visor and with just my standard
progressive glasses, I cut to the edge of the pattern as good as with the
Opti-Visor and was able to get more eye relief and sit with better posture
while cutting which was much more comfortable. It is important to have
a bar type padded stool to sit on whereby you are high above the scroll saw
table enabling you to get a better and less distorted view of the
cutting process. The stool that I have is much too low and you cannot
get the best view while cutting the pattern from a lower view or position at
the scroll saw table.
Before cutting the peghead and fingerboard for the inlays, I plan to
order size # 6 jewelers saw blades for this project which is a few thousands
thicker and should have a little less breakage and get the proper height
bar stool/chair. The size # 6 blade
will definitely not work for a very delicate design such as a Martin script
logo, etc.
Following pix of a few loose Gibson "Flying Eagle" mother of pearl
inlays that I found in my Kennedy machinists tool box dating back to the mid
1970s. I don't have a clue as to why I would have saved them and I gauged
the width of the saw cuts and they were between .019 to .020 inches in width
and I will guess around .0196 since the .019 gauge was a little loose in the
slots and the .020 would only go into one of the cuts the full depth.
If one is to replicate the pre-war Gibson inlay designs or designs that have
that type of boldness with the square cuts of the saw blade terminating into
the design, it is imperative that you use at least
a saw blade close to .020 inches in width which gives Gibson inlays their
uniqueness and most of their designs require a cut-back into the material
with the square cut versus a smaller diameter cut or a cut produced by a
round cutting tool/bit.
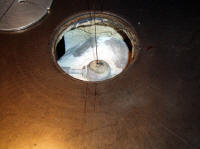
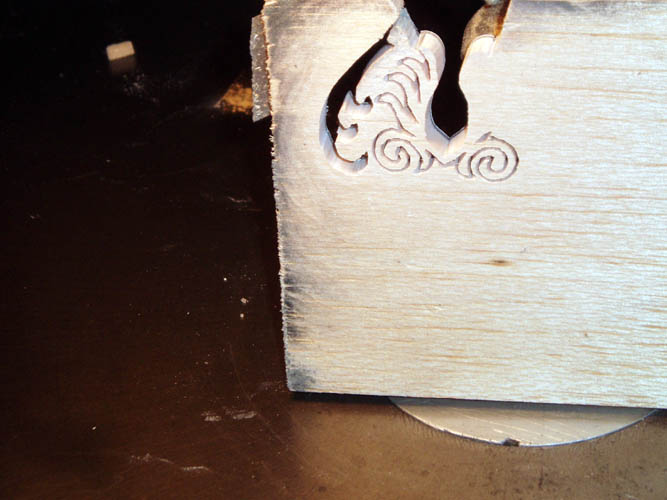
With this enlargement of the inlays, you can clearly see the saw cuts
going into the design and terminating with a square or stop cut and you are
unable to actually turn the saw blade around or should say turn your
material around because your saw blade remains in the same basic position
whether it is hand powered or machine powered. To reiterate, on
those cuts, you want the saw blade cut detail to have a clean stopping point
into the design and the only way you can achieve this is by backing out of
the cut and finding an area nearby in the unused design portion of the
pattern that will allow you to make a saw cut into and enlarge the cut and
then turn your material around 180 degrees and enter the saw cut you just
made with the back of the saw blade butting against the cut you must made.
You then proceed to move forward and then continue your cutting, repeating
this back cutting technique until you have your pattern cut.
This procedure will not seem clear until you actually start cutting
a design with a jewelers saw blade.
The above pix enlargement shows the essence of the back cutting
technique, whereas the saw cut was made into the design behind the
saw blade and what you are looking at is the material being brought into the
cut just made with the back of the saw blade (non-cutting portion of the
blade) about to go into the cut just made and then continue the cutting
design on the left of the saw blade.
It is very easy to understand why the CNC routers are heavily used
in the pearl cutting and inlaying business today, reducing not only the
manual labor, cutting experience required, and those machines do not take coffee breaks
and ask for vacation and holidays off, whereby producing a consistent product
governed by
the programmers ability and whatever cutter limitation is imposed. New
technology in cutter design and materials has made it feasible to own and
use CNC routers for inlays.
I lucked out today and did not break a single piece of mother of pearl
for my Flaming Claw inlay pattern and hope the inlaying will go as smooth!
Bill aka Mickey Porter 02-28-10.
LEAVING ON A
SPIRITUAL NOTE
If you do not know Jesus Christ as your Lord and Savior, please take this
moment to accept him by Faith into your Life, whereby Salvation will be
attained.
Ephesians 2:8 - 2:9 8 For by grace are ye saved through faith;
and that not of yourselves: [it is] the gift of God: 9 Not of works, lest
any man should boast.
Hebrews 11:1 “Now faith is the substance of things hoped for, the
evidence of things not seen.”
Romans 10:17 “So then faith cometh by hearing, and hearing by the
word of God.”
Open this
link about faith in the King James Bible.
Romans 10:9 “That if thou shalt confess with thy mouth the Lord
Jesus, and shalt believe in thine heart that God hath raised him from the
dead, thou shalt be saved.”
Open this
link of Bible Verses About Salvation, King
James Version Bible (KJV).
Hebrews 4:12 “For the word of God is quick, and powerful, and
sharper than any two edged sword, piercing even to the dividing asunder of
soul and spirit, and of the joints and marrow, and is a discerner of the
thoughts and intents of the heart.”
Romans 6:23 “For the wages of sin is death; but the gift of God is
eternal life through Jesus Christ our Lord.”
Romans 3:23 “For all have sinned, and come short of the glory of
God;”
Micah 6:8 “He hath shewed thee, O man, what is good; and what doth
the LORD require of thee, but to do justly, and to love mercy, and to walk
humbly with thy God?”
Philippians 4:13 "I can do all things through Christ which
strengtheneth me."
PREVIOUS PAGE
NEXT PAGE
BANJO CONSTRUCTION HOME PAGE


