SECRETARY BOXES
When my
end tables project is completed; currently waiting on the weather to
cooperate to start the staining and lacquering process, I plan to build a
few secretary aka letter boxes.
The basic secretary box construction is very similar to my
custom heirloom
boxes I made four years ago, but without the upper trim and the
lower trim and base added. However, they will feature some type of
small lift out tray for accessories such as stamps, pens, etc.
I surfed the internet for some ideas and most letter boxes are fairly plain,
but you can add whatever ornamentation; e.g., wood marquetry inlays, mother
of pearl and/or abalone inlays, carvings, etc. I have some scrap curly maple aka
unallocated wood left over from the curly maple mission style
end tables
and will build at least one from that material, but want to use 4/4 black walnut
for several boxes as well.
My friend
Robert Webster of Hamlet, NC gifted me with a couple pieces of
black walnut that will make at least one secretary/letter box.
Mike True of
Mike's Heirloom Boxes offers fantastic
boxes for sale on Etsy at various times and does First Class All American work.....a
top of the line craftsman for sure and a valuable resource.
NOTE: None of the hyperlinks to Mike's Heirloom Boxes are
working. Mike apparently due to an accident, no longer offers his
heirloom boxes via Etsy. Updated 11-17-2020.
Web published by Bill aka Mickey Porter on 04-18-19.
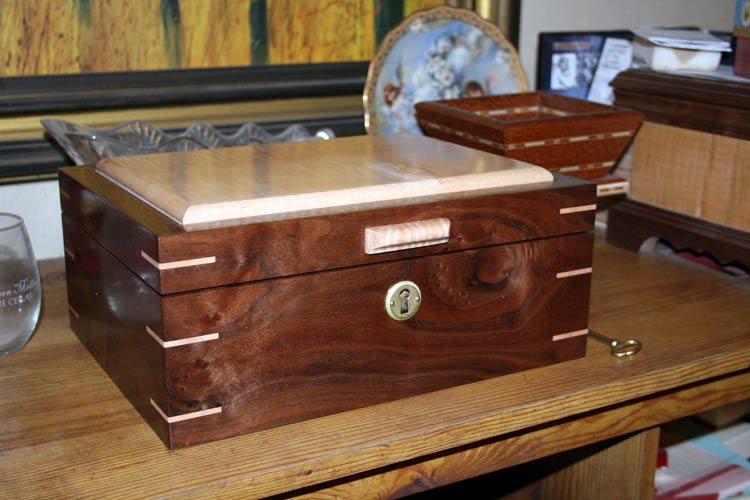
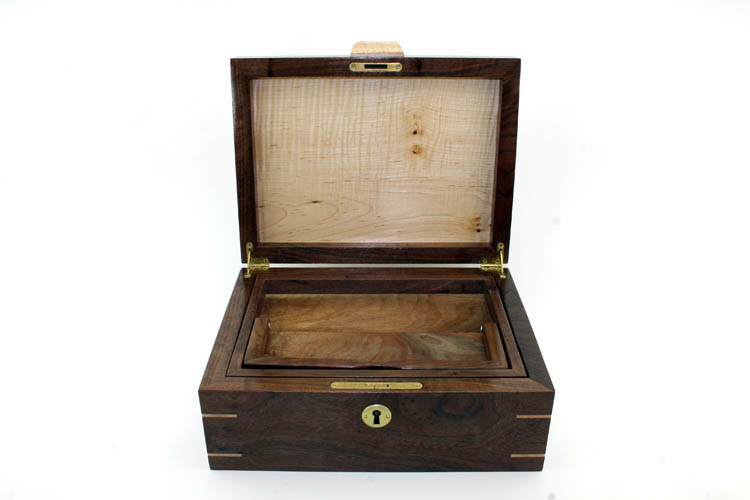
Completed secretary/letter box on 06-11-19 SN 74.
I give
Mike's Heirloom Boxes credit for the design
of this box, I only implemented what was already there. Copying/imitating
someone is one of the sincerest forms of flattery there is and pay the
person a genuine compliment! I made a
few minor correctable mistakes along the way since this project entailed a
learning curve, especially installing the full mortise lock and striker
plate.
I did change the design of the lift out tray and handle as far as adding
splines in the corners to reinforce the forty-five (45) degree miters.
PERSONAL SAFETY AND LIABILITY ISSUES
My goal will be to keep Safety
paramount because hand and power tools can do serious bodily harm and death
if not used properly, therefore these pages are solely for
entertainment purposes only from
a personal liability standpoint. Please read the
Legal Stuff
page for additional information concerning liability issues
before going any further. Safety glasses and hearing protection is a must,
although I do forgo the hearing protection many times; my bad!
LETS GET STARTED
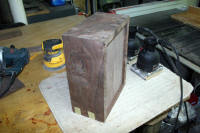
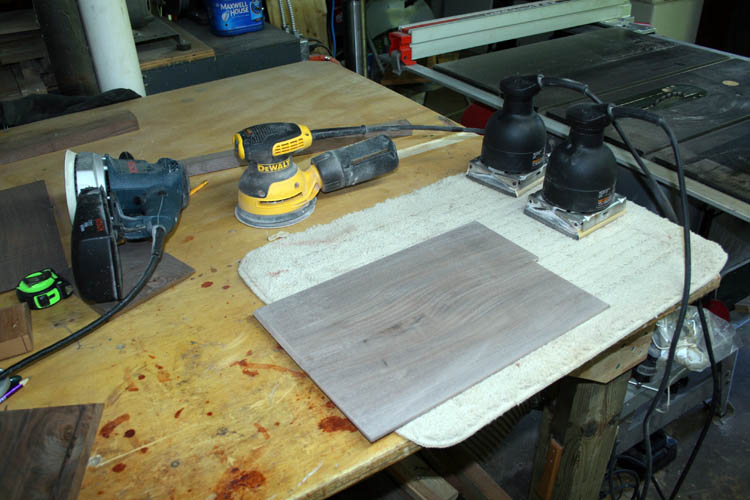
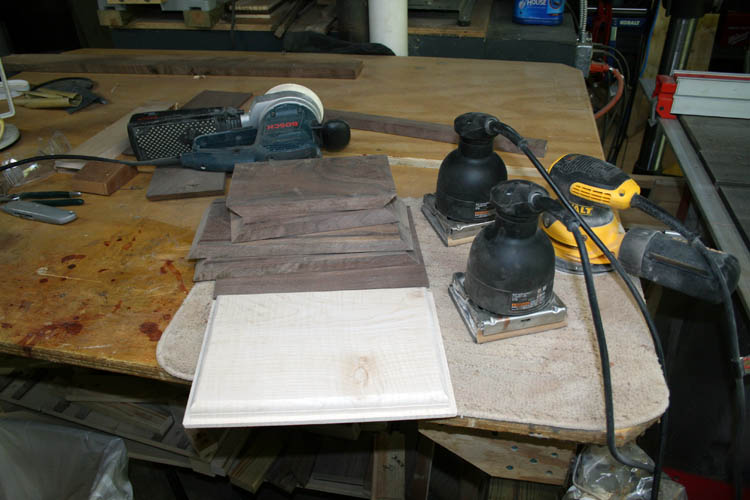
I located a couple pieces of scrap aka unallocated black walnut which had
a bow in the longer piece and it was about 1 inch thick. I cut a
section from it that was 25 inches in length, ripped all the pieces to 5
inches in width; and ran the bowed pieces across the jointer to have one
flat surface. I then ran them through the planer and ended up with
about 3/4 inch final thickness for the three boards.
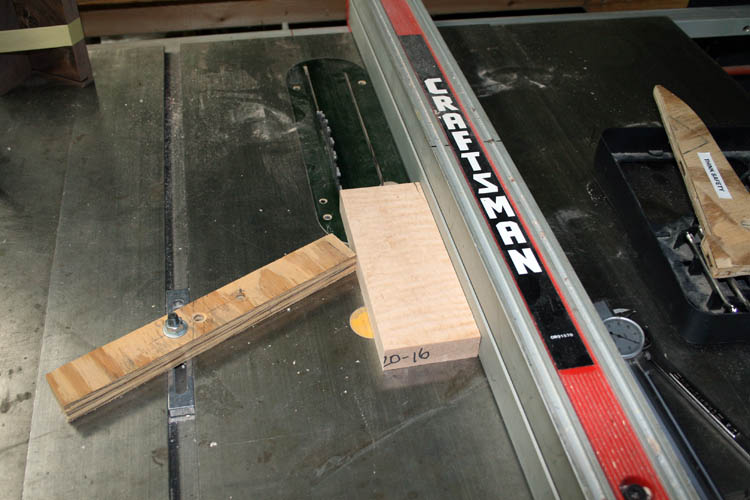
I did some test forty-five degree cuts on the forty-five degree miter
sled and the 45 degree angle was good, however I did not have a near perfect
90 degree right angle in the vertical plane. It took several trial adjustments on the sled
rear member which is allowed to pivot to get a near perfect 90 degree cut.
I had to enlarge the hole in the rear support guide member to give me more
adjustment with the 5/16 x 18 inch bolt, but finally got it right and
secured the member.
Check this
link out which probably accounts for having to recalibrate the
sled.
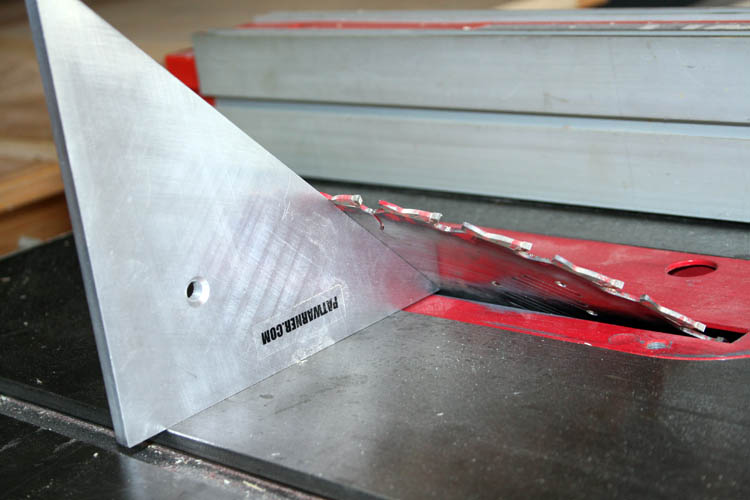
I used my Pat Warner custom aluminum
right angle to set the table saw to
a 45 degree angle. There is a 45 degree angle stop set screw on the
table saw tilt mechanism, but I don't rely on it for pin point accuracy.
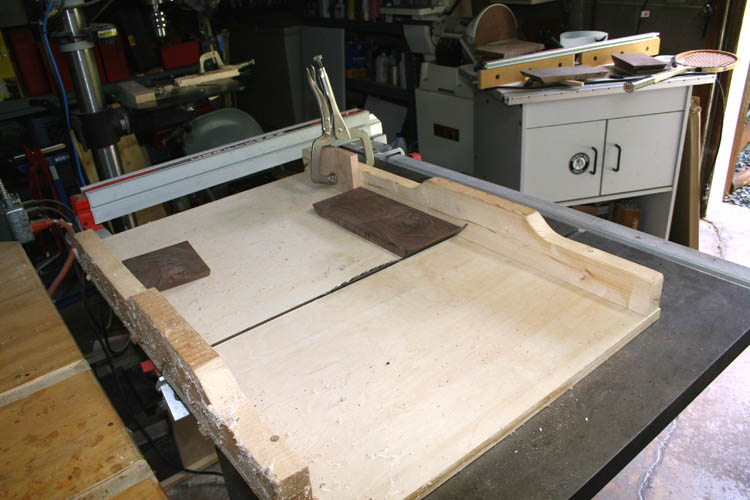
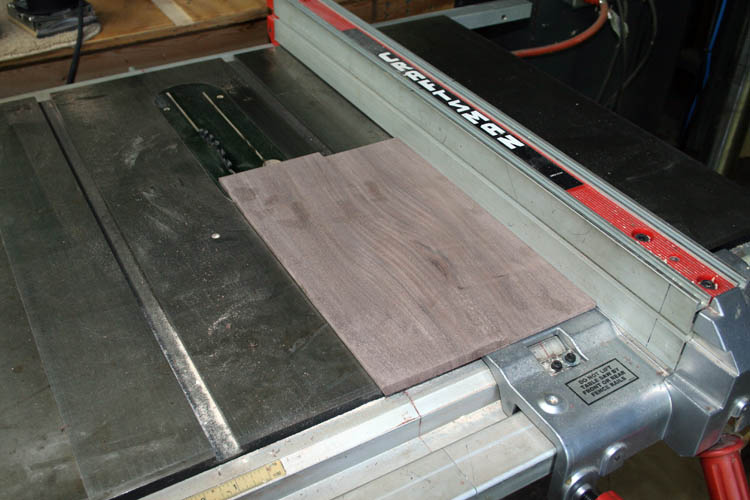
I cut the three boards to a forty-five (45) degree angle on one end;
marked the length desired and set a temporary stop to get the same length cut on
the side pieces and set the stop for the front and back pieces, otherwise
you will not end up with ninety (90) degree corners.
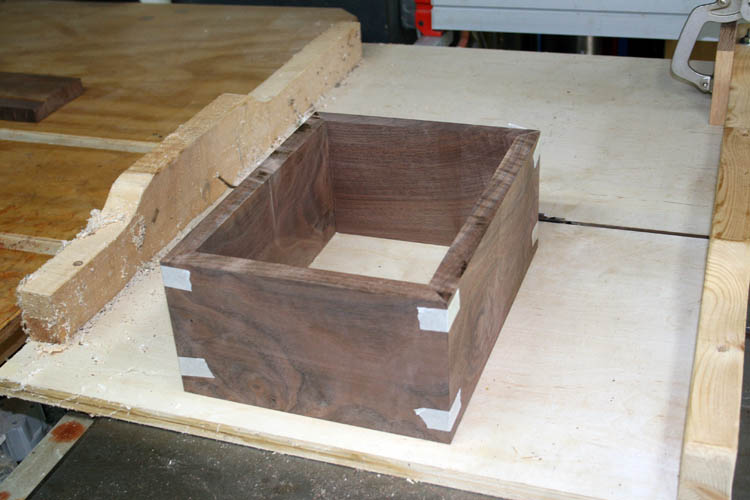
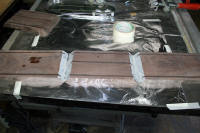
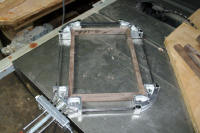
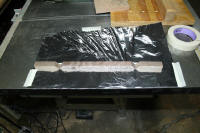
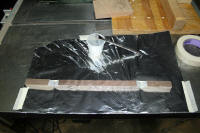
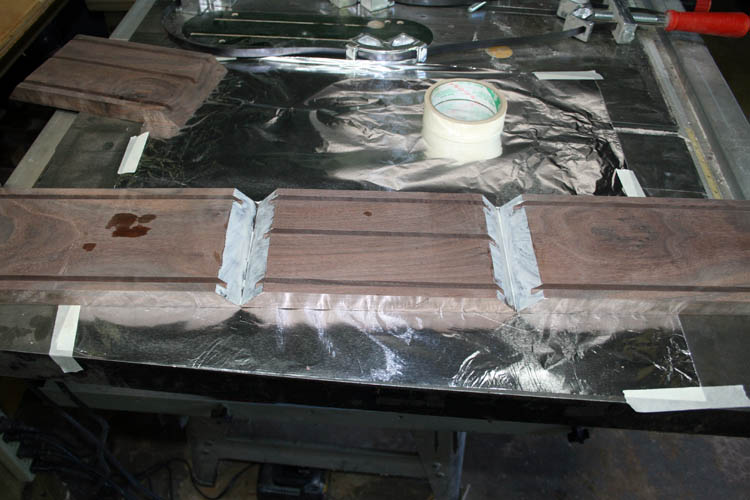
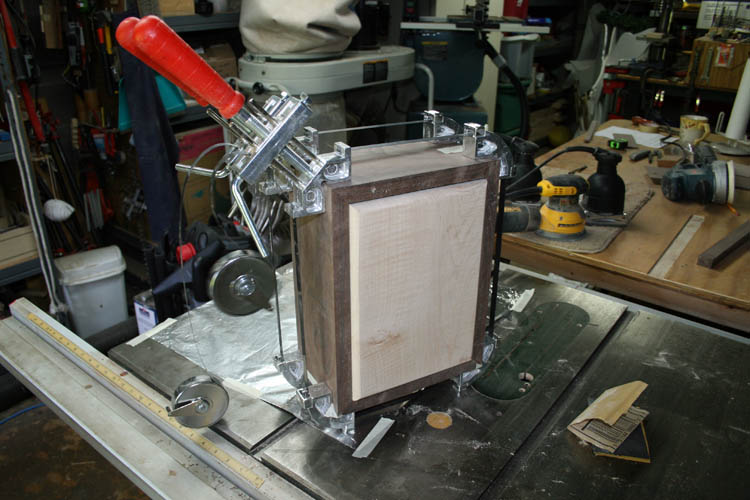
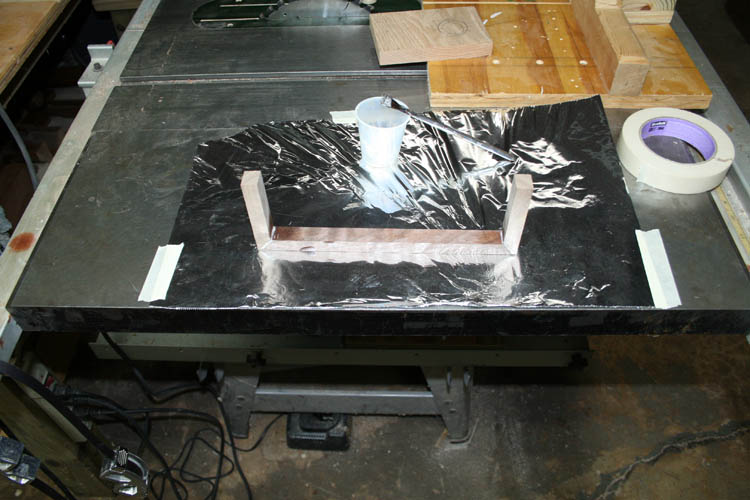
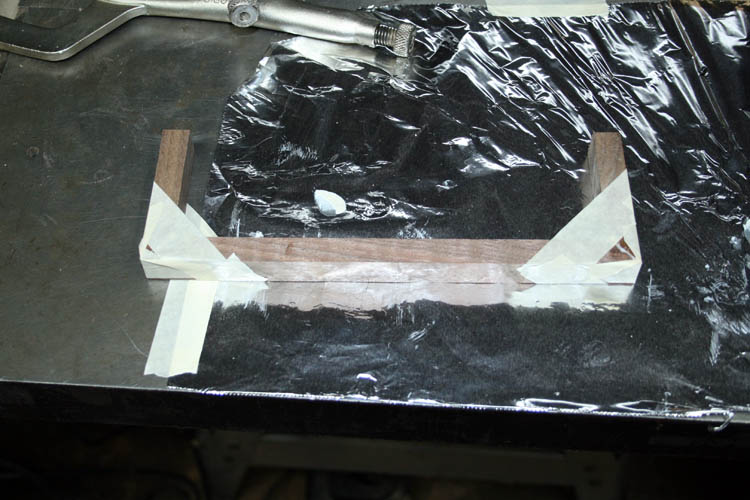
I used masking tape to check the fit and everything looked pretty
good; nice fitting joints. The acid test will be when I use the Merle
adjustable band clamps which has ninety (90) degree corner blocks and the
band clamps does a good job in aligning the corners.
Hopefully, all four corners will look like the mock tape up
joint.....grin if you must!

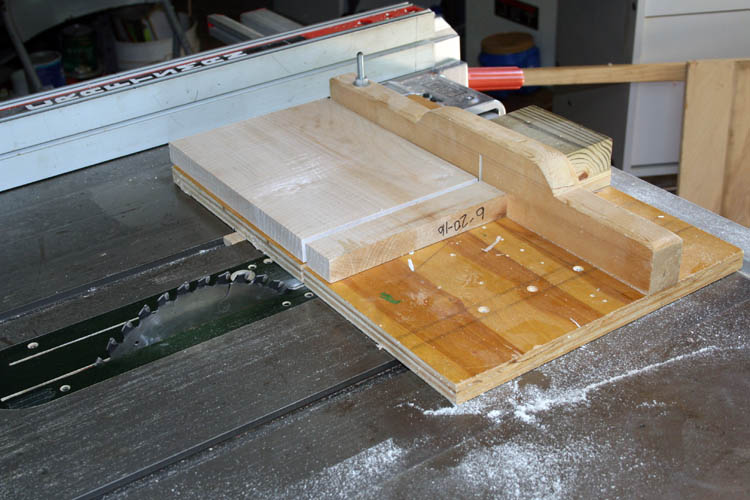
After the test fit of the miter joints, I found a piece of curly maple to
make a raised top for the secretary box and cut a rabbit on all sides to fit
a routed 1/4 inch slot in the box.
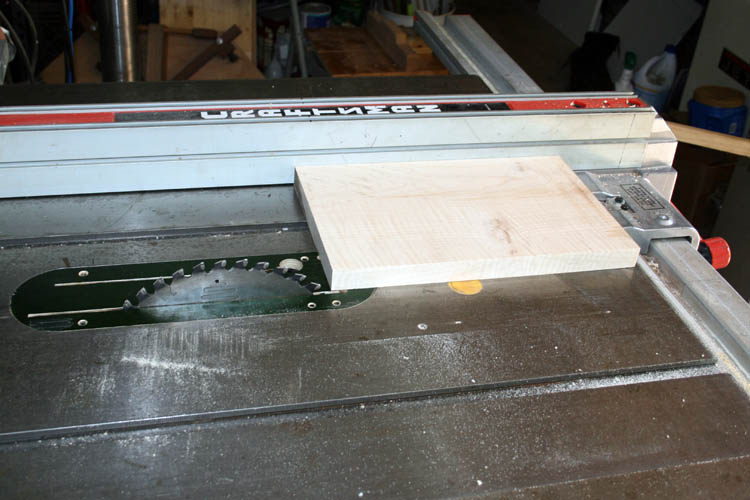
I used a small ninety degree sled to cut the board to its final length
before the rabbit.
After the final dimensional cuts, the rabbit was cut into the board and
there is some room added for any movement caused by humidity, etc.

I used the table router to cut 1/4 inch width slots for the top, back and
two small tabs for the upper pull out drawer.
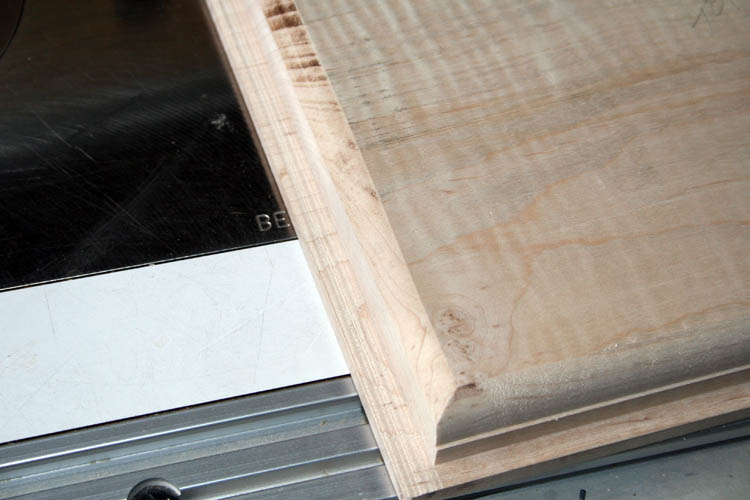
The router bit was changed to a 3/8 inch radius, but the cut wasn't
enough radius and changed the router bit to a 1/2 inch diameter radius.
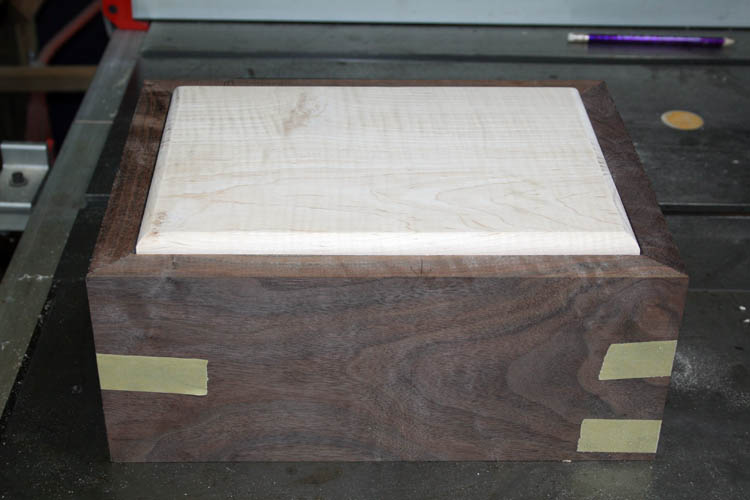
I did a dry fit for the top and like the looks of it.
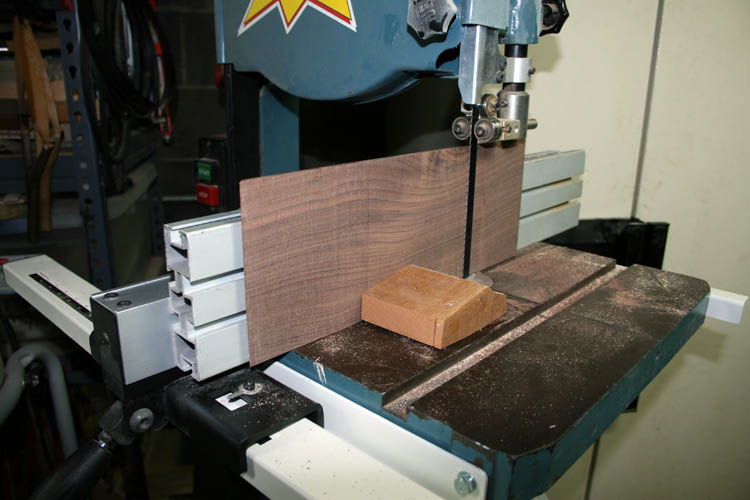
I set the band saw auxiliary fence against the regular fence and ripped a
1 inch thick board x 5 inches width and got several boards around .240 inches in thickness.
Two of the boards were glued together to give me the required width that I
needed for the bottom.
After the glue sets up overnight, I will cut the bottom to the final
dimensions; do a test fit and start the sanding process for both the inside
and outside for all the members and then the glue up using the Merle
adjustable band clamps.
Web page updated by Bill aka Mickey Porter on 05-14-19.
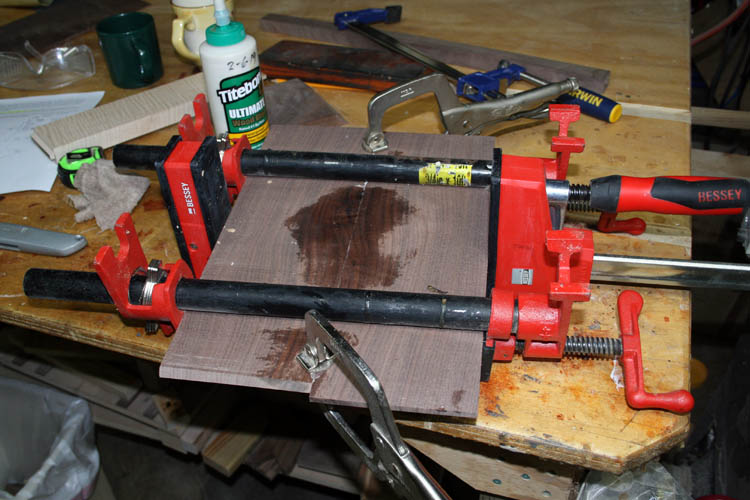
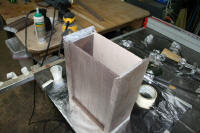
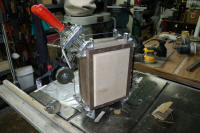
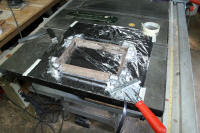
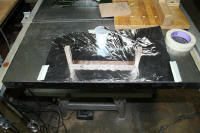
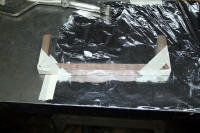
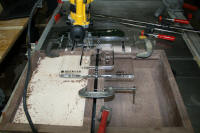
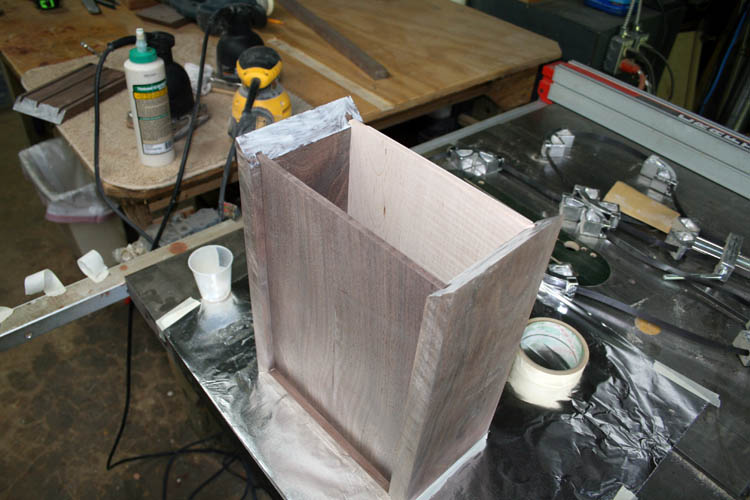
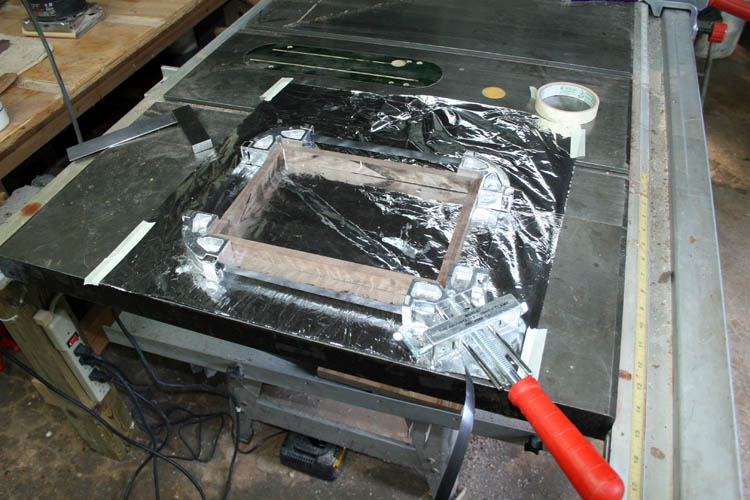
BOX GLUE UP
After getting the back member sanded and cut to size using the table saw,
I did another dry fit to ascertain everything fit ok and then it was glue up
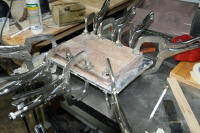
time. As stated earlier, the Merle adjustable band clamps does a good
job in keeping the box corners square. I used masking tape on the
outside of the sides and back, applied glue with a brush and then simply
folded the pieces into the box shape, inserted the top and back members into
the 1/4 inch width routed slots. The remaining end was fitted in place
and masking tape to hold everything in place until the Merle adjustable band
clamps were in position and tightened.
THUMBNAIL PIXS BELOW


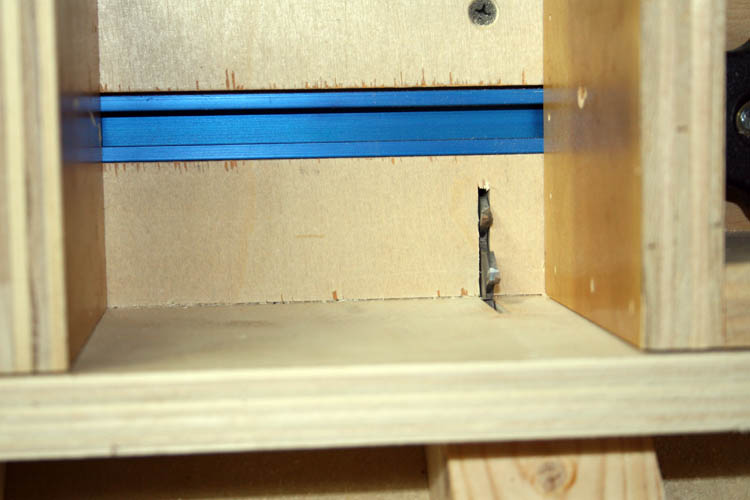
It is only 10:18 in the morning and will cut some test spline strips from
maple for the corners of the box to help reinforce the 45
degree miter joints, whereas such joints are not that strong being glued on
the end grain. Also, the contrast between the maple and the walnut
should pop out real good too. The corner spline jig will get its début
very soon.
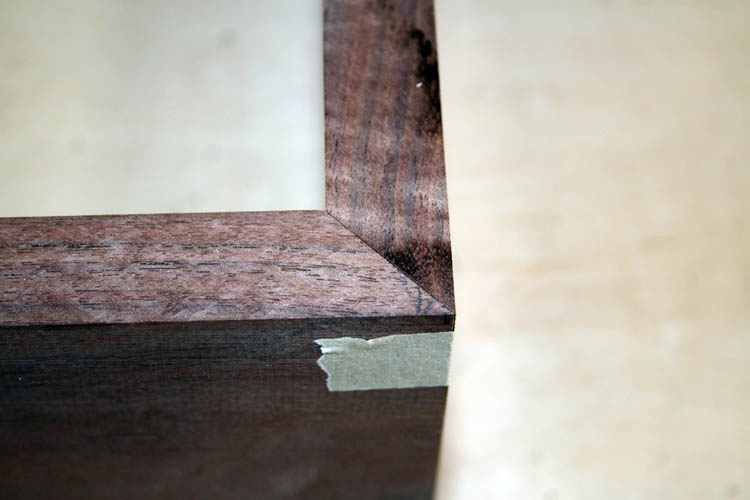
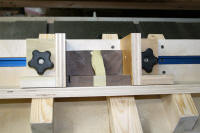
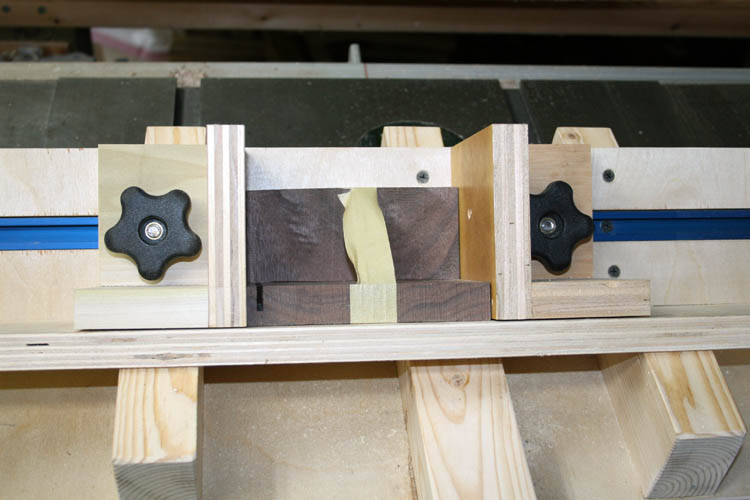
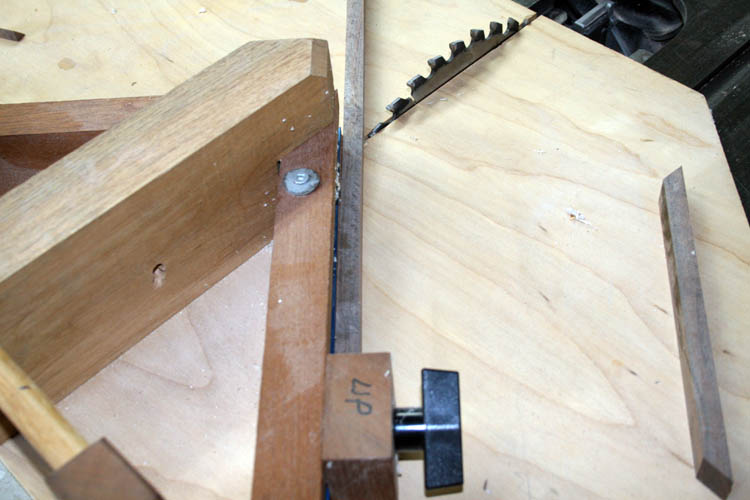
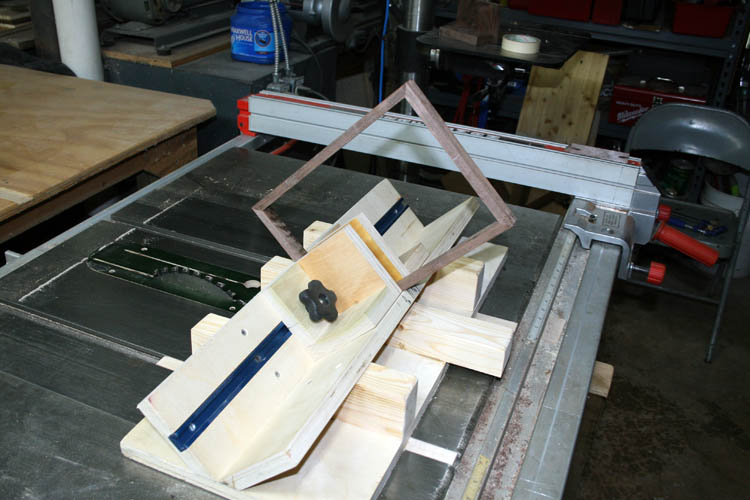
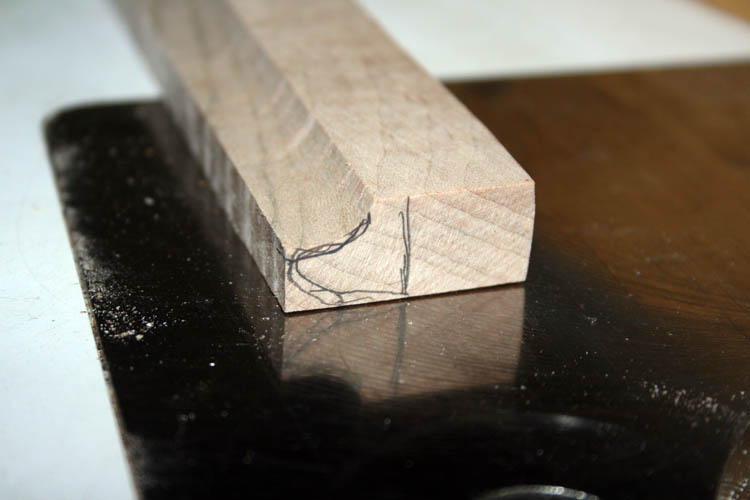
CUTTING SPLINES AND TESTING
I used the table saw to cut maple splines for the corners of the
secretary/letter box. My crosscut saw blade is approximately .125
inches in kerf width which will be the width of the spline slots in the box
corners. I had some left over black walnut that I used to
test the miter joints and glued two pieces to give me a ninety degree angle
for testing out the corner spline jig while the glue dries on the
secretary/letter box.
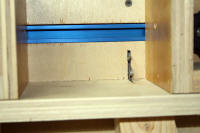
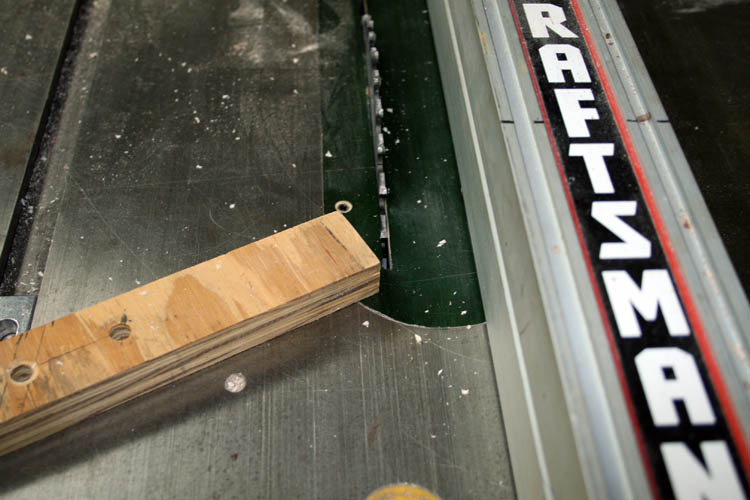
I used a home made jig referenced off the left table top miter slot to
have repeatable cuts. With the jig, you do not have to attempt to cut
the narrow strips and have them trapped between the table saw fence and the
saw blade which can be dangerous as far as kickback is concerned.
Letting the thin strip pass on the outside of the saw blade is definitely
much safer in my humble opinion.
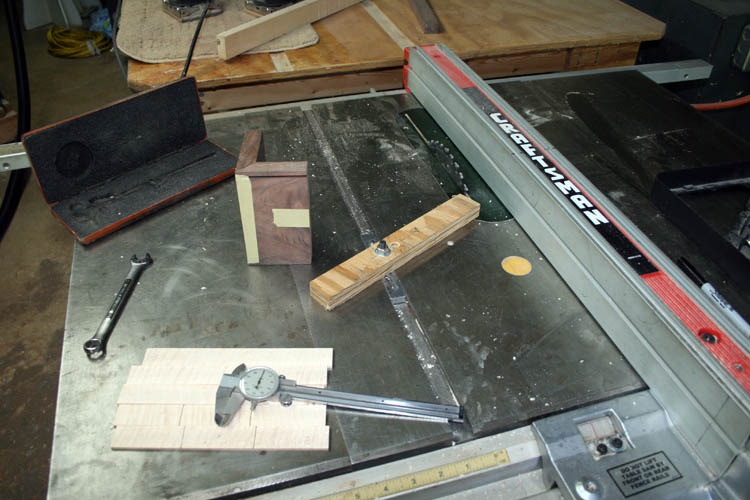
Once the desired width strip is desired, you move the fence over with
your wood until it touches the gauge on the left. I used the dial
caliper to set the jig.
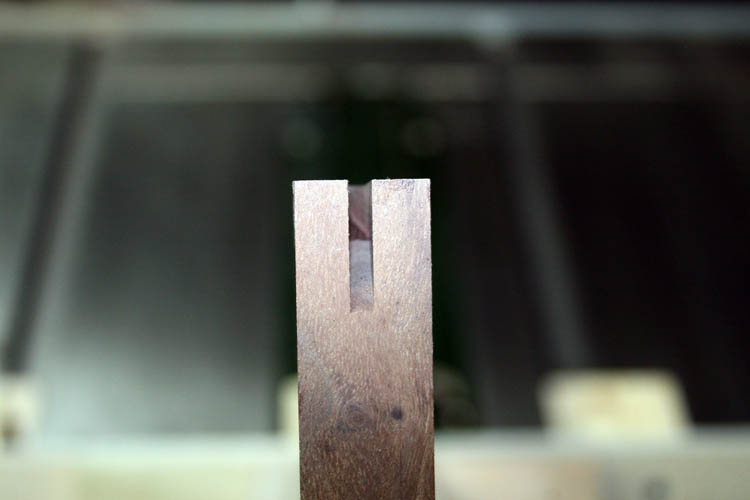
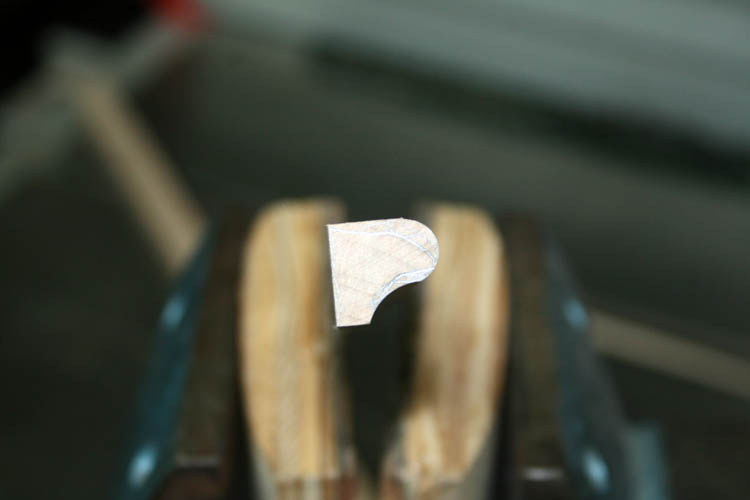
THUMBNAIL PIXS


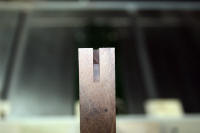
Close-up pix of the test spline on scrap material.
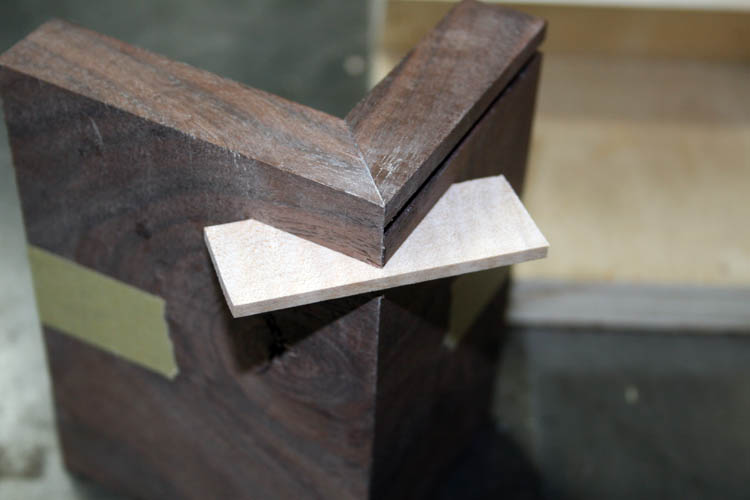
Tomorrow, the Lord willing of course, I will saw the slots into the
corners of the secretary/letter box using the corner spline jig and glue the splines in place.
Web published update by Bill aka Mickey Porter on 05-15-19.
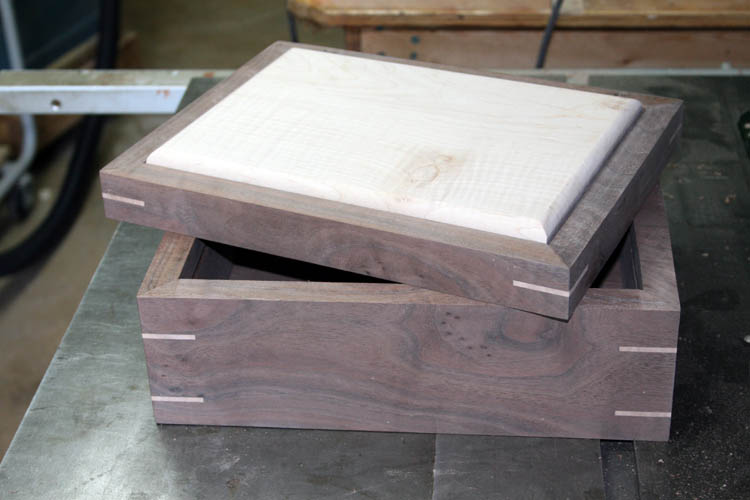
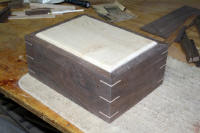
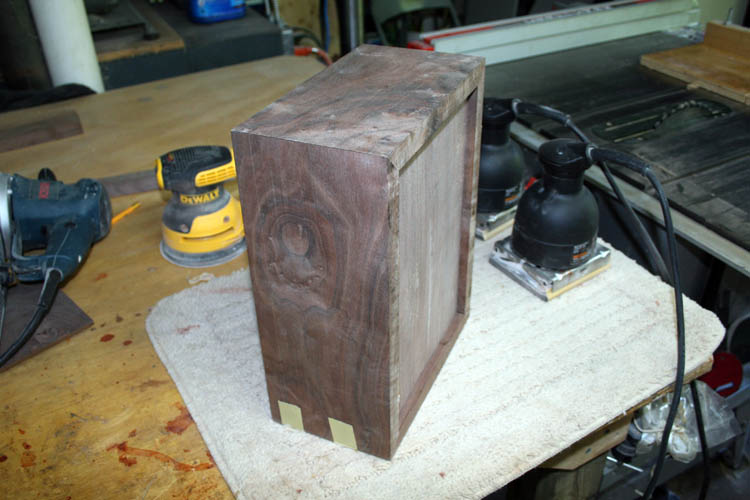
INSTALLED CORNER SPLINES
After the testing of the corner spline jig yesterday, it is time to slot
the box and glue in the corner splines. Most of the splines were a
little bit over size and had to hand sand them down several thousands of an
inch.
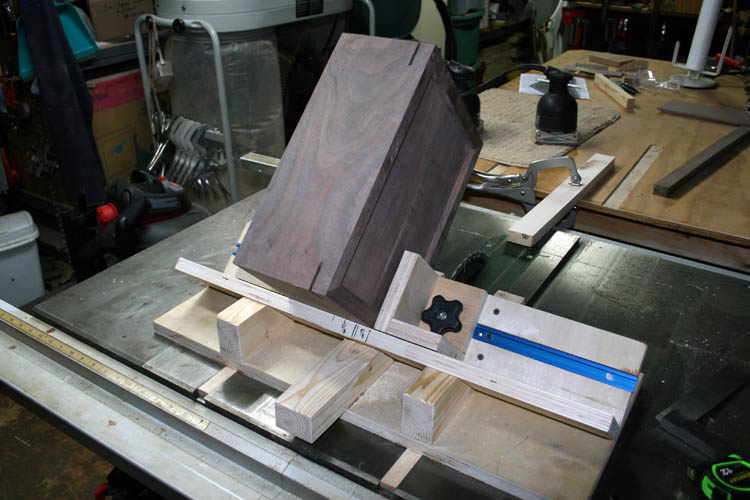
I realized very quickly that you need a calibrated scale attached to the
cradle member facing you, of which I placed masking tape on there and drew
marks in line with the saw blade. I then measured where I wanted the
slots to be in reference to the center line of the saw blade and marked the
masking tape. The book end type stops worked great keeping the box
positioned and stable where you desire to cut the slots!

I let the glue set for 3.5 hours +-, although the Titebond Ultimate III
glue sets up very fast and many remove clamping devices within 30 minutes, but I am still old school when it comes to glue
drying; hard to break old habits and I definitely am not in any kind of a
production mode. I used a no kerf thin dowel trim saw to cut the
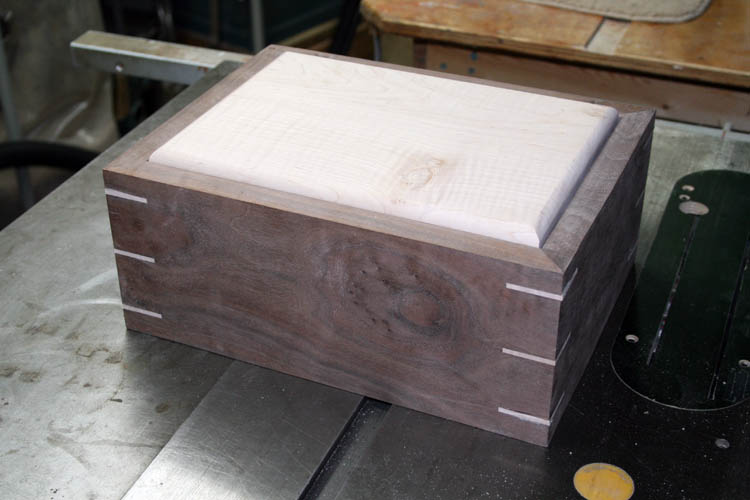
excess splines flush with the box and then sanded smooth.
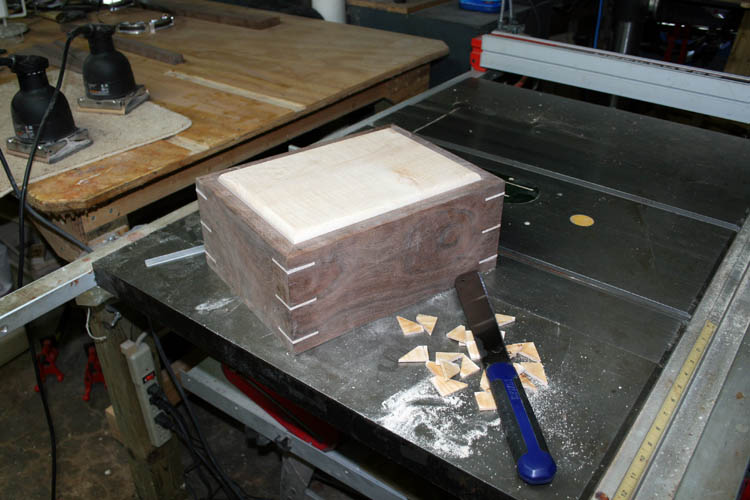
It is beginning to look like a secretary/letter box for sure.
I ordered a pair of solid brass quadrant hinges from Rockler which is a
functional hinge, but they look cheap and cheesy in comparison to the
Brusso high
dollar quadrant hinges and will round up a brass and/or brass plated full
mortise lock for the box.
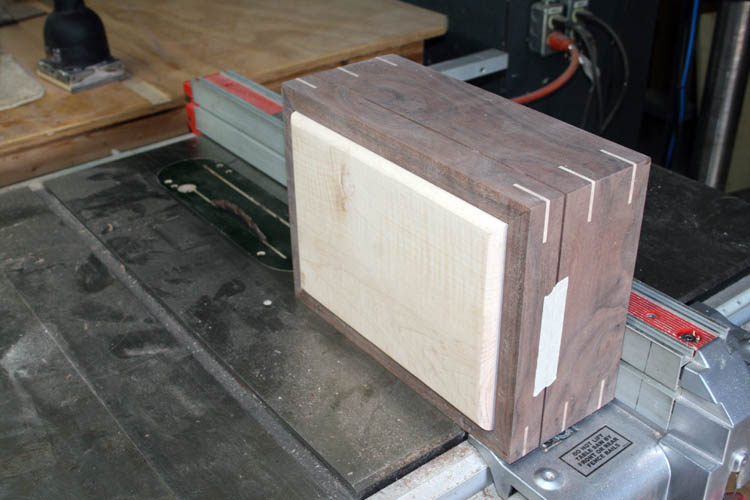
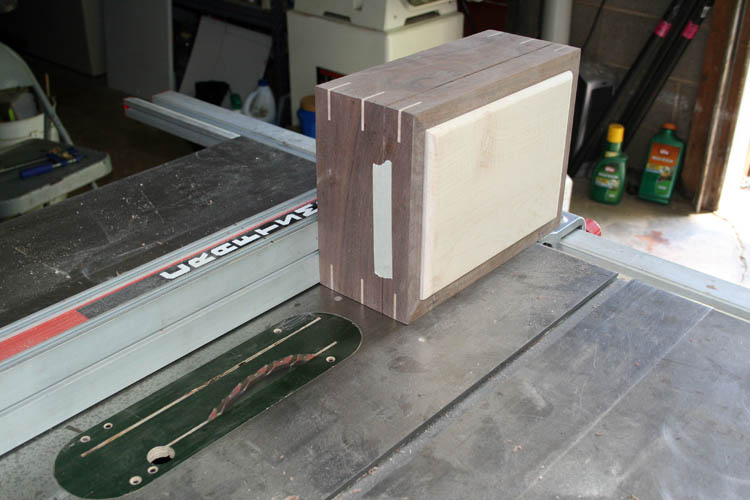
REMOVING THE LID FROM THE BOX
I used the table saw and a thin kerf rip blade (22 teeth total) to detach
the lid from the base. I set the saw fence where the bottom of the box
would rest against the fence and the lid portion would be to the left of the
saw blade. After I made the first cut, I used masking tape across the
slot made by the saw blade and did this for three (3) sides and finished the
fourth side cut which came out excellent. No heroics involved here
with the table saw.....grin if you must!
Inserting a scrap piece of the wood the thickness of the saw blade would
be much better than just the masking tape by itself in my humble opinion.
Wood does open up and close up many times do the stress factor and the grain
structure of the wood too.
I have a book titled
Basic Box Making by Doug Stowe that has
valuable information about building all kind of small boxes. My Sister
Susan Pettigrew of Reidsville, NC gifted me with the book thinking is was
about making turkey box calls. Nevertheless, it has been an excellent
resource book with lots of tips and pictures on how to build small boxes,
etc.
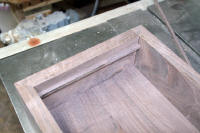
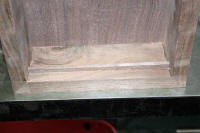
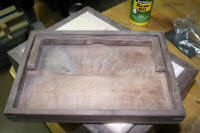
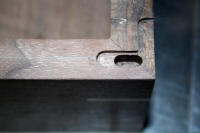
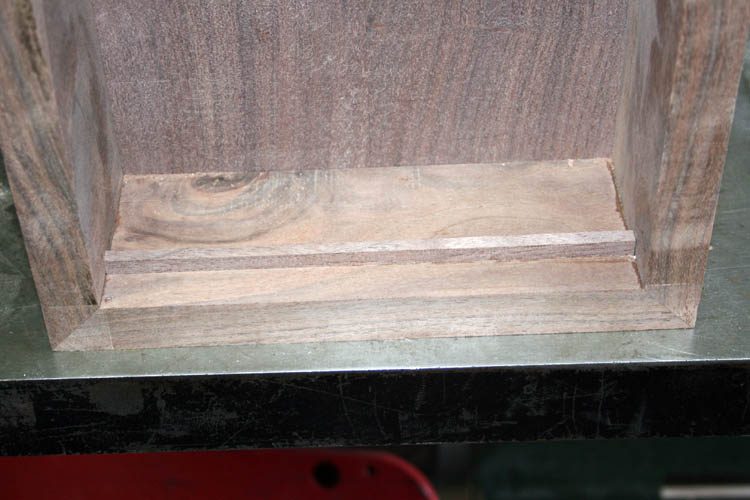
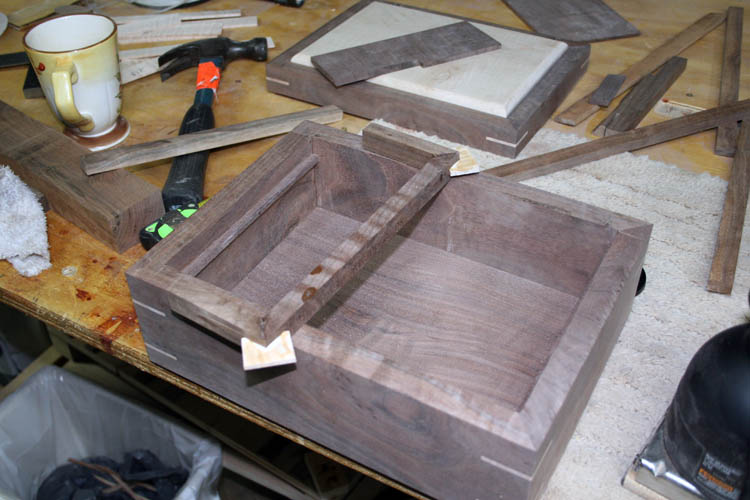
STARTED LIFT OUT TRAY
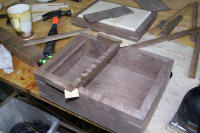
After cutting the lid free from the base of the secretary/letter box, I
glued in two support ledger strips that will hold the lift out tray in
position. I was guessing at the ledger distance and will end up with a tray
that is 3/4 inch deep, however there is about 5/8 inch of spare space in the
lid below the "floating" curly maple top. I reinforced
the miter joints, however that is probably an overkill because the bottom will be glued in place and should be
strong enough. The maple corner splines do add a little bit of a
custom touch to the tray. The pivoting handle 45 degree ends had a
spline installed since they do need extra strength not provided by just end
grain being glued together.
THUMBNAIL PIXS


Tomorrow, the Lord willing of course, I will rip (band saw) a piece of
walnut to about 1/4 + inch thickness and do a glue up like I did for the
bottom of the box.
I plan to order a sheet of 24 x 48 x 1/4 inch walnut veneer plywood for
making the bottom and pull out tray, however the vendor that handles it, the item
is currently out of stock.
WALNUT VENEER SAGA - HOME DEPOT
NOTE: I ordered 3 walnut veneer panels Columbia Forest
Products 2' x 4' x 1/4"
from
Home Depot and the first panel I removed from the
shipping box had a lamination
separation. Also, the total thickness was .198 inches, a long way from
.250 inches as advertised. The walnut lamination was so light in
color, it didn't even resemble walnut. I measured the lamination that
came unglued and it was .020 inches. The center core is poplar for a
total of three laminations.
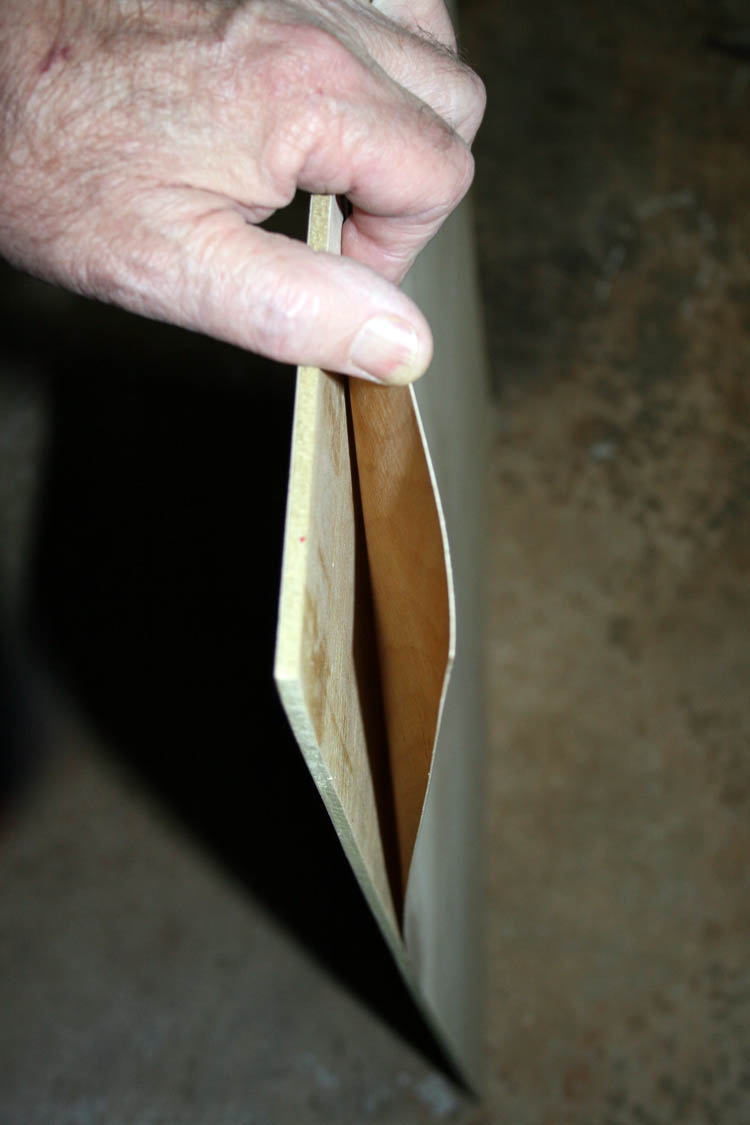
The ole cliché, "A picture is worth a
thousand words!
Home Depot asked me to do a product review and I told them the product
was a piece of junk and would not recommend it to anyone. They
rejected my review and wanted me to revise it, as if they were doing me a
favor......not in my lifetime. If you do not want the truth, don't ask for
it!
Web page updated on 06-21-19.
This project is definitely moving much quicker than the curly maple
mission style
end tables!
Web page updated by Bill aka Mickey Porter on 04-16-19.
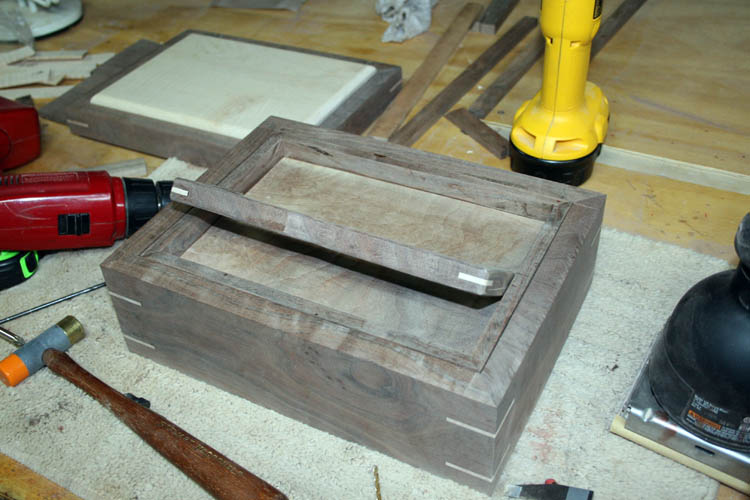
COMPLETED THE LIFT OUT TRAY
I band sawed to width, a 5" wide x 1" thick x 12" +- length of black
walnut to a 1/4 inch thickness and glued two pieces together early this
morning. In the afternoon, I cut it to size and glued and screwed it
to bottom of the frame for the lift out tray. Since I only have about
3/4 inch for the depth, should have been at least 1 inch, I fitted the
bottom of the tray where it would not make contact with the ledger strips,
only the frame member and didn't lose 1/4 inch in depth of the tray. A
more or less U double L shape handle was made with 45 degree miter joints
and later after the glue dried several hours, slotted the miters for a maple
spline to strengthen the glue joint. I drum sanded a couple small half
moon shapes in the center of the handle for the fingers to get hold of the
handle to left the tray from the box. If I do these type of
secretary/letter boxes in the future, I would probably make a jig for the
router table instead of drum sanding the half moon shape to cut down on the
dust factor and help the ole lungs out......grin if you must!
On assembling the handle to the tray, I put the cart before the horse so
to speak. I should have fitted the handle before I glued the back in
place which would have made it much easier, but it still came together ok.
THUMBNAIL PIXS


I am thinking about an inlay of mother of pearl or abalone for the lid
bordered by ebony for contrast with the light colored curly maple wood which
will not be stained.
Web page updated by Bill aka Mickey Porter on 05-17-19.
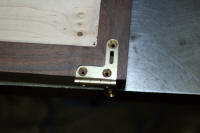
ORDERED CHEAP HINGES
I am sometimes my worst enemy in trying to be frugal, because I know,
"Most of the time, you get what you pay for."
I ordered a pair of Rockler solid brass quadrant hinges SKU 24300 and after
receiving the hinges, they were definitely far too cheesy and cheap looking
for this secretary/letter box, therefore broke down and ordered a
"high dollar" pair of
small Brusso
solid brass quadrant hinges....they are top of the line and look it too.
I will add a side by side pix comparison of the hinges when the Brusso
hinges arrive.
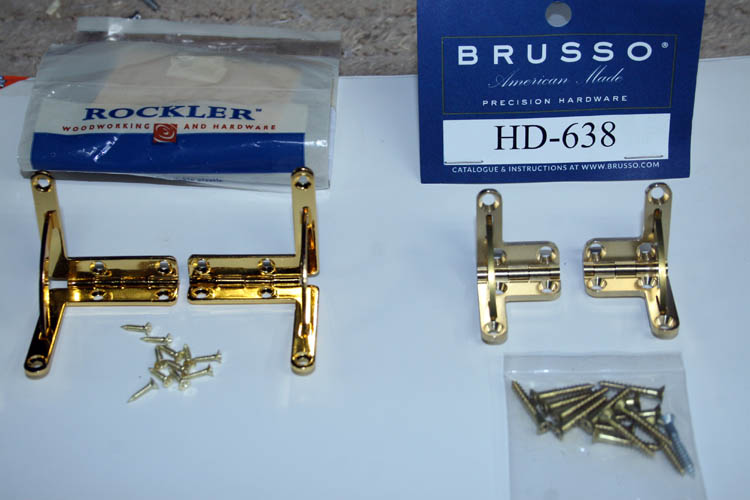
The Brusso hinges are much heavier gauge .080 +- material and in solid brass,
whereas the Rockler are brass .064 thickness
Also, the screws for the Rockler are miniscule to say the least. I am
sure the Rockler hinges would work fine and has a larger
"foot print" than
the Brusso hinges, whereas you can see the quality in the Brusso quadrant
hinges. As
soon as my Jig It jig plate arrives for the Brusso HD-638 hinges, I will install
them.
I will use the Rockler quadrant hinges on a small utility box for tools,
etc.
Web page updated by Bill aka Mickey Porter on 05-28-19.
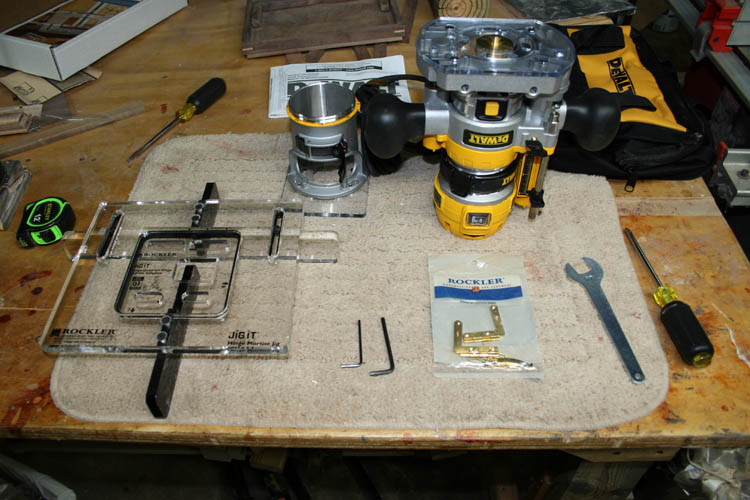
Rather than reinvent the wheel so to speak, I also ordered a Rockler Jig
It system for routing the mortise slots for the hinges which is very
reasonably priced. There is no doubt in my mind, I can cut the
mortises free hand, but I definitely like
"working smarter not harder." If you plan to do
more than a few of the same thing, a jig or fixture is the way to go for
productivity and accuracy; that's my story and I'm sticking to it!
The Rockler Jig It system has inserts available for different
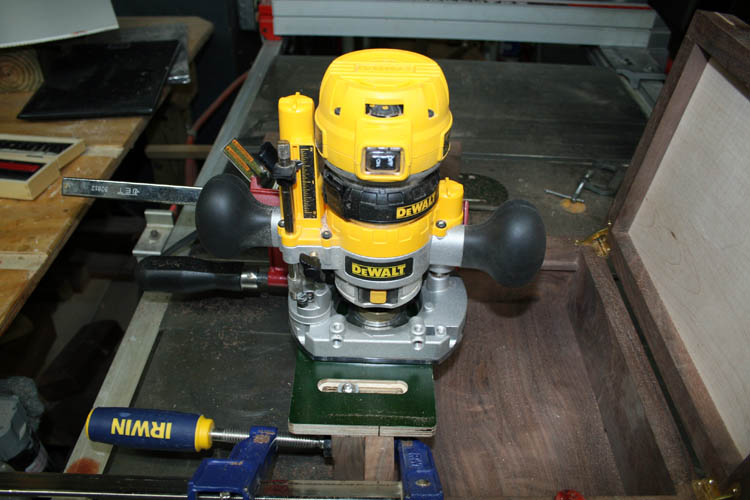
manufacturer's hinges. The system requires a plunge router with a 3/8
inch OD guide bushing and a 3/16 inch diameter router bit. My DeWalt
DW625 3 HP plunge routers are far to large and heavy for this
project and they require a good amount of real estate for their base,
therefore ordered a small 1.25 HP DeWalt plunge router kit DWP611PK which has the
standard base with it and carrying bag. It will definitely get used for other
things as well.
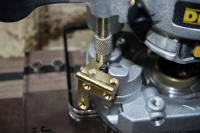
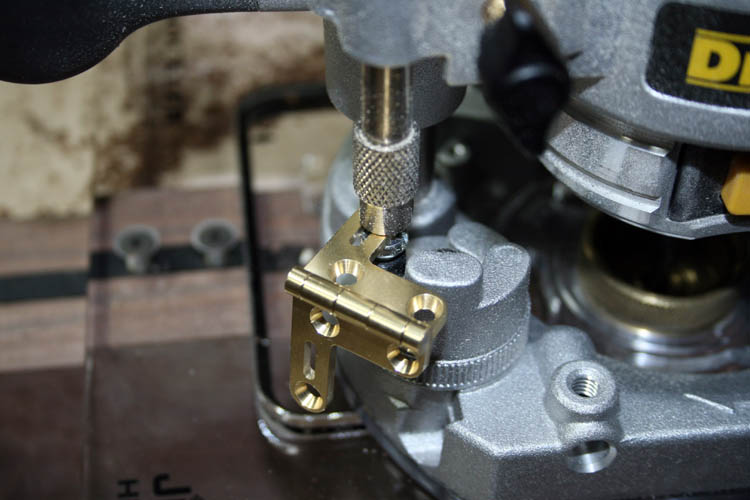
After receiving the plunge router, I installed a 3/8 inch OD guide
bushing in the plunge router base. It is imperative that you use some type of alignment pin/tool
inserted in the router chuck, loosen the phenolic base screws which normally
has some adjustment room, plunge the alignment pin into the bushing and
tighten the phenolic router base plate. This will ensure that your
router bit is centered into the bushing which spells accuracy!
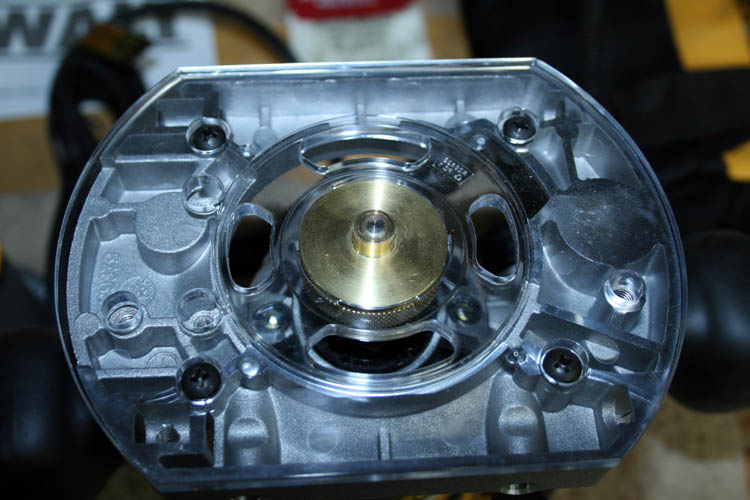
Close-up of the brass guide bushing and the steel alignment pin centered.
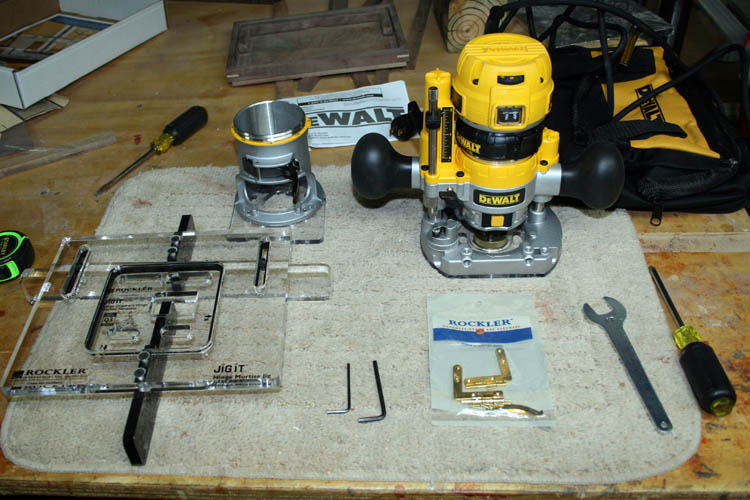
Mortise hinge routing system ready for a test run.
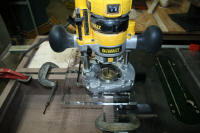
DAVID VERSUS GOLIATH
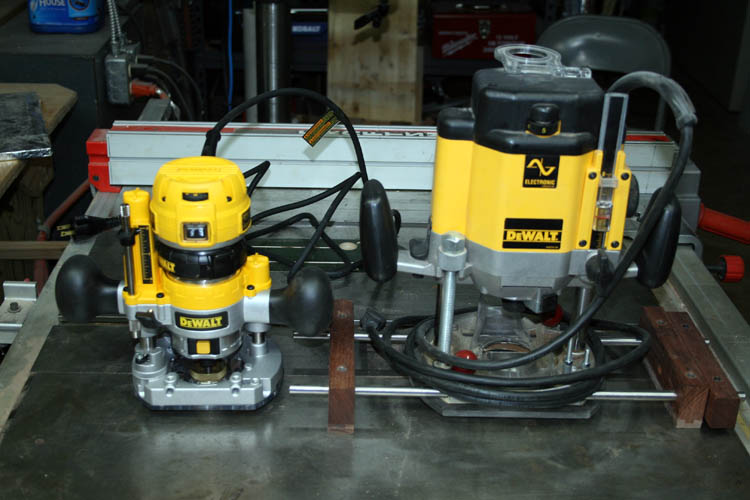
The above pix shows the comparison between the 1.25 HP versus the 3 HP
DeWalt plunge router.
Full mortise locks are on order and now it is a waiting game until the
items are received to get back onto this project. I plan to construct
a simple jig plate for the Jig It fixture to do two of the three steps
required for a full mortise lock installation. As
Jethro Bodine would say, "Have to do
some ciphering on this one", grin if you must!.
Web page updated by Bill aka Mickey Porter on 05-22-19.
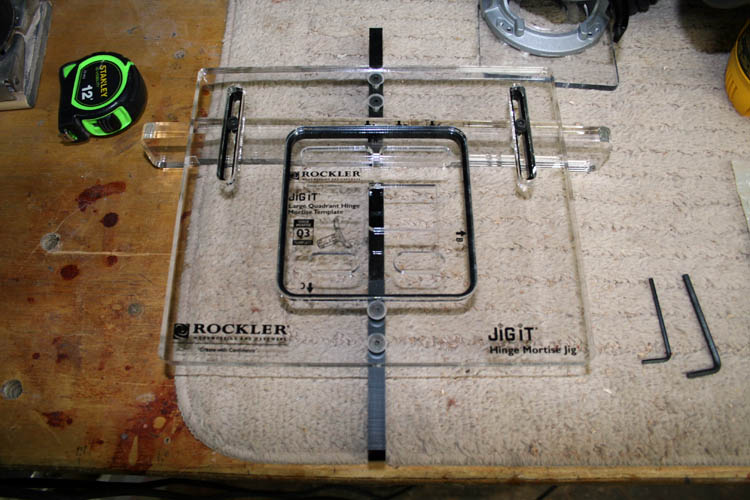
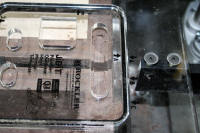
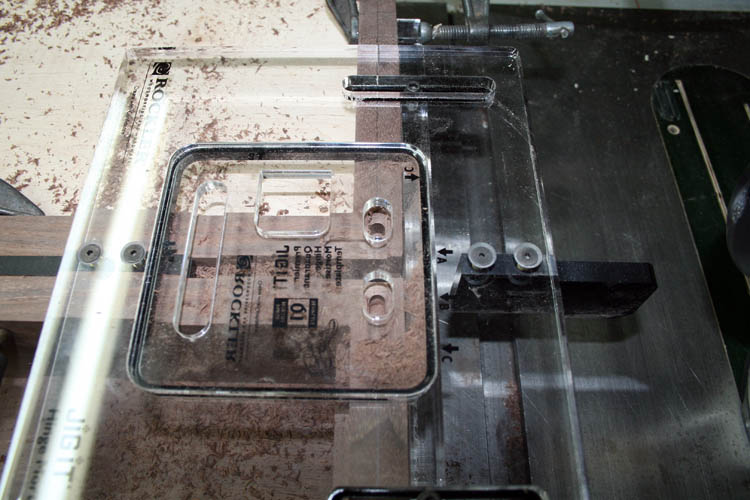
JIG READY FOR TRIAL RUN
The Brusso quadrant hinges should be arriving within a week along with a
template insert just for that particular hinge for the Rockler Jig It
mortising jig.
I am getting a little antsy waiting on some things ordered, but that is
the way it goes when you don't multi-task ordering things needed.
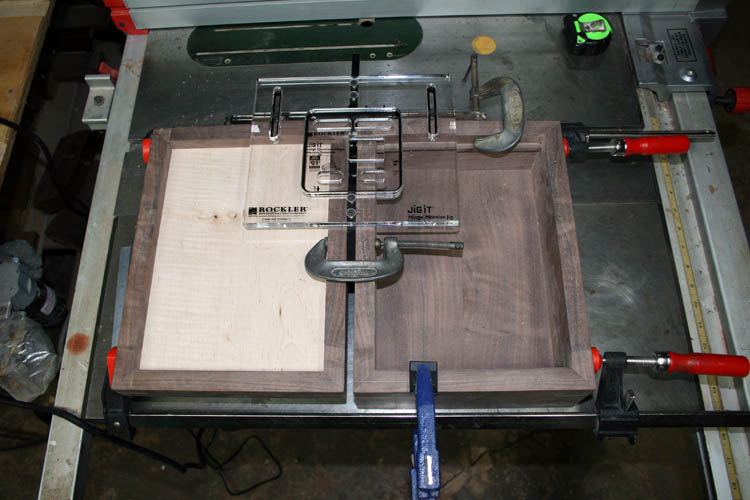
Above pix of the jig clamped in place ready for the router.
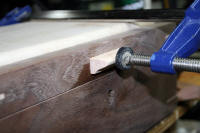
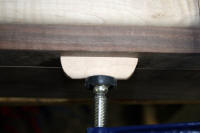
The first order of business is getting something underneath the lid to
raise the height where the box and lid are flush aka level with each other.
I ripped a piece of scrap aka unallocated black walnut to around 2 inches in
width and it was wide enough to easily support the lid. Next, you mark
a center line on both sides of the box and lid where the outer portion of
the quadrant hinge will rest. You place the jig between the lid and
the box and align the rear slidable cross member of the jig where the center
mark on the slidable member is positioned over the center line mark you just
made. Clamp the fixture in place and you are ready to start routing.
As with most jigs and fixtures that work using a guide bushing on the
router base, the guide bushing follows the cut out in the fixture and the
routed cavity is exactly where you want it, if your fixture is correctly
made to fit that particular guide bushing in combination with the
appropriate diameter router bit.
I will detail the router set-up when the Brusso hinges and the template
insert arrives.
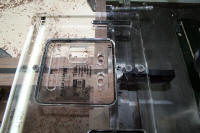
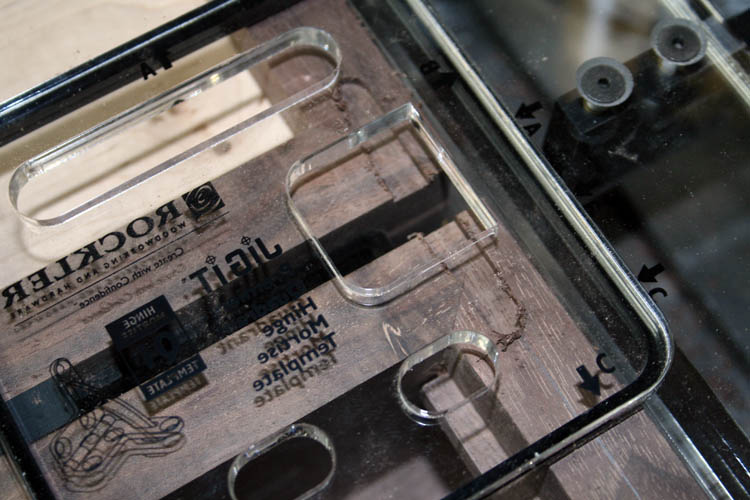
CLOSE-UP OF THE JIG IT
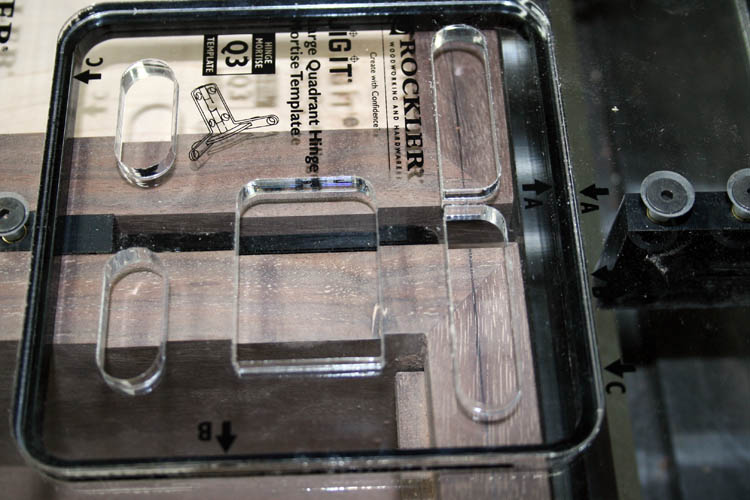
The above template will allow you to make all the required mortises for
the Brusso style hinge, in this case the above template matches their own
Rockler solid brass quadrant hinges, of which I do not plan to use those
hinges since they look to cheap and cheesy in comparison to the Brusso
hinges! I will use the Rockler quadrant hinges on a small utility box
project in the future.
Web page updated by Bill aka Mickey Porter on 05-23-19.
NO TEMPLATE AVAILABLE FOR THE FULL MORTISE LOCK
I sent emails to Rockler Woodworking and Woodcraft if there was a jig
plate available for the Jig It jig to route mortises for the full mortise
lock and the answer was nil.
I viewed one YouTube video that showed the usage of a plastic right angle
template to install a full mortise lock and it worked great, however there
was no viable link to who manufactured the jig and its availability. I
emailed the person who wrote the blog/video and never received a reply as of
yet.
In the meantime, I started building a simple wood
template jig for the
Woodcraft full mortise lock and it has been one of those days that nothing
seemed to go smoothly. I plan to create a separate page just for the
full mortise lock jig.
I believe I can build a jig template for the Jig It jig also for the full
mortise lock and it will be a good challenge for sure. If I owned a
milling machine, CNC router and/or an accurate drill mill, it would not be that
difficult. I have an X-Y table/vise for my large drill press, but it
is not really that accurate and the drill press quill is not designed for
such side to side torque required.
I will post the link from this page, once I finish the router jig for the
full mortise lock.
Web page updated by Bill aka Mickey Porter on 05-25-19.
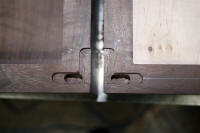
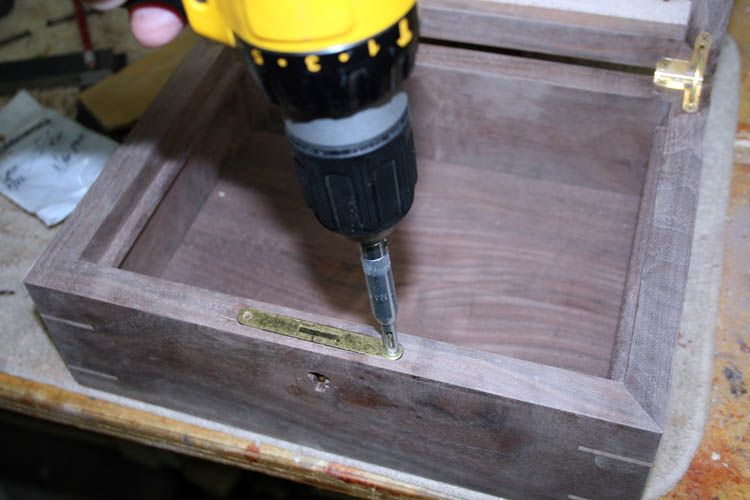
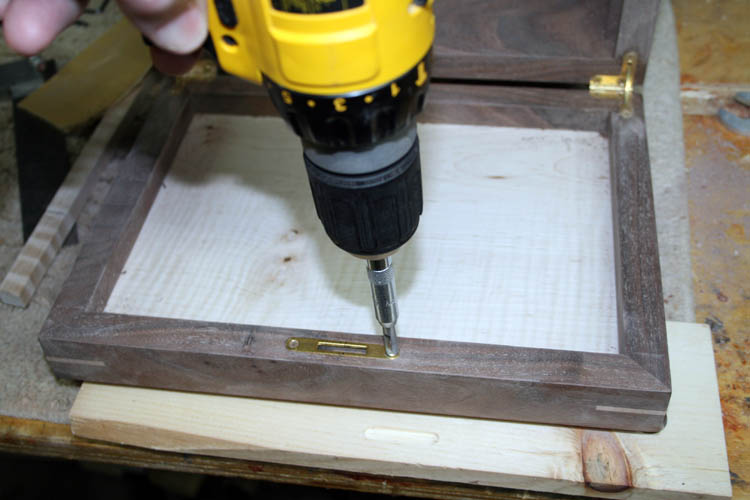
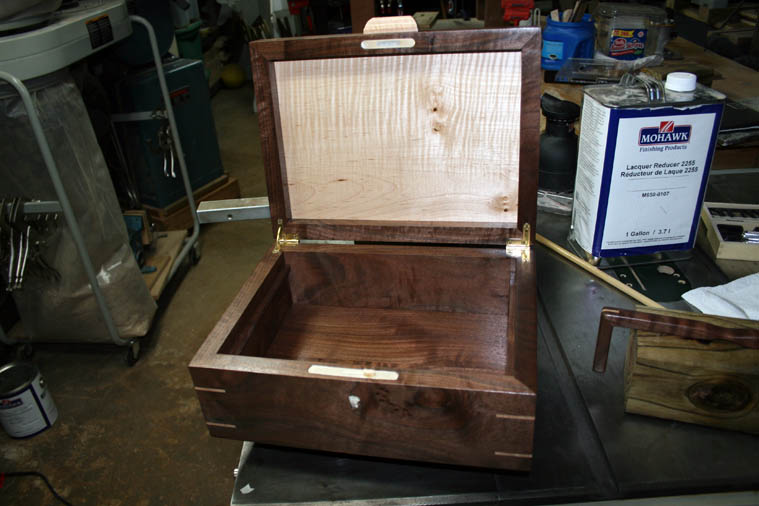
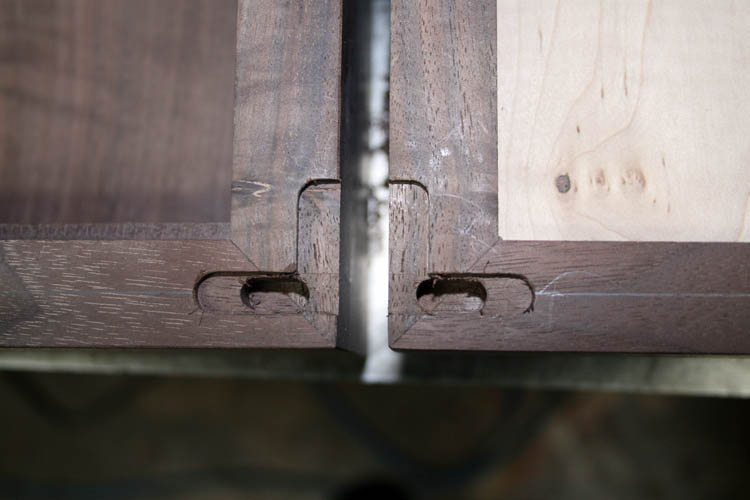
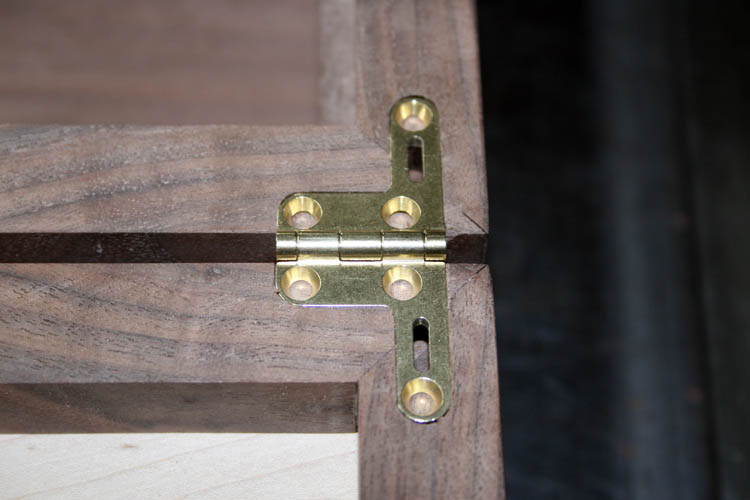
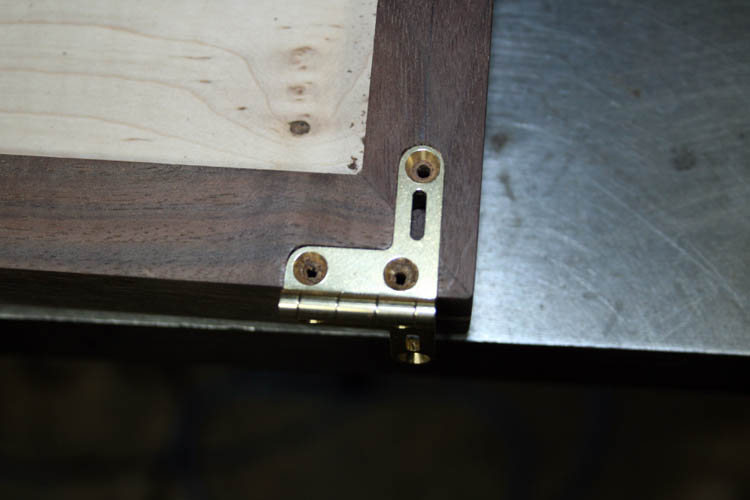
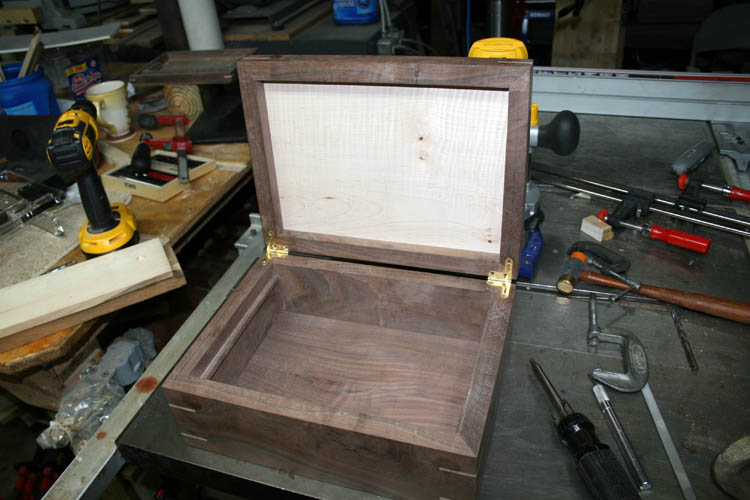
INSTALLED BRUSSO HINGES
The template insert for the Brusso hinges arrived this afternoon 05-30-19
and got a chance to field test it and the hinges fit
"tighter than two coats of paint", in fact had to file
the side of the routed cavity a couple thousands to get the hinges to go
into the routed cavity.
I had already marked a center line on the sides of the box and lid where
the hinges will go and the jig rear support with a centerline was placed
over the center line on the box. The jig was clamped into position
with three small three inch or less length C clamps.
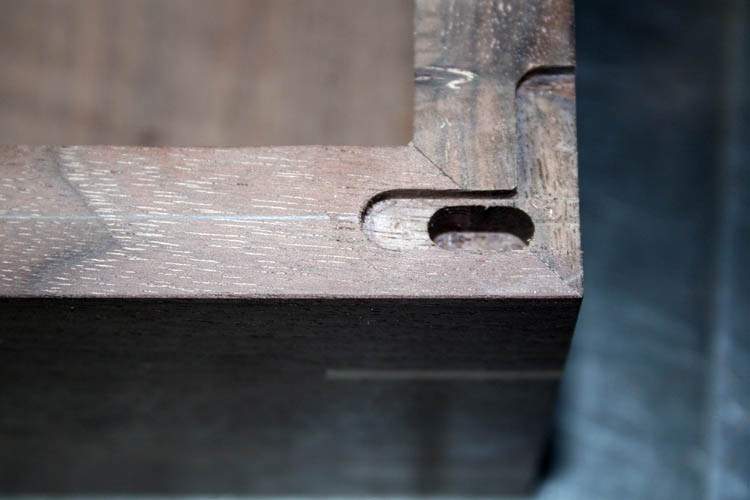
The Jig It plate for the Brusso HD 638 quadrant hinges has a series of
three guide slots each labeled A, B and C. The mortise slots in the
jig plate labeled A and B are used to route the two wings sometimes called
arms. Mortise slots labeled C are used to route a hole for the
detachable support arm which allows the lid to remain open at a 95 degree
angle. The cavity in the lid needs to be at least 3/8 inch for the
upper portion of the supporting arm to rest when the lid is in the closed
position.
If your router bit is long enough, you can route the full depth for the
support arm which requires at least 1. 5 inches total and if your lid is
thick enough, you can route half the distance where the supporting arm will
rest equally in both the lid and the box. Most route and/or drill the full
depth for the supporting arm in the box body due to the height of the box.
THUMBNAIL PIXS


I used a Speedy self-center drill for a 5/64 inch diameter drill bit for
# 2 screws and
drilled all the holes for the hinges. I opened the upper portion of
the 5/64 inch hole to 3/32 of an inch for the upper body of the brass screw.
The Brusso hinges comes with a steel screw to cut the threads into the pilot
hole drilled and then install the brass screw. I stripped the head of
the steel screw and had a time getting it to back out, but finally got it
with some time and effort. That is when I
opened up the upper portion of the pilot holes drilled to 3/32 inch and
everything went well after that.
Now it is a waiting game on the 3/16 inch two flute carbide flat bottom tipped cutter
with a long shank to be able to use the full mortise lock jig I recently
made.
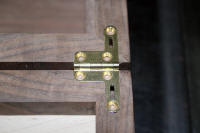
The hinges were mounted pretty much flush and the lid and body of the box
fit nicely together. I will go over the box again with the
Porter-Cable vibrating sander model 330 with 320 grit paper. It is
best the have the hinge arms a couple thousands of an inch proud where the
front of the lid will be flush with the box, otherwise if the hinges are
mounted below flush (too low) in the mortise, the front of the lid will not
fully close.
The Rockler Jig It jig definitely gets a 5 star rating in my book.
The instructions with the jig are right on the money too!
Web page updated by Bill aka Mickey Porter on 05-30-19.
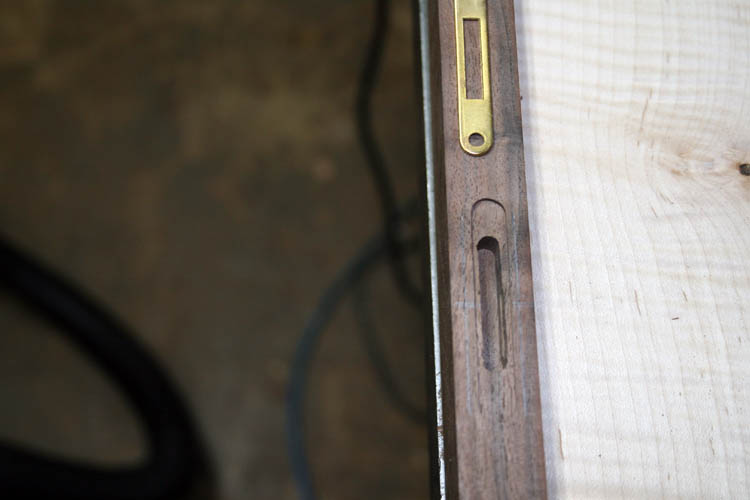
INSTALLED FULL MORTISE LOCK
After receiving the long shank router bit, I routed mortises for the lock
selvedge and lock body. The lid was routed for the striker plate and a
cavity aka mortise for the lock bolt to rest in as well. Holes were
drilled for key hole, but I had to realign the drill template since the
holes were to the right of where they needed to be. I used an
antiquated Dremel Moto Tool router with a small router base attachment and a 1/8 inch
diameter spiral end mill to complete the key hole.

I have detailed the installation of the full mortise lock
here
and will make a small curly maple knob for the lid and do some final sanding
prior to spraying a few coats of nitrocellulose lacquer. I plan to
sand a slight angle on the outside of the lid and box to highlight a line
for eye appear where the lid and box meet.
I will install the escutcheon after the finish is applied. The
escutcheon pin holes are already drilled.
Web page updated by Bill aka Mickey Porter on 06-04-19.
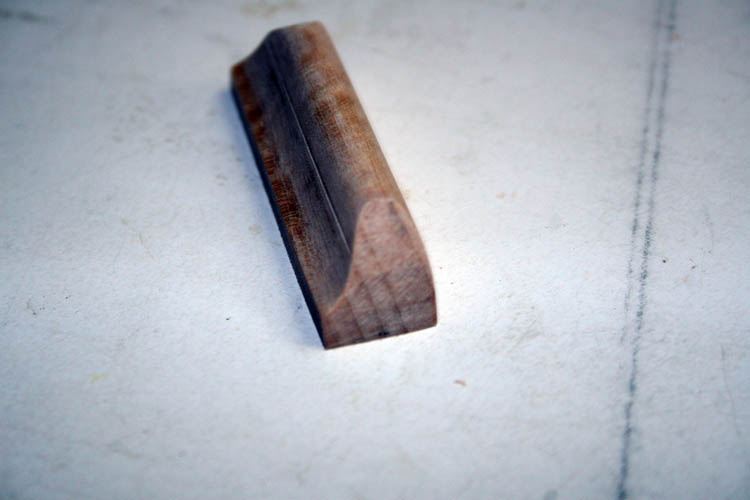
MADE LID KNOB
I used a piece of scrap aka unallocated curly maple to make a knob for
the lid. I used two (2) router bits being a 5/16 inch radius ball nose
and a 3/8 inch bull nose router bit, both manufactured by Whiteside here in
NC. I used the table saw to cut the width needed after doing the
routing. I have enough for several knobs as needed.
I blended the routed edges using a 6 x 48 inch belt sander and a
Porter-Cable 330 palm sander.
THUMBNAIL PIXS


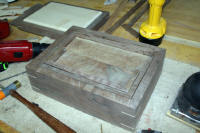
With more final sanding, this secretary/letter box will be ready to
apply a few coats of nitrocellulose lacquer and let my bride have this one.
She already has a placed picked out for it!
Web page updated by Bill aka Mickey Porter on 06-04-19.
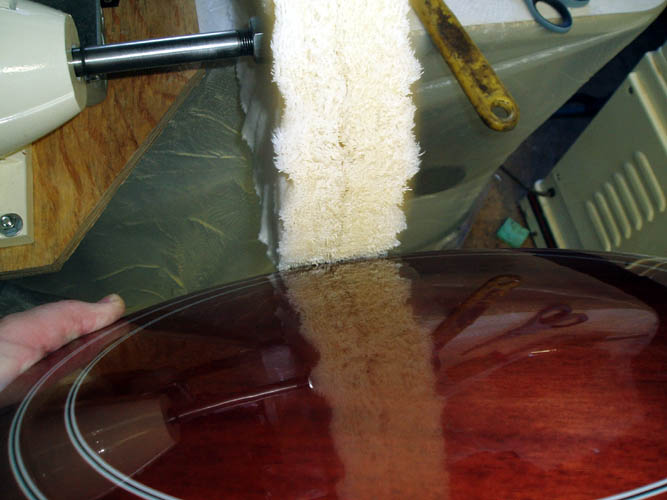
FIRST COAT OF LACQUER
I sprayed a thin coat of lacquer on the secretary/letter box on 06-06-19
and planned to spray another coat today, but we got some much needed
drizzling rain.
There are five (5) days of rain forecasted and will spray additional
coats of lacquer when the weather (humidity) conditions permit.
Web page updated by Bill aka Mickey Porter on 06-07-19.
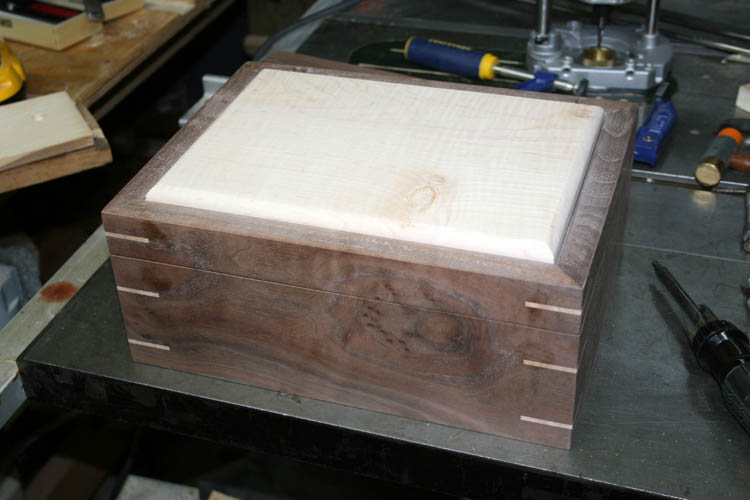
SECOND COAT OF LACQUER APPLIED
The humidity was around 64 % at mid-day and lightly buffed the box and
components; e.g., lift out tray and handle with 320 grit sanding paper, but
had better results with a green Scotchbrite pad getting into the corners in
preparation for spraying the second coat of musical grade instrument
nitrocellulose lacquer thinned about 25 %.
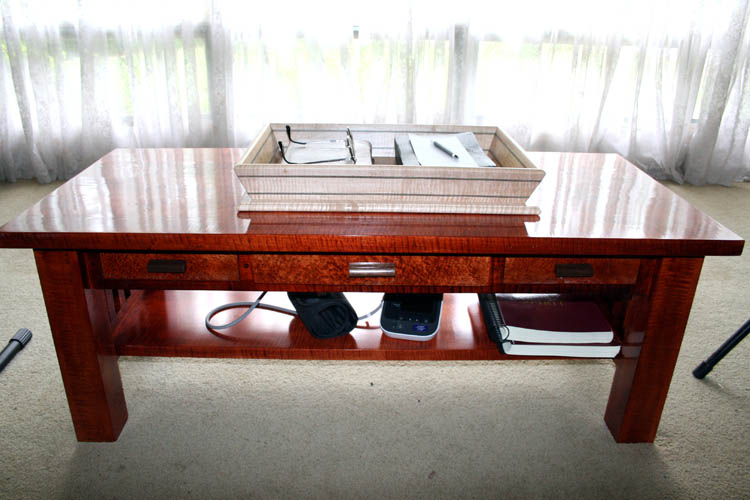
I do not plan to add a build up of lacquer like I did on the curly maple
coffee
and end tables,
just enough finish to protect and seal the wood and bring out the grain
pattern in the walnut and curly maple.
Web page updated by Bill aka Mickey Porter on 06-08-19.
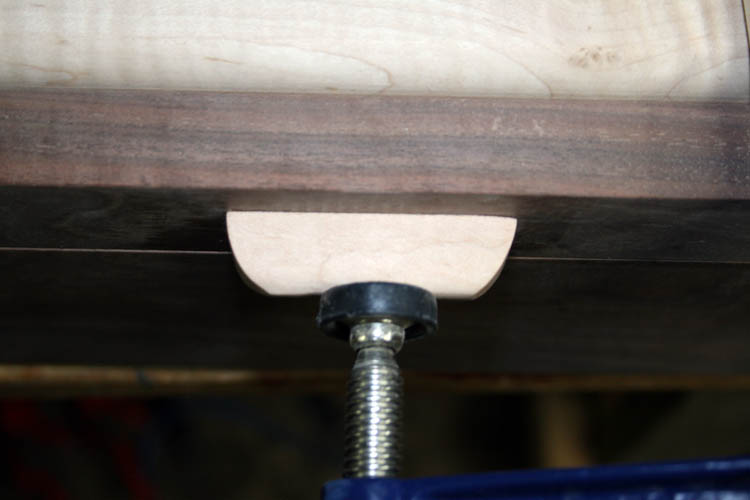
MODIFIED TURN TABLE
Back in October 2010, I made a turn table for spraying a
banjo resonator and
since then have used the base being plywood for something else.
I modified the turn table today on 06-10-19 to use for spraying the
secretary/letter box using some scrap aka unallocated pine shelving
material.

I screwed a piece of pine onto the turn table to elevate the box to
facilitate spraying the lacquer.
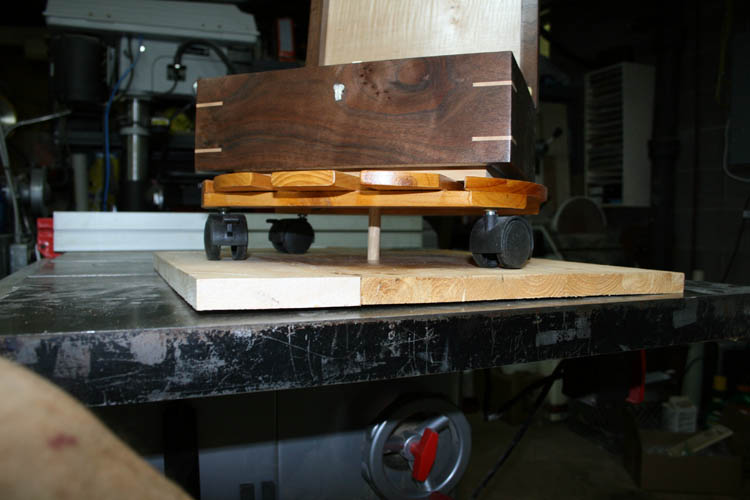
The pivot point is a 1/2 inch hardwood dowel rod that fits tightly into
the base support.
As soon as the weather is conducive (humidity less than 65%), I will
spray a few more coats of lacquer on the secretary/letter box, however it
looks pretty good with just two coats and rubbed to a matt type finish.
SPRAYED THIRD COAT OF LACQUER
I sprayed a fairly heavy wet coat of lacquer on the box and didn't see
any runs.
I sprayed the lacquer outside on a table in front of the basement garage
door since nitrocellulose lacquer has a very high VOC and after spraying one
heavy coat only, brought the turn table and secretary/letter box back inside
to cure out.
I will let the lacquer cure out several days and might not need additional
coats which will be fine too. Like I said earlier, I don't plan to do
an extensive build up of lacquer as some of my
projects.
I believe my bride is going to be well pleased with this secretary/letter
box.
Web page updated by Bill aka Mickey Porter on 06-10-19.
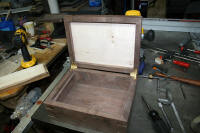
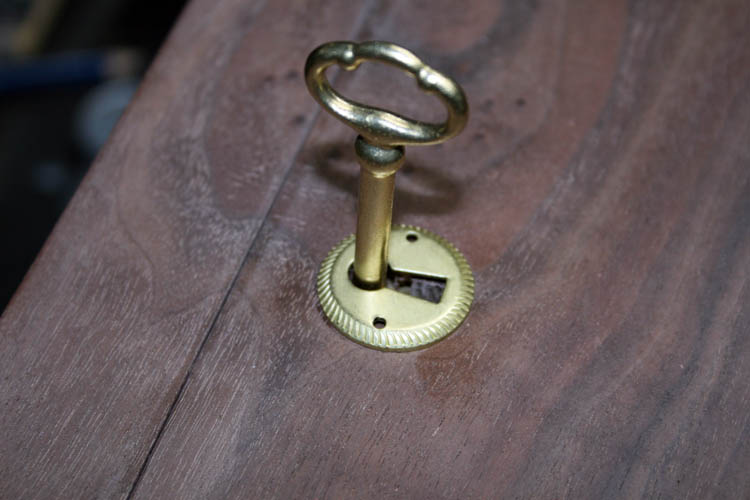
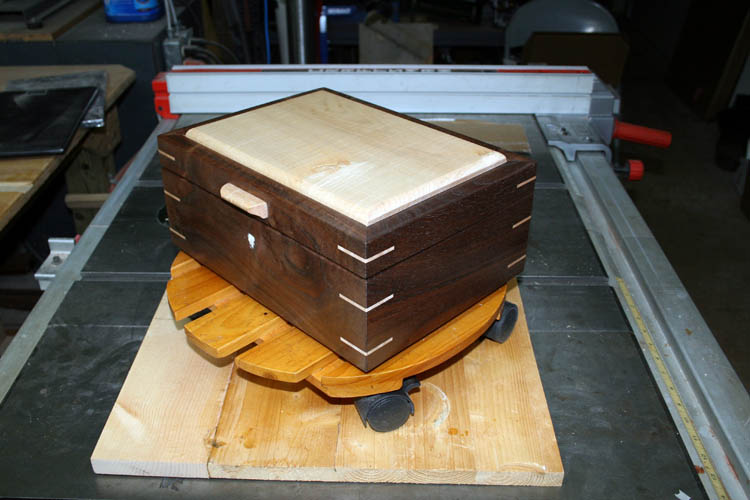
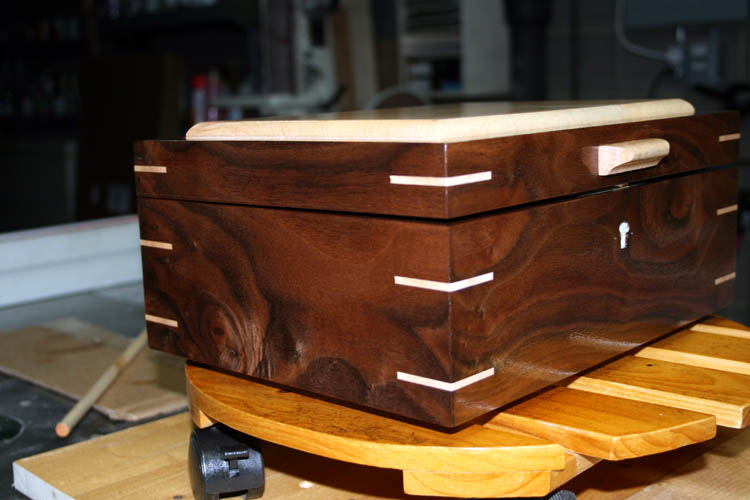
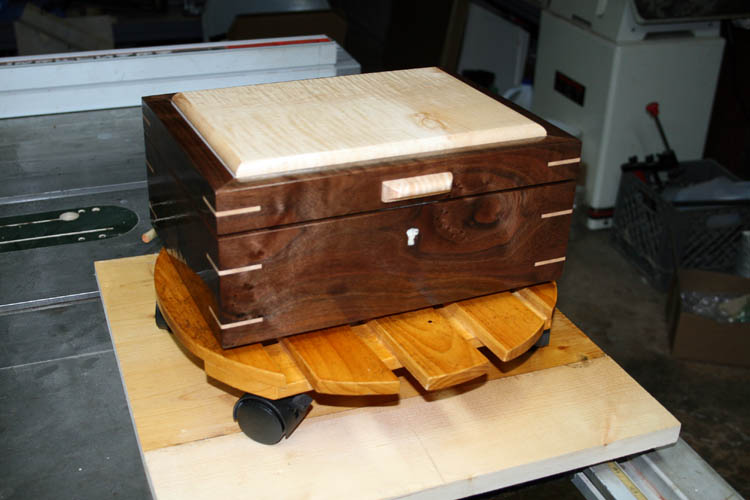
INSTALLED ESCUTCHEON
I installed the escutcheon on 06-11-19 and had to shorten the mounting
nails about 1/8 inch due to them hitting the lock body. I see now why
Mike's Heirloom Boxes has the full mortise
lock installed to the back side of the front of the box instead of centered;
just a guesstimate at the best!
My bride has her rings, watches, etc. stored in the lift out tray and
special cards of interest in the bottom of the box. She was totally
euphoric and delighted with this box.
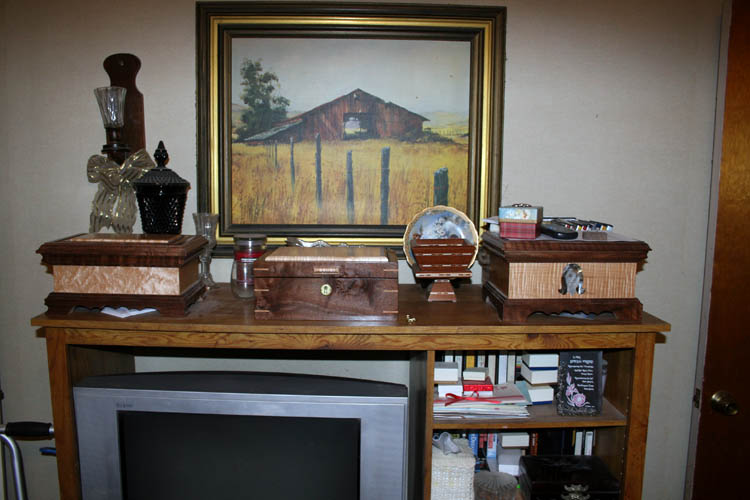
A few other goodies I have made for her!
Web page updated by Bill aka Mickey Porter on 06-11-19.
LEAVING ON A
SPIRITUAL NOTE
If you do not know Jesus Christ as your Lord and Savior, please take
this moment to accept him by Faith into your Life, whereby Salvation
will be attained.
Ephesians 2:8 - 2:9 8 For by grace are ye saved through
faith; and that not of yourselves: [it is] the gift of God: 9 Not of
works, lest any man should boast.
Hebrews 11:1 “Now faith is the substance of things hoped for,
the evidence of things not seen.”
Romans 10:17 “So then faith cometh by hearing, and hearing by
the word of God.”
Open this
link about faith in the King James
Bible.
Romans 10:9 “That if thou shalt confess with thy mouth the
Lord Jesus, and shalt believe in thine heart that God hath raised him
from the dead, thou shalt be saved.”
Open this
link of Bible Verses About Salvation,
King James Version Bible (KJV).
Hebrews 4:12 “For the word of God is quick, and powerful, and
sharper than any two edged sword, piercing even to the dividing asunder
of soul and spirit, and of the joints and marrow, and is a discerner of
the thoughts and intents of the heart.”
Romans 6:23 “For the wages of sin is death; but the gift of
God is eternal life through Jesus Christ our Lord.”
Romans 3:23 “For all have sinned, and come short of the glory
of God;”
Micah 6:8 “He hath shewed thee, O man, what is good; and what
doth the LORD require of thee, but to do justly, and to love mercy, and
to walk humbly with thy God?”
Philippians 4:13 "I can do all things through Christ which
strengtheneth me."


