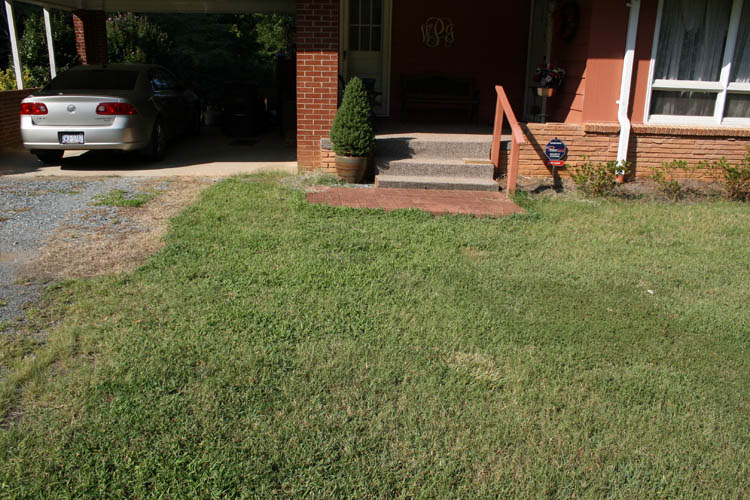
WHEELCHAIR RAMP CONSTRUCTIONBack in mid
to late July, 2019, my bride was having difficulty ascending our front steps
due to her right knee giving way and decided to build a wheelchair ramp.
We had an appointment to see an orthopedic surgeon in Monroe, NC on
August 13, 2019 and I really had to "step it up and go" to get the
wheelchair ramp at least operational and do the finishing touches as needed
at a much slower pace.
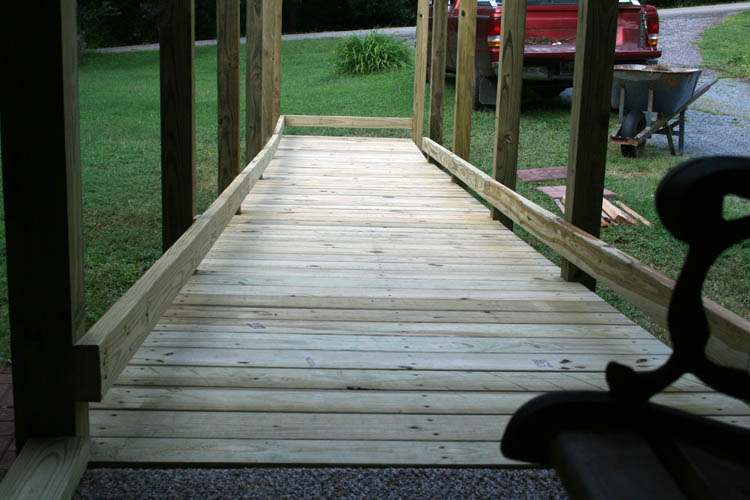
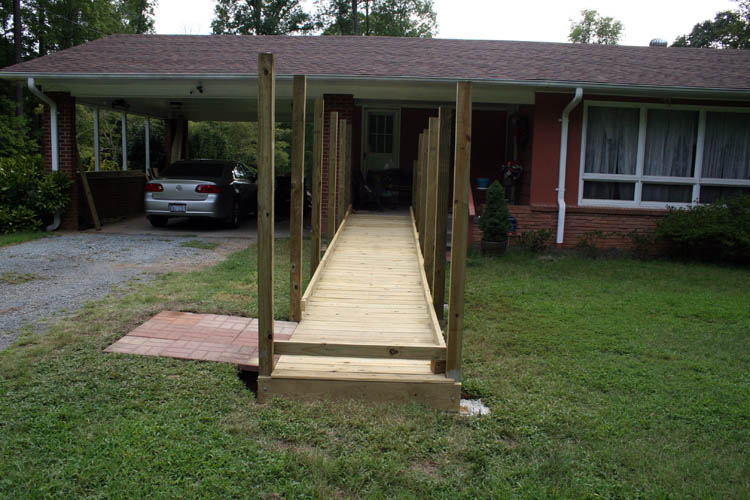
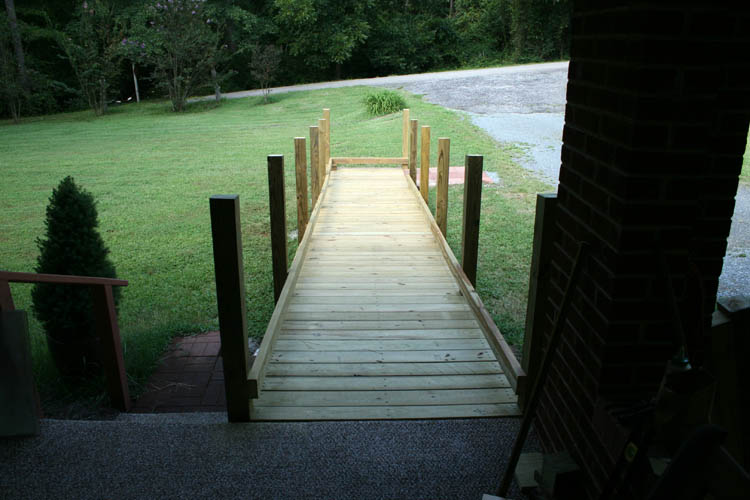
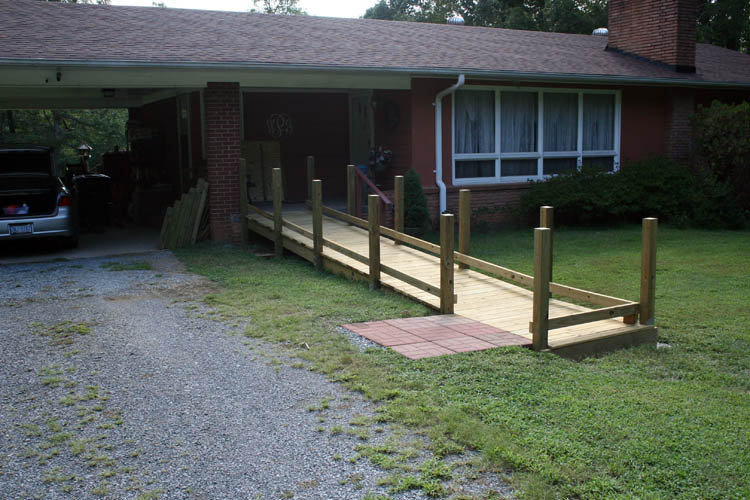
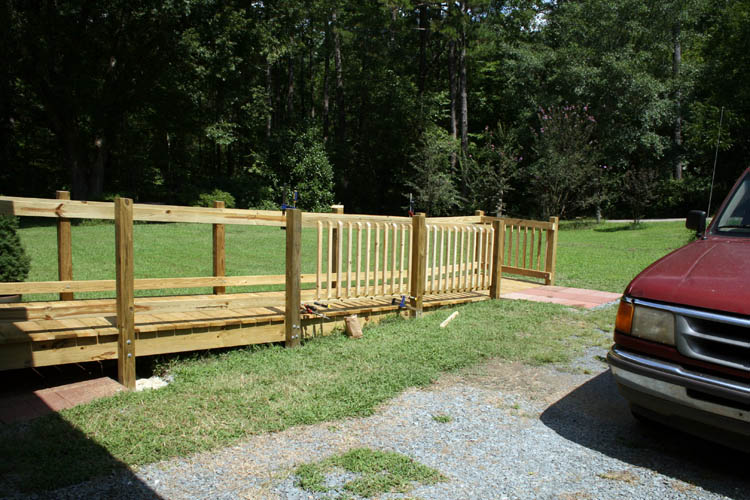
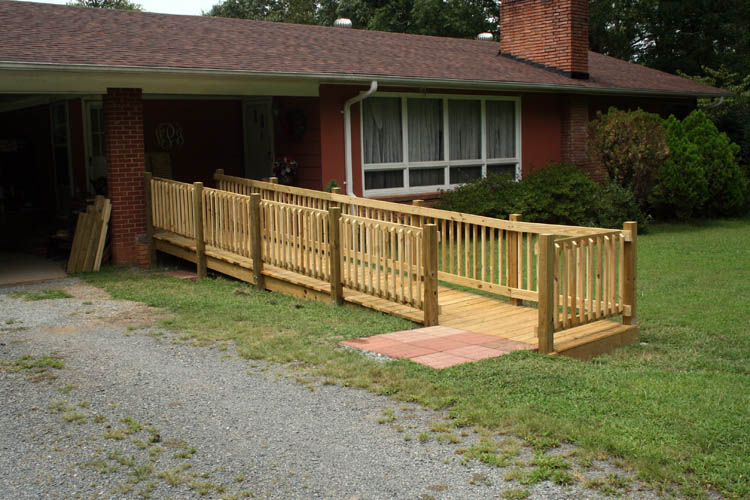
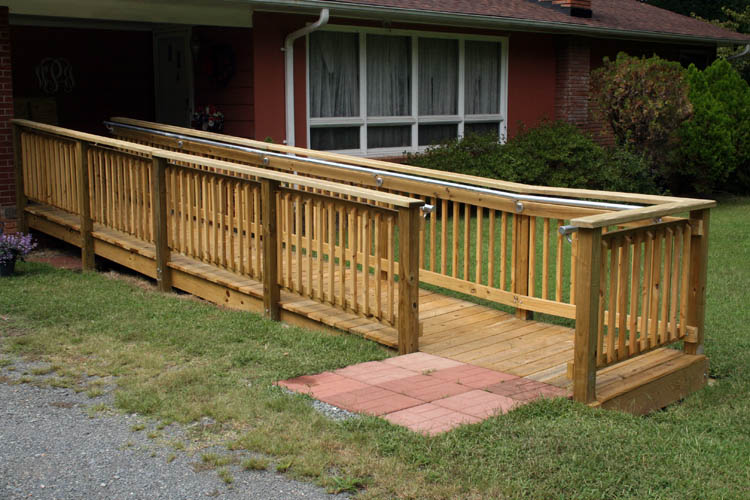
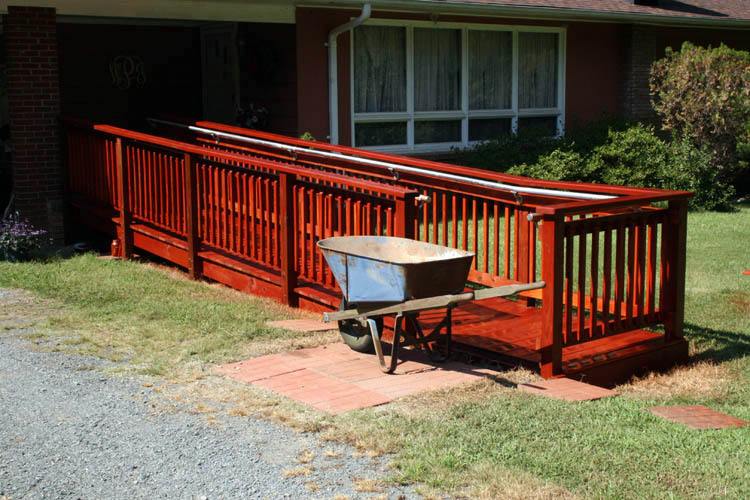
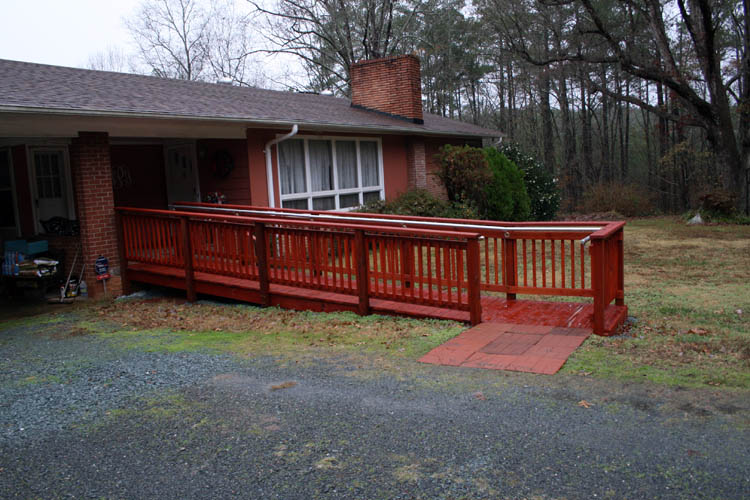
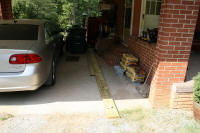
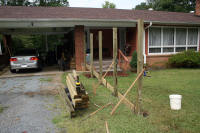
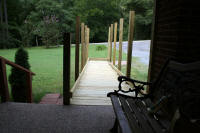
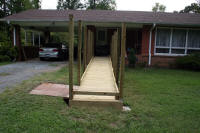
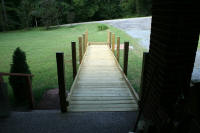
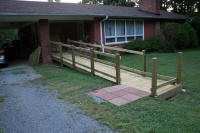
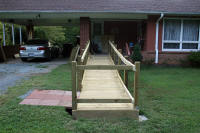
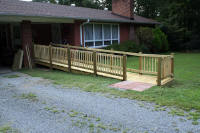
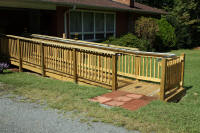
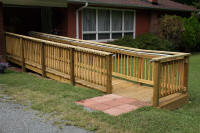
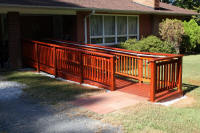
Below is a pix of the finished ramp taken on 12-14-19 and I will detail with pixs and some
narrative comments to the construction of the wheelchair ramp:
GETTING STARTED
This project required some research as to the ADA (American Disability
Act) code requirements for a wheelchair ramp along with local permits and
other ramifications for
the same.
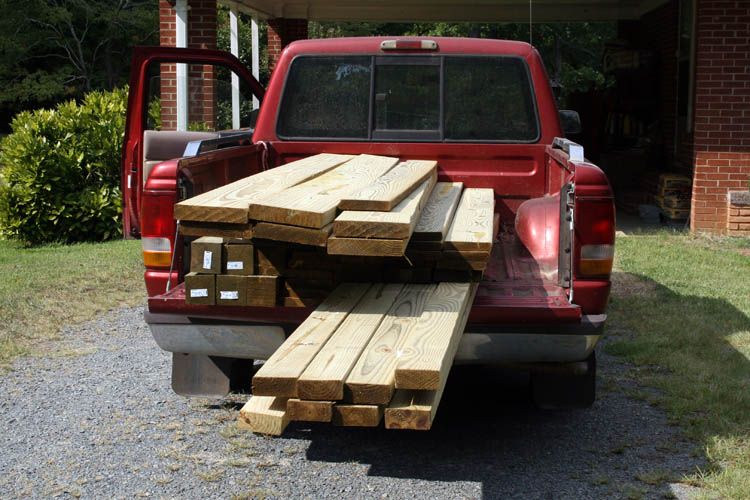
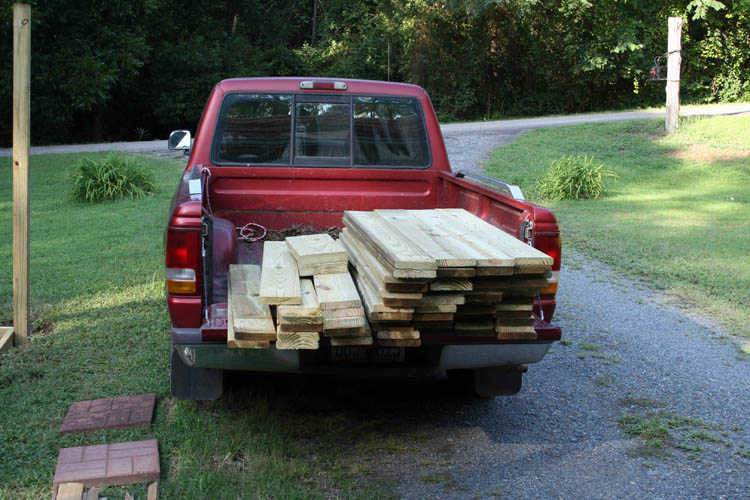
After gathering the required information and purchasing the required
materials, of which I found about everything I needed locally except the
safety steel grab bar tubing and mounting cast iron brackets. The
brackets were located on line from
Steel Supply, L.P. in Houston, Texas and the galvanized
steel tubing was obtained from Lowe's in Rockingham, NC. The wood
components, screws and Quikrete cement mix were obtained locally from the
Wadesboro Lumber Barn.
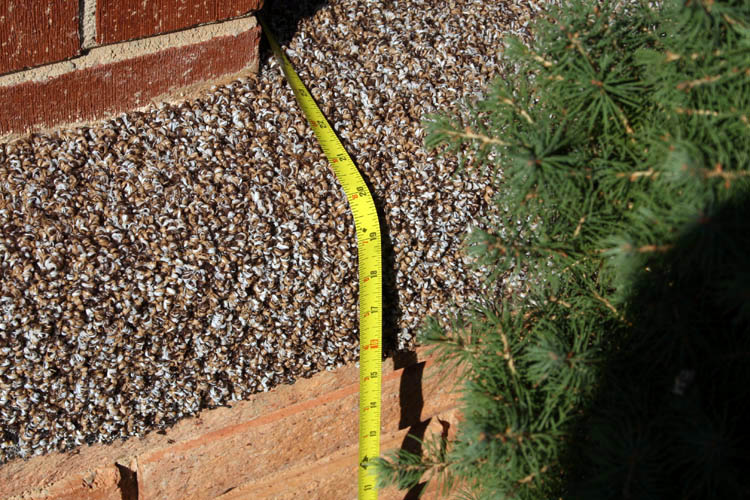
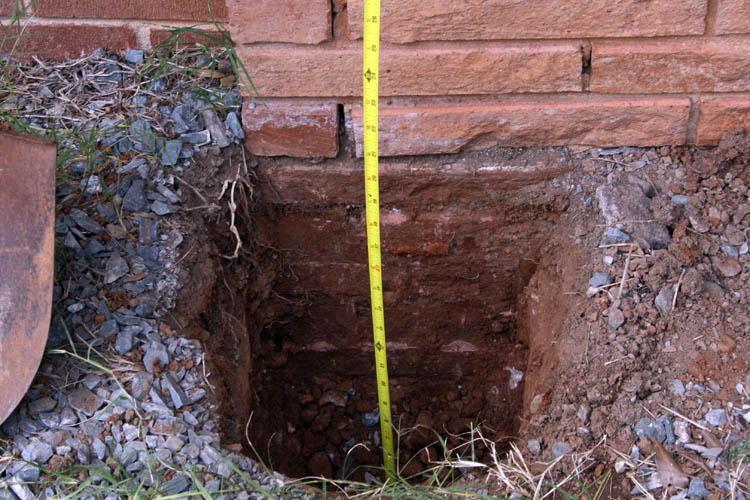
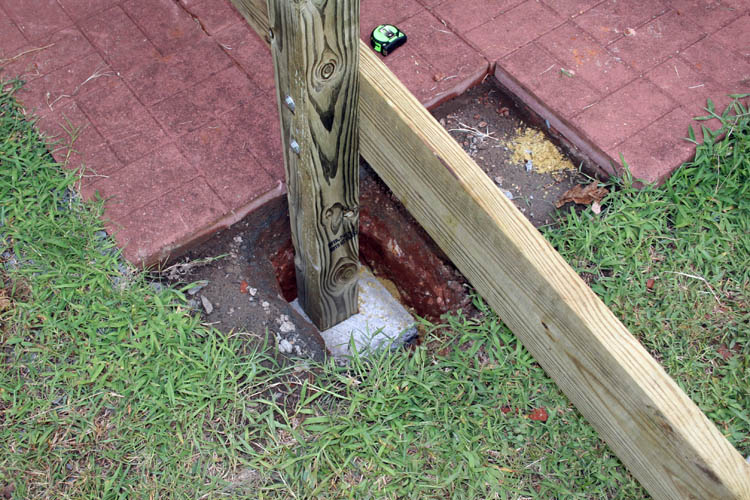
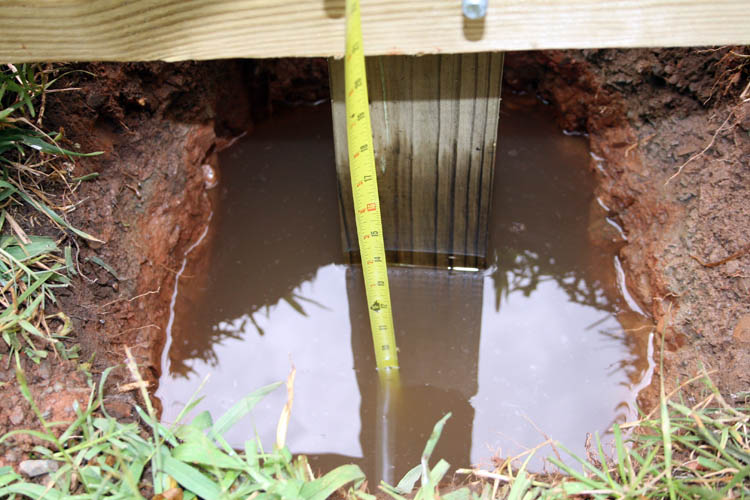
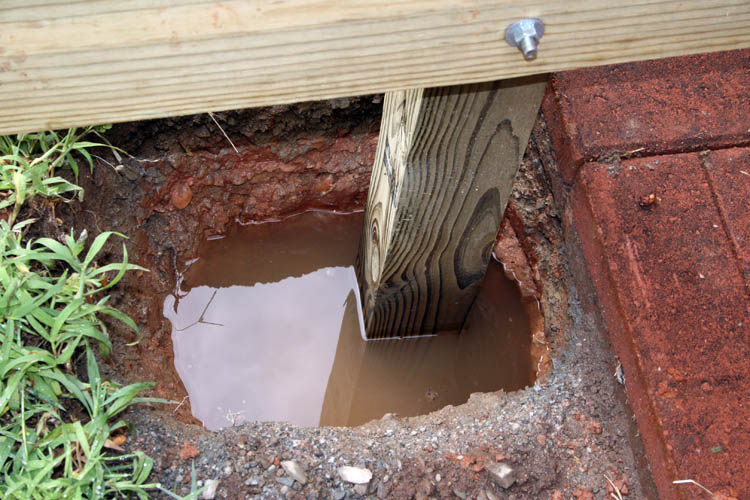
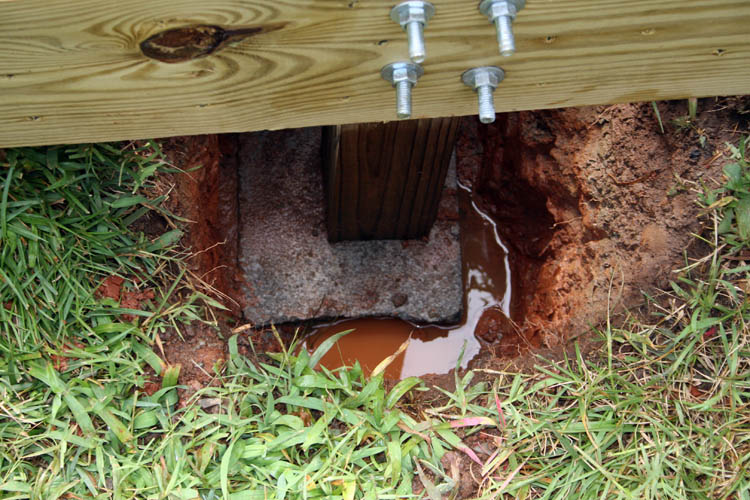
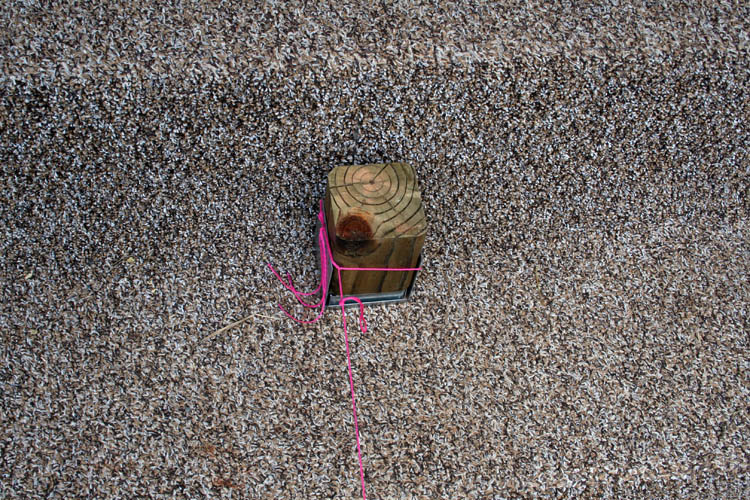
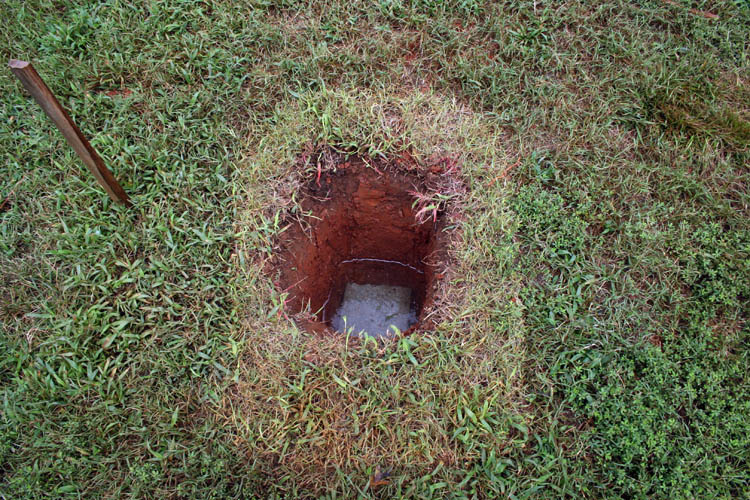
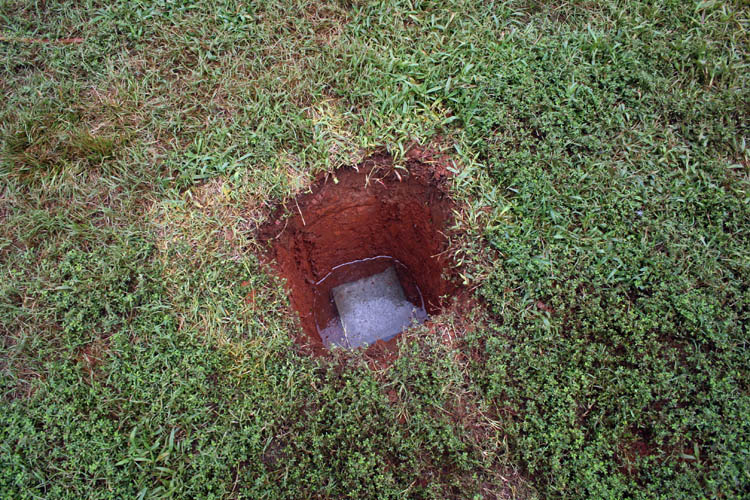
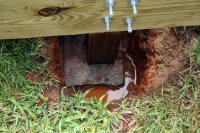
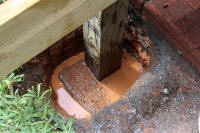
I will not go into all the required ADA specifications for the ramp, but
the in ground posts were required to be twenty (20) inches deep with the
post sitting on top of a piece of cement cap type block or brick.
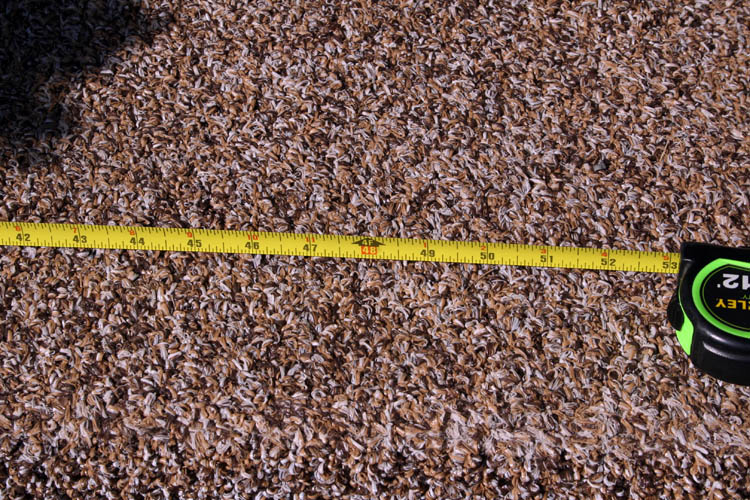
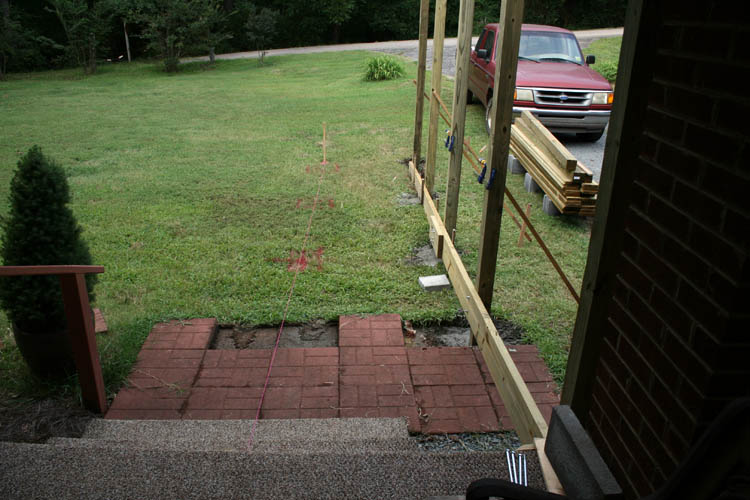
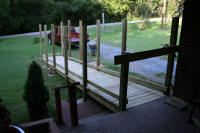
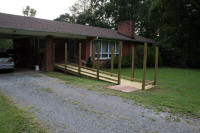
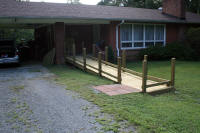
Also, for each one inch of elevation at the start of the ramp, you have to
extend the ramp out horizontally one foot. The elevation required to our front
porch was nineteen (19) inches and I extended the ramp out 20 feet and also
added a horizontal landing at the end of the ramp to access the driveway
from the side of the wheelchair ramp versus the end of the ramp.
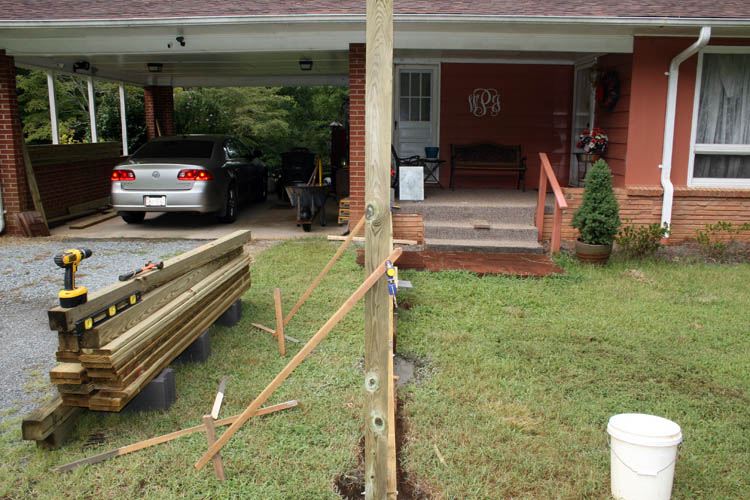
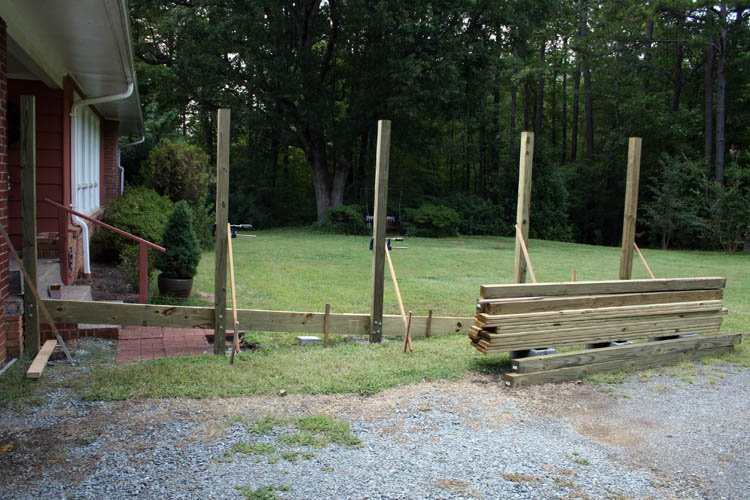
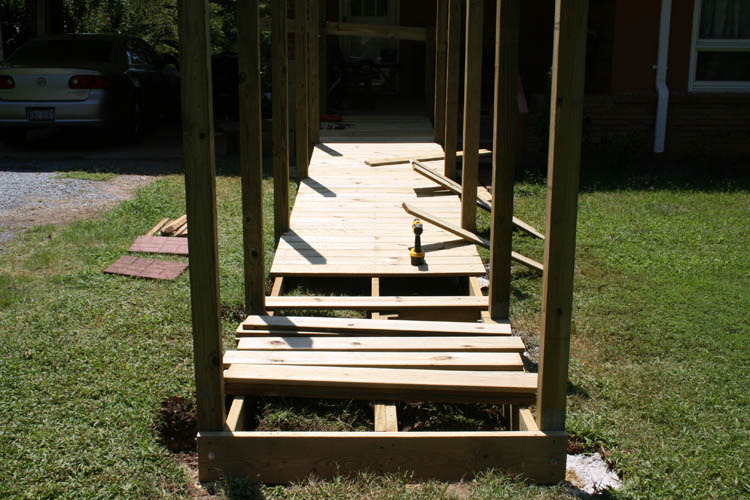
I started the construction on July 30, 2019 and my friend Robert Webster
of Hamlet, NC was over earlier and we discussed some material issues.
Robert stated, "After you get the preliminaries
done, give me a call and I will help you." To me that
meant, getting the holes dug and the posts in the ground, etc. Robert
did come by after I got the posts in the ground and the support runners in
place for the decking wanting to drive some deck screws. NOTE: After all the serious manual
labor was completed and told him, "I didn't need him and would finish
the ramp myself".....grin if you must!
THUMBNAIL PIXS


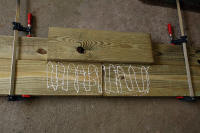
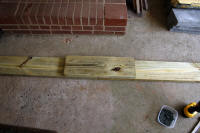
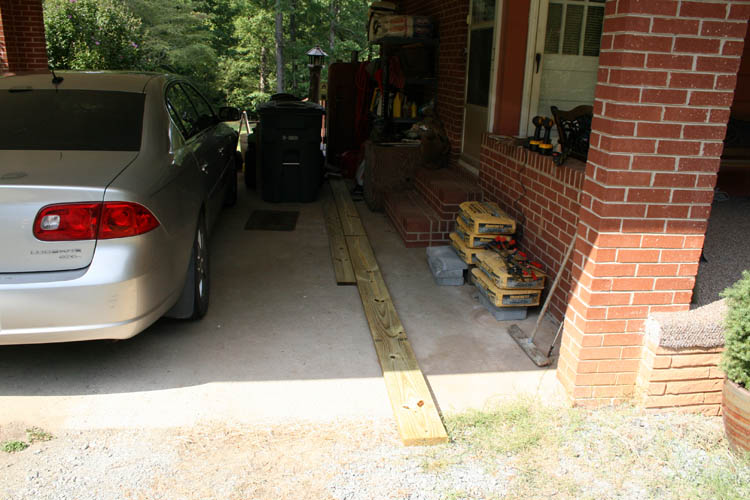
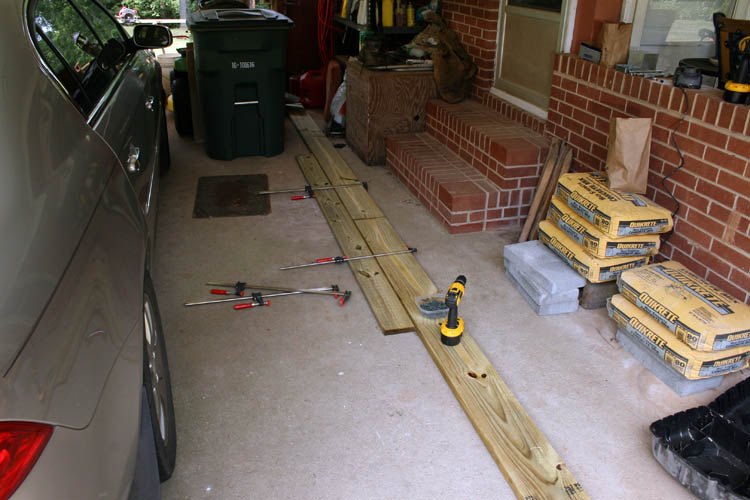
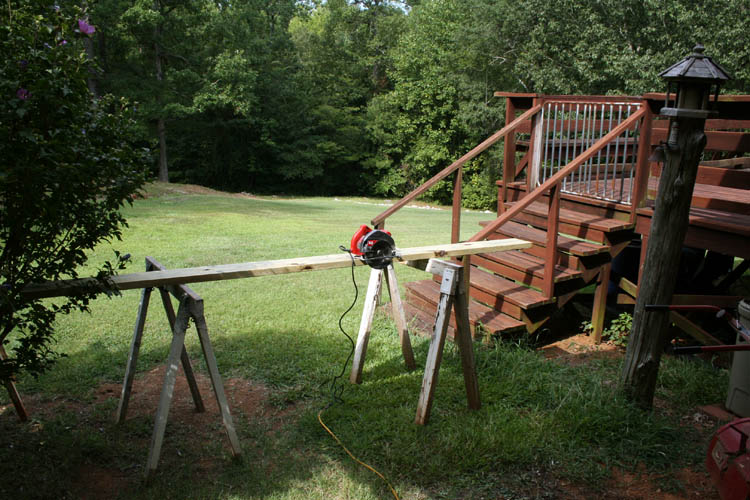
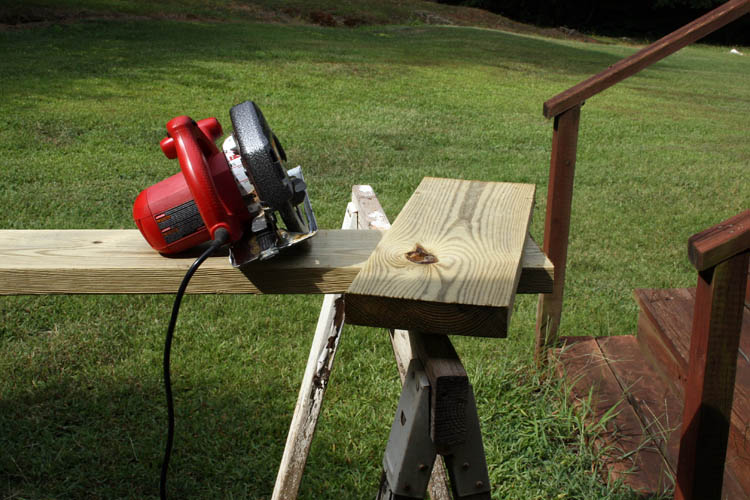
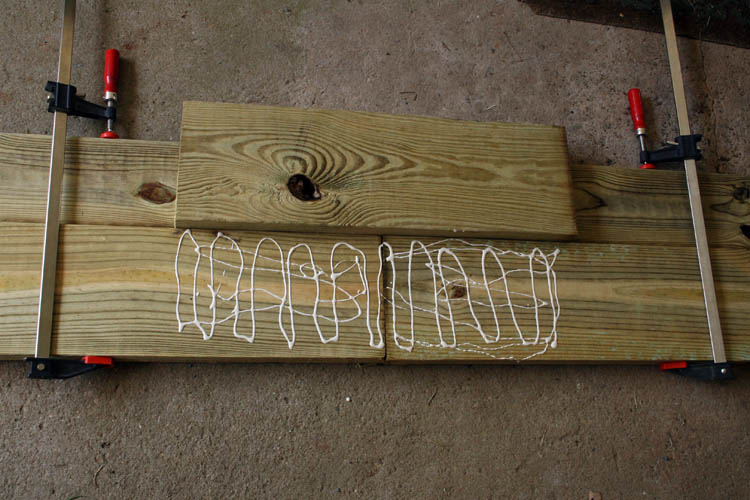
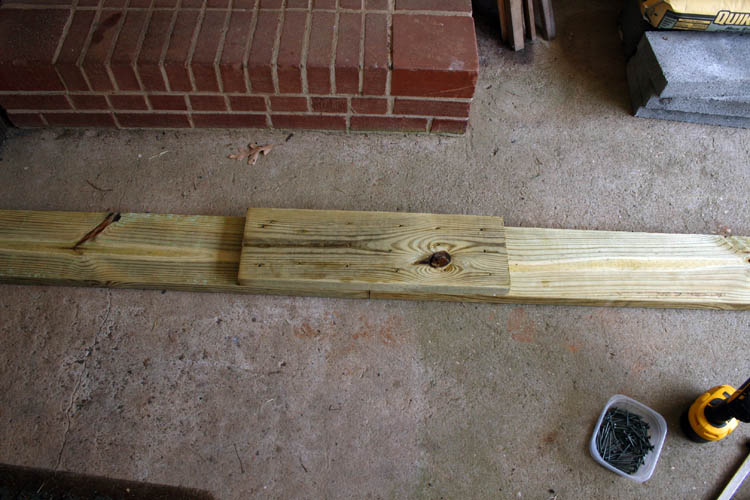
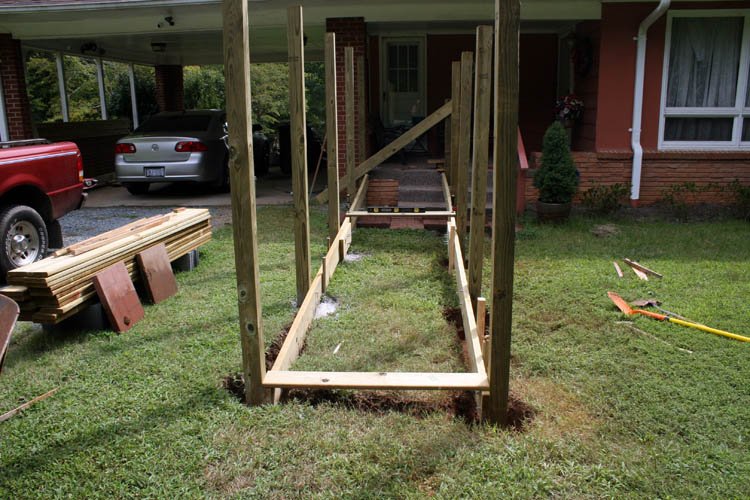
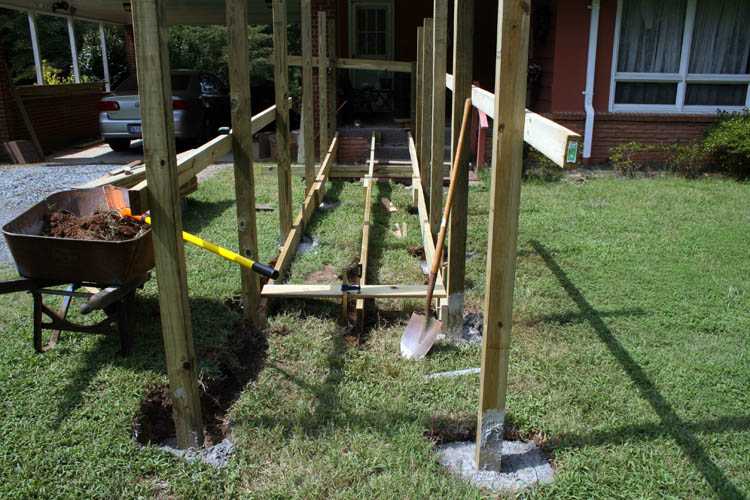
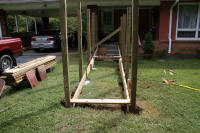
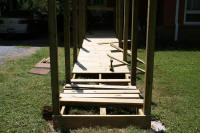
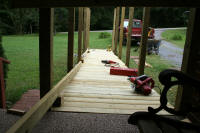
I used 2 x 8 x 10' for the beams aka floor joists and butted them end to
end, placed glue and a scab 2 x 8 x 24" on top and used a generous amount of
deck screws to secure the scab to the joists. I used a total of three
(3) beams aka joints for the decking support consisting of six 2 x 8 x 10'
boards.
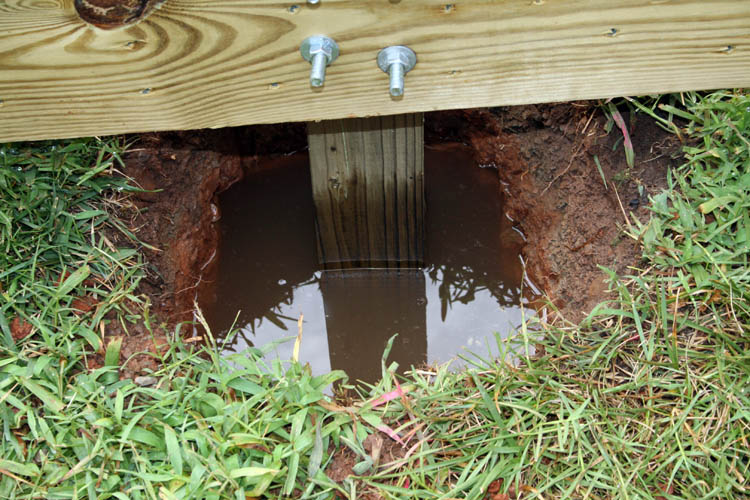
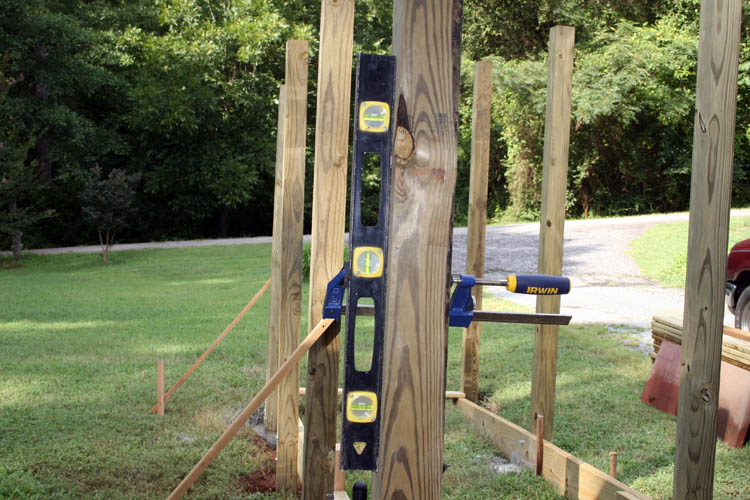
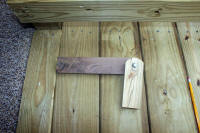
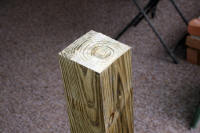
The posts were 4 x 4 x 8' treated and the decking material was 5/4
treated decking boards. The connection between the beams and the posts
were 3/8 steel bolts.
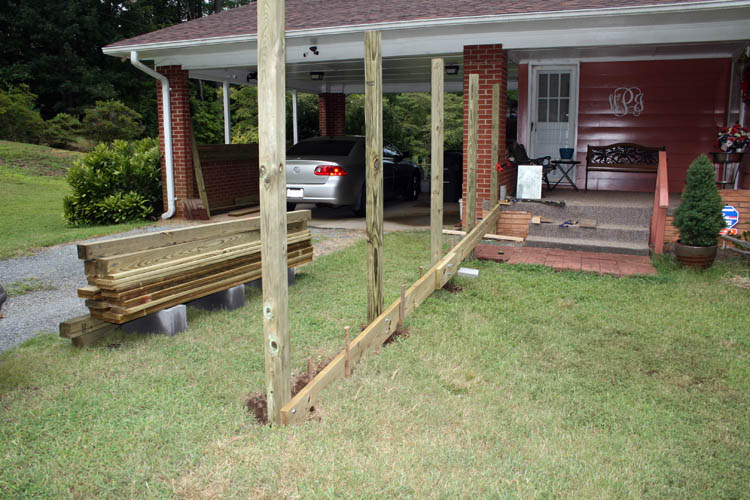
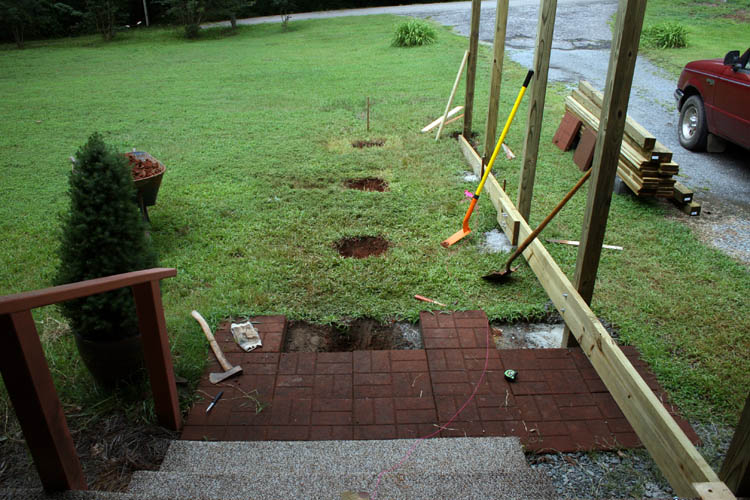
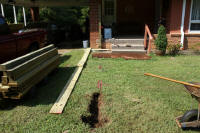
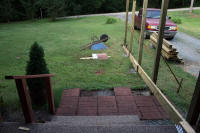
DIGGING THE HOLES
I should have used some mechanical help; e.g., gas engine auger to dig
the holes, but did it the hard way with brute force. I had a post hole
digger, but the ground was hard as a rock with an under layer mixture of silica
rocks and red clay below the top soil. Using the post hole digger, you
would need a steel breaker bar to help break up the rocks and hard packed soil, of
which I did not have. I did much better with a round
point shovel, however the holes were much larger than needed, required about
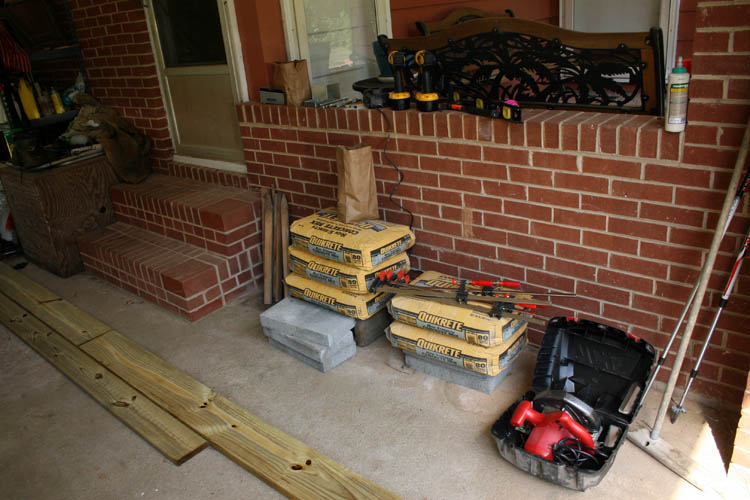
18 to 20 eighty pound bags of Quikrete. The
temperature during the post hole digging was in the mid 90s
and it took a toll on myself of which I will relate.
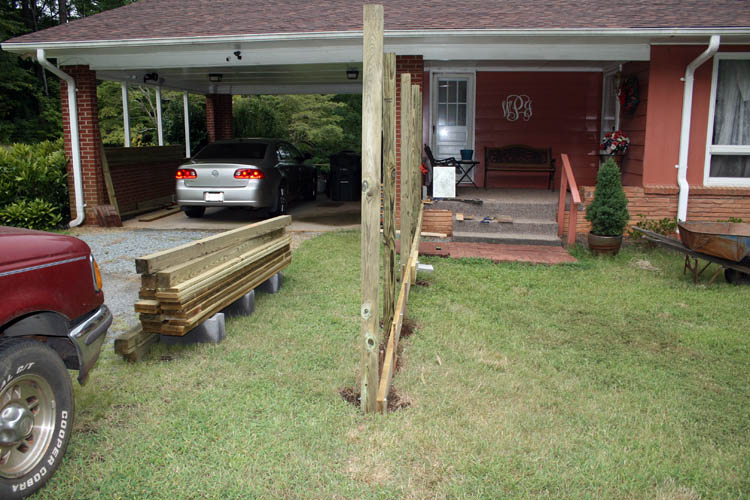
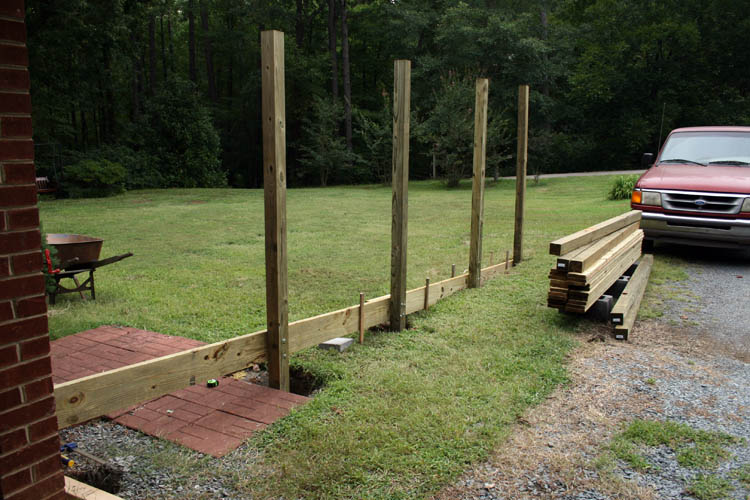
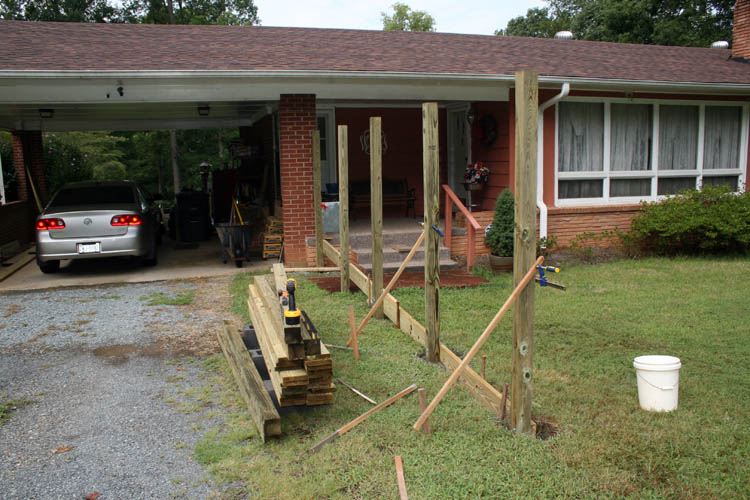
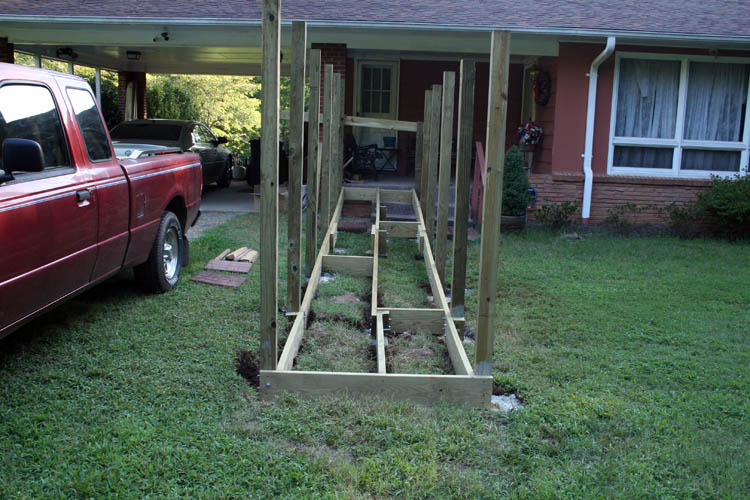
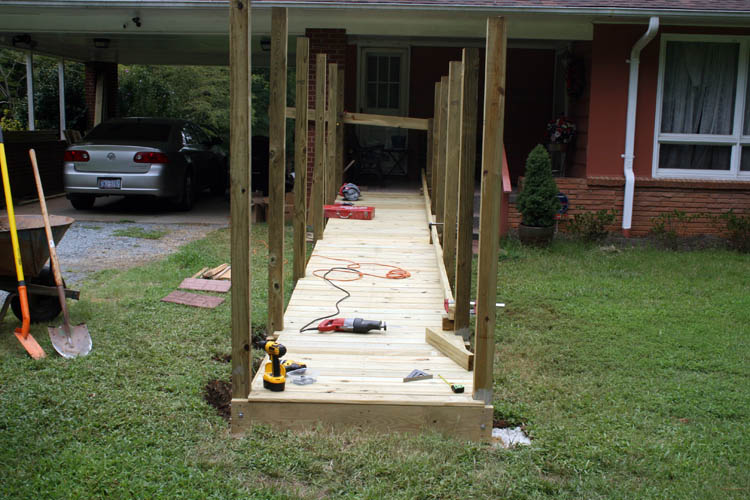
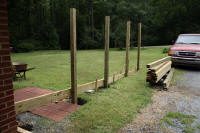
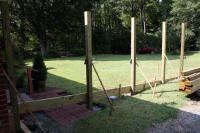
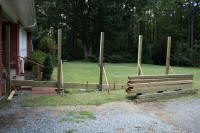
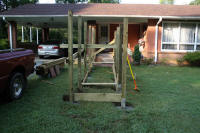
By August 12, 2019 I had the ramp operational as far as the posts set in
Quikrete, decking and bottom rail in place and porch ramp. On August 13, 2019 while
returning from taking my bride to her orthopedic surgeons appointment in
Monroe, NC, I was
having severe pains in my right lower side and back thinking it was
a kidney stone attack for sure! The pain got worse and I had to make a trip to
our local ER facility on the early morning of August 18, 2019 and their
tests didn't indicate what the problem was....a band-aid visit for sure,
although they did the best they could with the technology they possessed,
CAT scan, blood work, etc.
They gave IV fluids for dehydration and prescriptions for two pain killers
and/or muscle relaxers that only made me drowsy and endured the pain.
Luckily, it wasn't a kidney stone attack, of which I have had one removed
in 2000 or 2001 and it was a level 10 of pain.
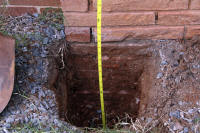


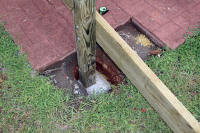


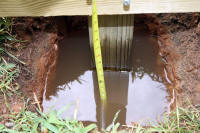
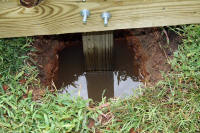
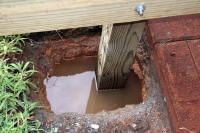
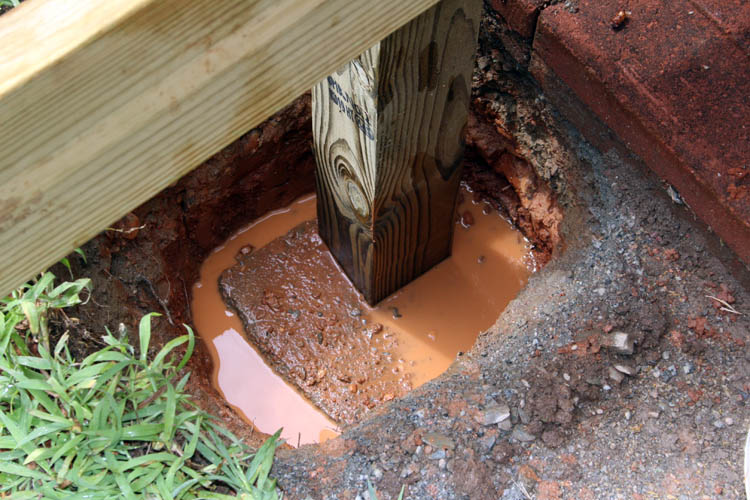
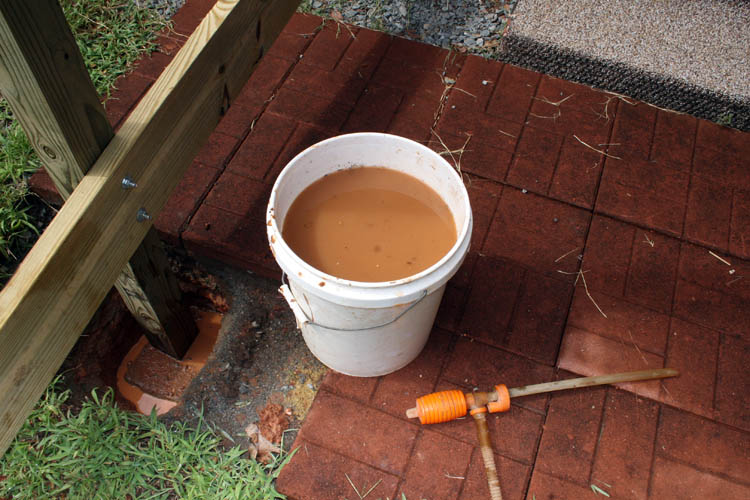
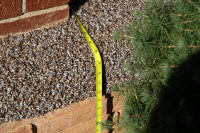
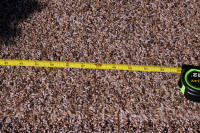
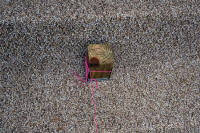
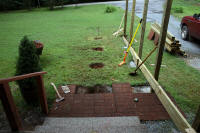
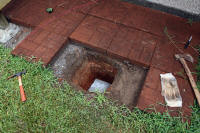
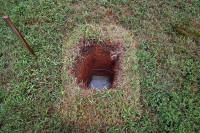
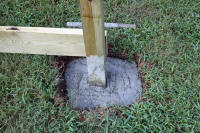
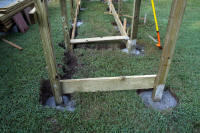
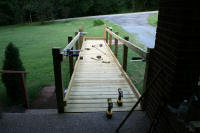
As evidenced by the last few pixs above, we had a heavy rain and most of
the post holes were filled up with water. The hard packed red clay
definitely would not perk for a septic system in this area.

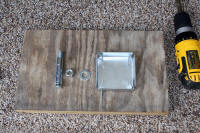
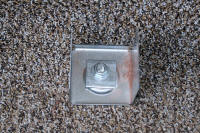


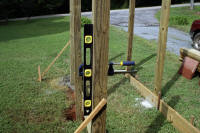

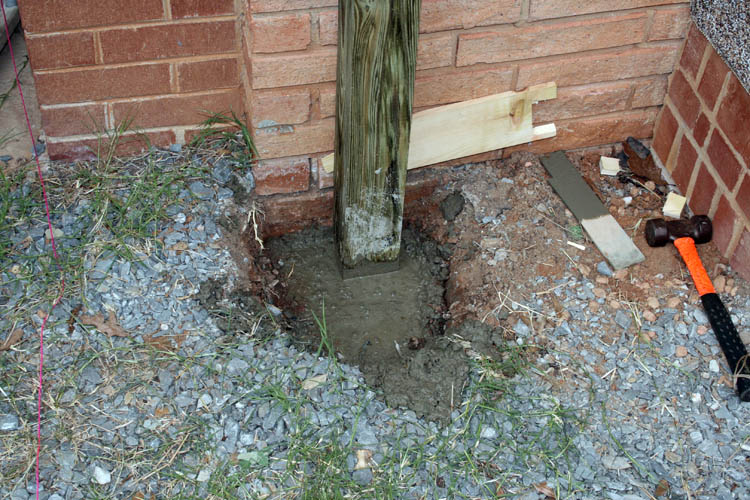
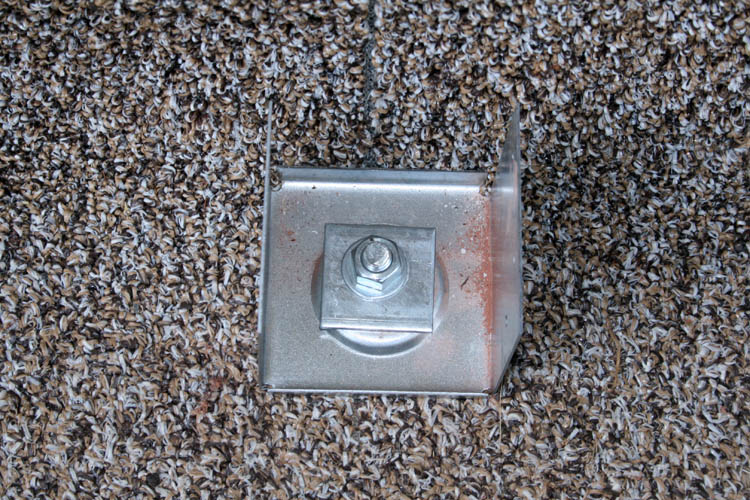
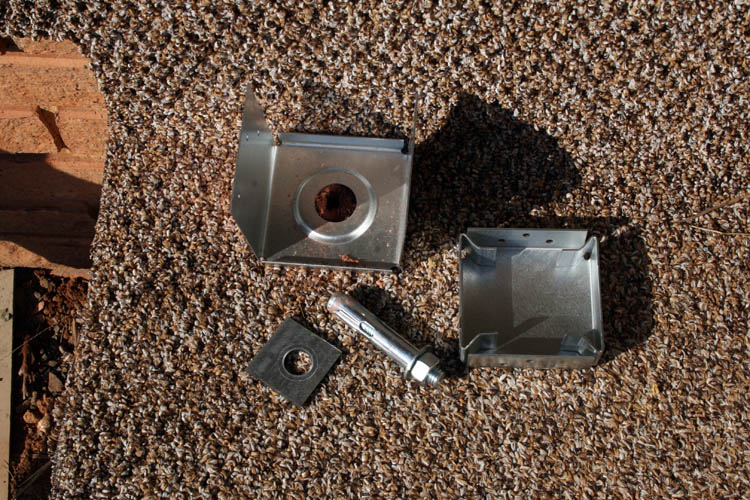
I used a couple concrete anchor systems for anchoring a 4 x 4 post onto the steps
which worked pretty good. After the two side joists aka beams were
bolted to the posts, it was
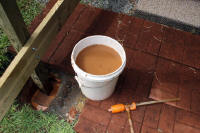
time to add Quikrete to the holes. I did it the hard way and mixed the
Quikrete in a wheel barrow; most just pour the dry mix in the hole and add
water. BTW, I used the end of a plastic container and dipped out
most of the water from the holes that were water logged from the heavy rains
we had.
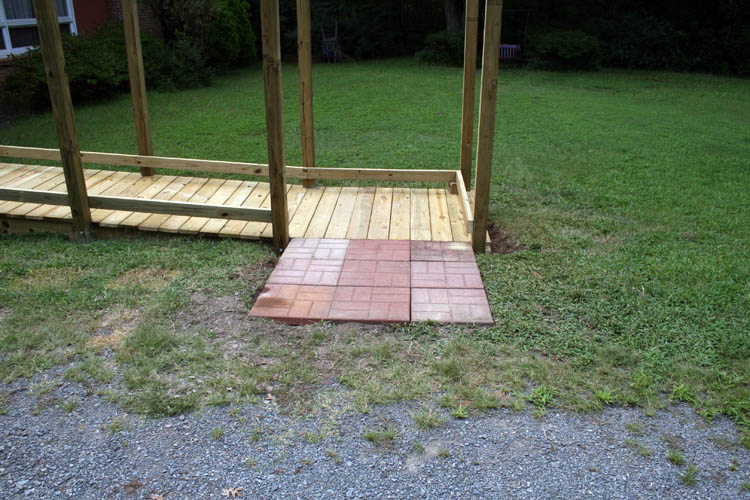
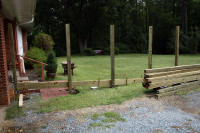
ADDED HORIZONTAL LANDING
I added a
horizontal landing at the end of the ramp to access the driveway which
required two more post holes and 2 x 8 framing aka joists to tie it together
with 3/8 inch diameter bolts.
ADDED CENTER JOIST AKA BEAM
After the
posts were installed for the horizontal landing, I started the layout for
the center joist aka beam which required the usage of a concrete anchor on
the steps and of course more 20 inch deep holes to dig.


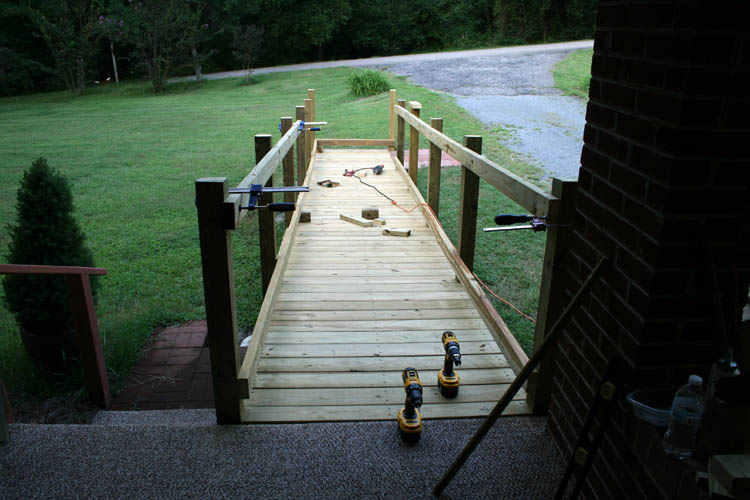
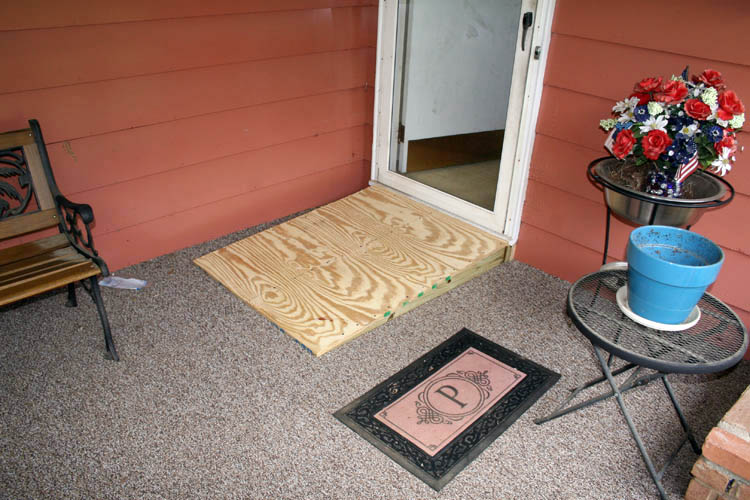
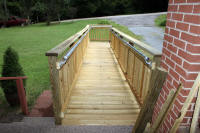
RAMP FOR THE PORCH TO THE LIVING ROOM
I
built a ramp for the porch to the living room access using 3/4 inch exterior
plywood with taper sides and center and glued and screwed it together and
later stained it.
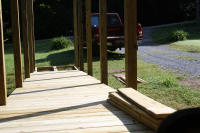
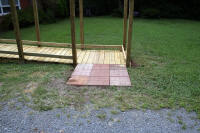
INSTALLED CONCRETE
PAVERS
With the wheelchair ramp completed enough to use it,
concrete pavers were added from the horizontal landing to the drive way.
There was still much to do, but needed it operational for usage on August
13, 2019 for an orthopedic surgeons appointment and didn't have another day
to spare....cutting it very close on this one.
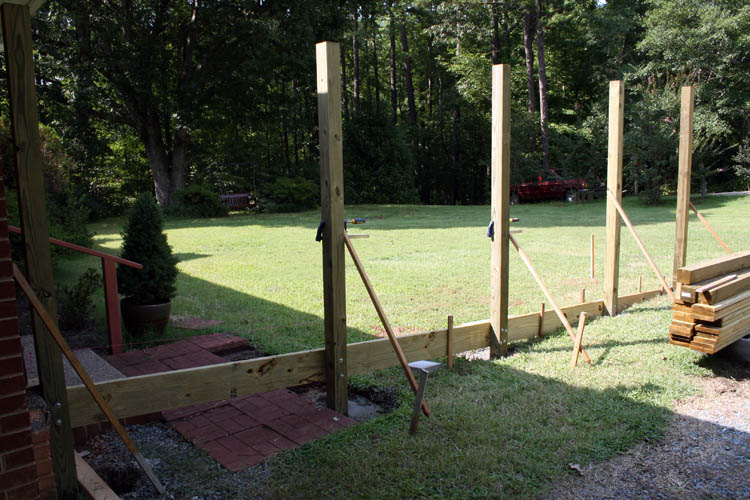
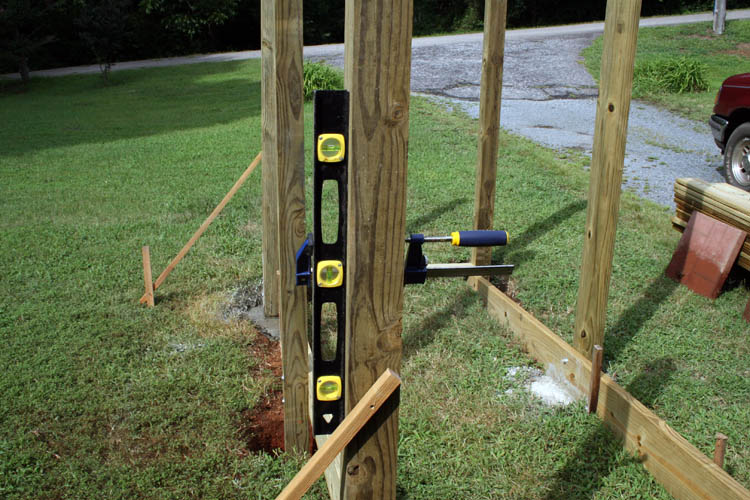
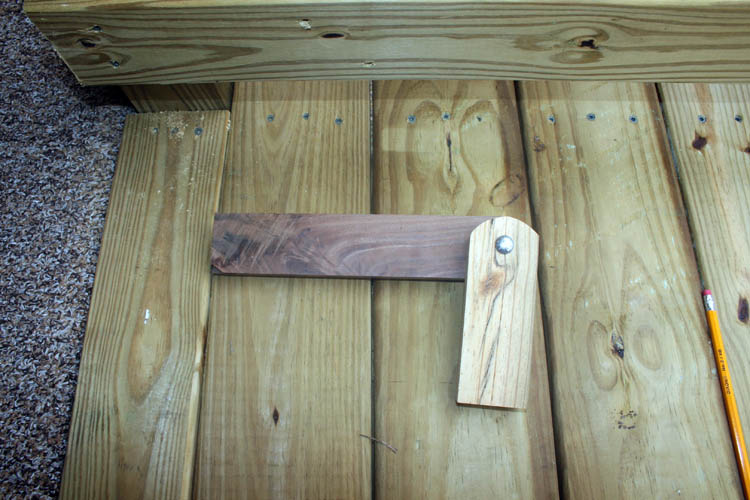
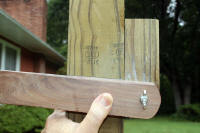
CONSTRUCTION CONTINUES
The next order of
business was to cut the upright 4 x 4 posts to the proper length and at an
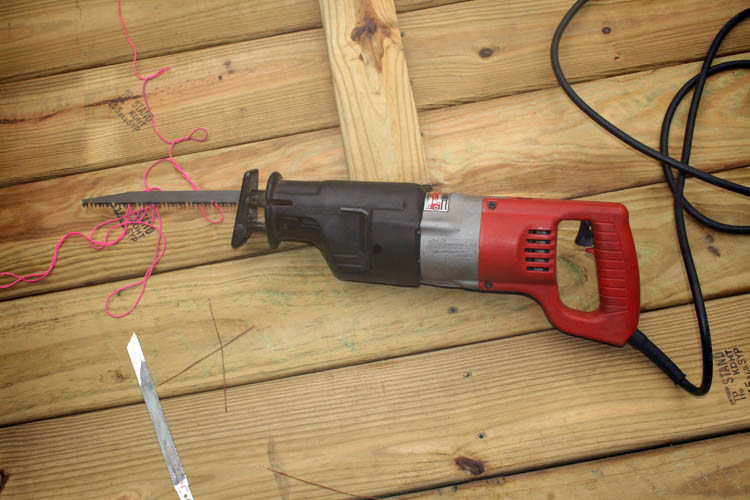
angle parallel to the tapered ramp. If I was proficient enough, a
skill saw would be the easy way to cut the posts, but I rarely use a skill
saw and was out of the question.
I went on line an found a very simple and inexpensive jig that allows the usage of a
reciprocating saw. It was a pain to get both sides parallel, but it
worked out great.


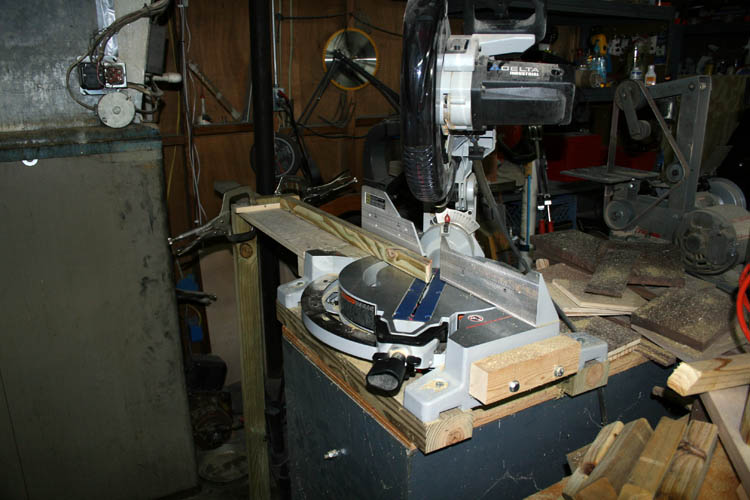
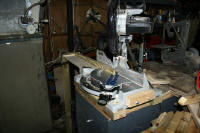
With the 4 x 4 posts cut to length and the upper rail added, it was time to
cut the upright pickets to length. The standard lengths available
locally are 36 x 48 inches in length if my memory is correct. I needed
them cut to a little over 29 inches in length and made a fixture for the
miter saw to cut them to length and the 45 degree end at the same time.
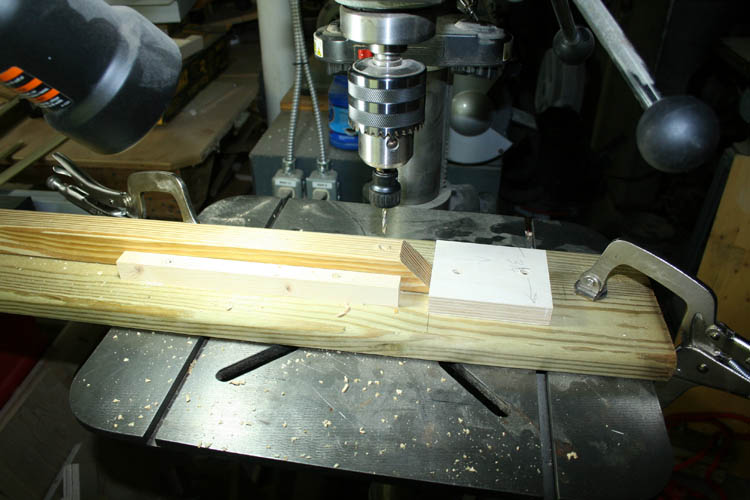
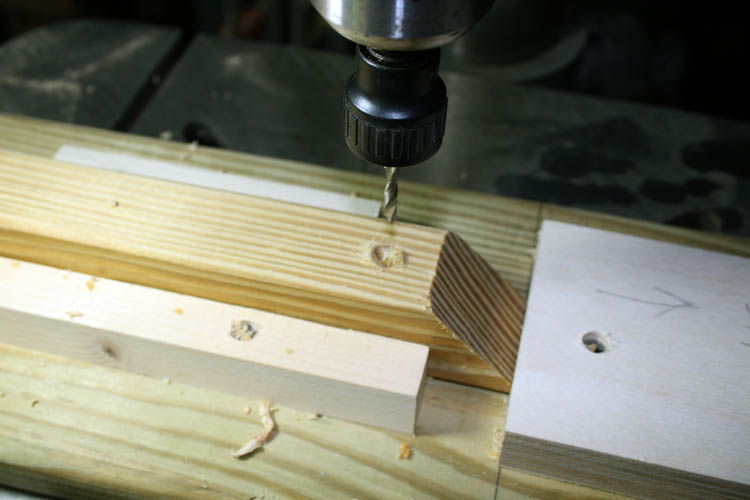
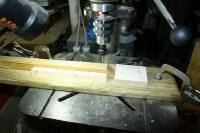
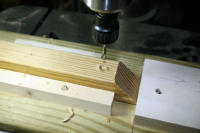
A fixture to pre-drill the holes using the drill press for the screws since
wood is prone to crack or split close to the end without a pre-drilled pilot
hole. Even though the deck screws has a drill point for such, a
proper diameter pre-drilled hole is a safer way to go when near the end of a
board. Most contractors would not
pre-drill any holes on deck or wheelchair ramp construction in my humble
opinion because of the extra time involved which means money!

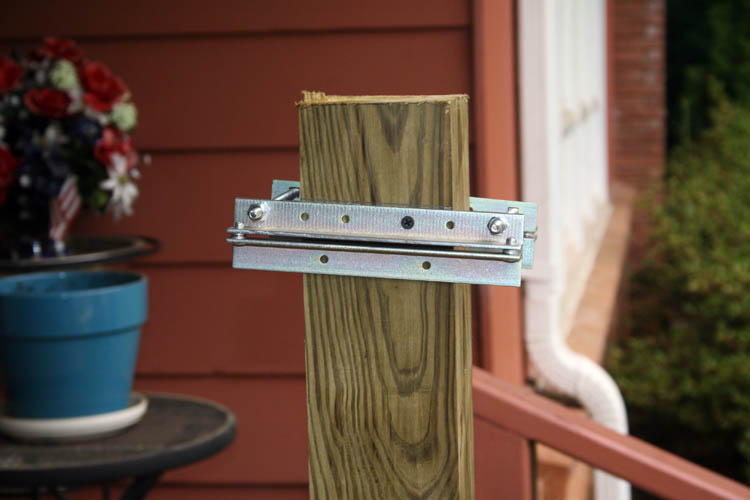
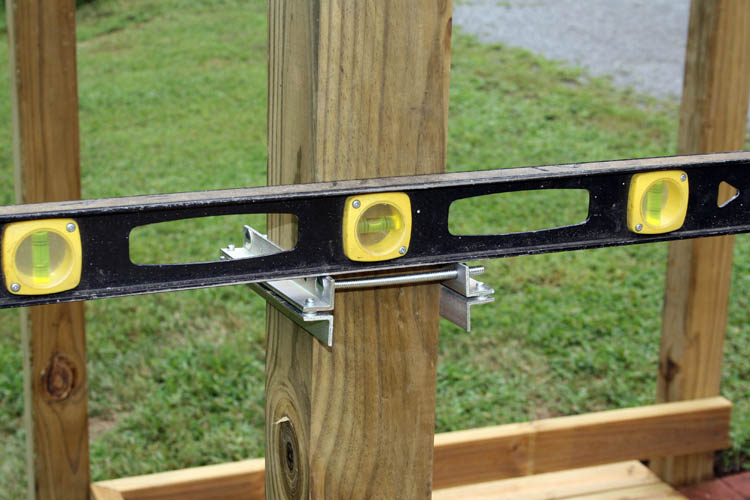
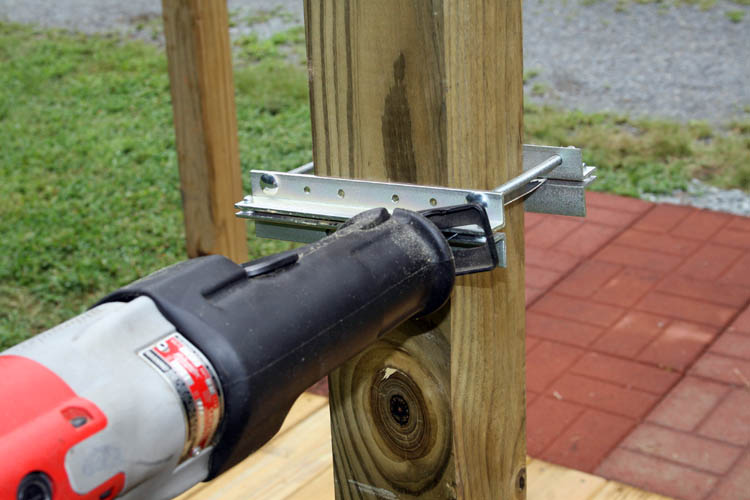
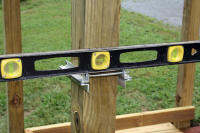
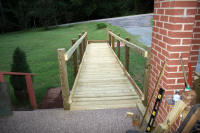
HAND SAFETY RAIL REQUIRED
The ADA requires
a hand safety rail inside the ramp and specifies the height from the deck, width
between the two rails, diameter and distance from the support member.
Of the wooden wheelchair ramps I viewed locally and on line, I rarely saw a
safety rail installed which is required by code.
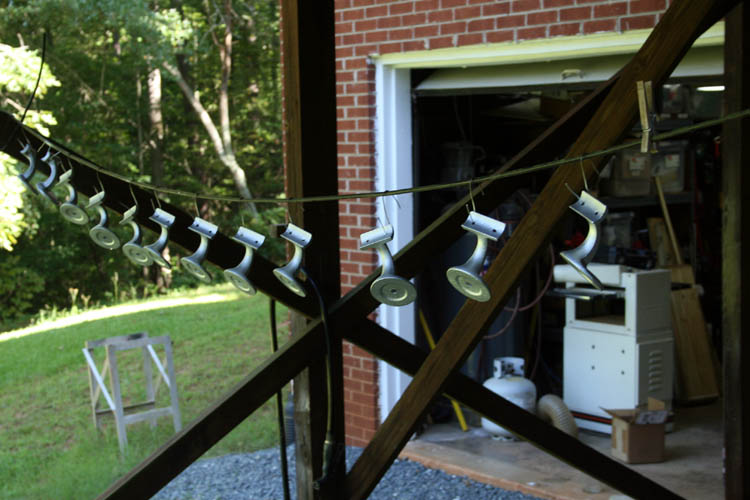
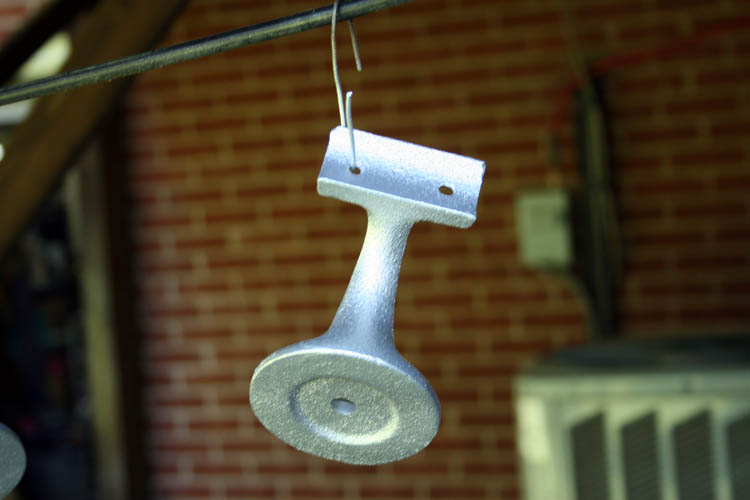
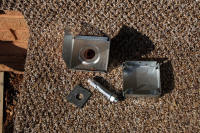
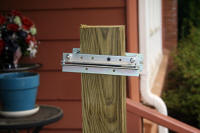
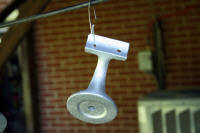
I located cast iron
safety rail supports aka brackets from
Steel Supply, L.P. in Houston, Texas and spray painted
them aluminum to match the galvanized tubing rail member. The
galvanized rails were about impossible to drill holes with a hand drill and
I finally marked them and drilled the holes using the drill press. I
used my miter saw with a friction blade to make the forty-five (45) degree
angle cut required for one of the rails.

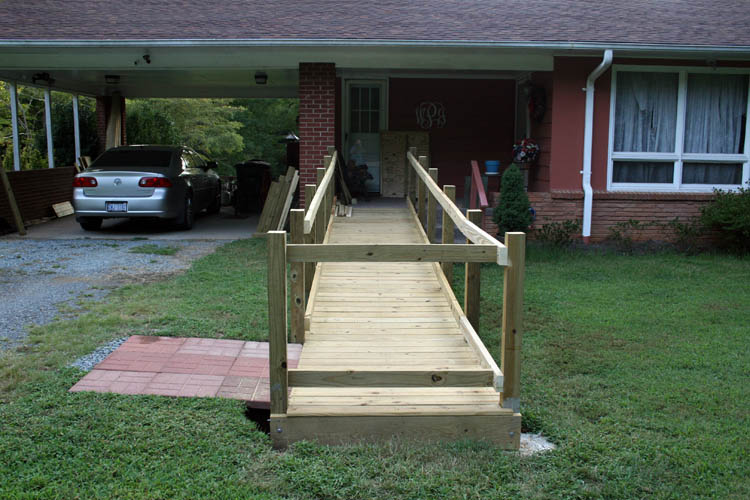
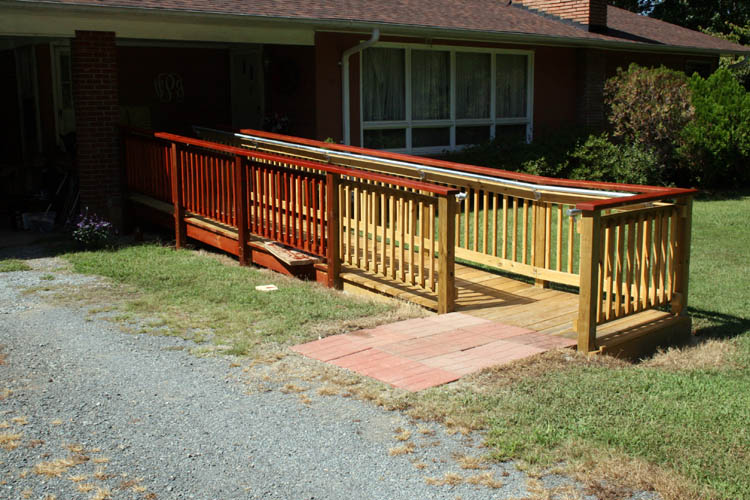
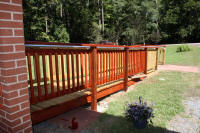
STAIN APPLIED
I used a cedar oil type based
stain TWP 100 from SealandProtect.com and used my
spray gun to apply the sealant to the pickets and used a
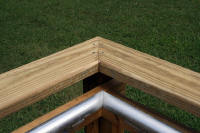
roller for the balance of applying the stain. On the cap rail, I used
2 x 6 x 10' members and routed a radius on both top edges and sanded it with a
belt sander. I also used biscuits, glue and deck screws on the
forty-five (45) degree connection of the cap rail.


In closing, it took two (2) weeks to get the wheelchair ramp operational by
myself on
August 12, 2019, but I took my time and finished the ramp on September 20,
2019. I had a couple mistakes, nothing serious and was easily
corrected and this was a learning process as well. As evidenced by the
trip to the Emergency Room on August 18, 2019, I should be well aware that I
am no longer a "spring chicken." Those eighteen or twenty 80 pound bags
of Quikrete took its toll on myself along with digging eleven (11) holes in the
hard packed red clay soil with a shovel and the temperature in the mid 90s. While
digging the holes, I would dig about 5 minutes and rest about 5 to 10
minutes and losing more fluid in the form of sweat than I could replace with
water and Gatorade! With our Lord's help, I was able to finish this
project being a success!
NOTE: SealandProtect.com is no longer a distributor for TWP
Products, do not order from their website! Their landline
telephones are not in service either! With my recent order of August
2023, I had to have my credit card company refund my money because of their
inability to ship, whereas SealandProtect.com is still taking orders on
line....bad business for sure!
You can order TWP Products from
world of stains.
This wheelchair ramp is SN 78.....grin if you must!
WHEELCHAIR RAMP PIX TAKEN ON 12-14-19
Web published by Bill aka Mickey Porter on
12-13-19 and updated on 12-14-19.
LEAVING ON A
SPIRITUAL NOTE
If you do not know Jesus Christ as your Lord and Savior, please take
this moment to accept him by Faith into your Life, whereby Salvation
will be attained.
Ephesians 2:8 - 2:9 8 For by grace are ye saved through
faith; and that not of yourselves: [it is] the gift of God: 9 Not of
works, lest any man should boast.
Hebrews 11:1 “Now faith is the substance of things hoped for,
the evidence of things not seen.”
Romans 10:17 “So then faith cometh by hearing, and hearing by
the word of God.”
Open this
link about faith in the King James
Bible.
Romans 10:9 “That if thou shalt confess with thy mouth the
Lord Jesus, and shalt believe in thine heart that God hath raised him
from the dead, thou shalt be saved.”
Open this
link of Bible Verses About Salvation,
King James Version Bible (KJV).
Hebrews 4:12 “For the word of God is quick, and powerful, and
sharper than any two edged sword, piercing even to the dividing asunder
of soul and spirit, and of the joints and marrow, and is a discerner of
the thoughts and intents of the heart.”
Romans 6:23 “For the wages of sin is death; but the gift of
God is eternal life through Jesus Christ our Lord.”
Romans 3:23 “For all have sinned, and come short of the glory
of God;”
Micah 6:8 “He hath shewed thee, O man, what is good; and what
doth the LORD require of thee, but to do justly, and to love mercy, and
to walk humbly with thy God?”
Philippians 4:13 "I can do all things through Christ which
strengtheneth me."