MORTISE JIG - PAT WARNER DESIGN
INTRODUCTION
With my last project completed on 05-24-18, being the
curly maple coffee
table, I started rounding up additional curly maple 1 inch thick boards for
two matching curly maple
end tables. I used my
Shop Fox Mortise Machine to excavate the 3/8 inch width mortise cavities which worked fairly well,
but want to use 1/2 inch width router made mortise slots for the end
tables. My main reason for wanting to use the router is what I call
"working smarter not harder" and
I will try and explain. Using the 1/2 inch square chisel and the 3/8
inch square chisel on the
mortise machine in hard maple takes a tremendous amount of manual downward
force to complete the mortise because you are pushing the square chisel into
the wood, whereas the rotating drill bit cuts the balance of the mortise
inside the square chisel. The date on my
birth certificate might have something to do with applying the force needed
too......grin if you must!PERSONAL SAFETY AND LIABILITY ISSUES
My goal will be to keep
Safety paramount because hand and power tools can
do serious bodily harm and death if not used properly, therefore these pages
are solely for entertainment purposes only from a personal
liability standpoint. Please read the
Legal Stuff
page for additional information concerning liability issues before going
any further. Safety glasses and hearing protection is a must although
I do forgo the hearing protection many times; my bad!
TRIBUTE TO PAT WARNER
I have a dedicated mortise fixture for my turkey box calls, but need one
that is versatile for mortise and tenon joinery. Using one of my
favorite sayings, "Not to try and re-invent the
wheel", I decided to use a
design created by router guru Pat
Warner, deceased who took using a router to the ultimate level of perfection
in my humble opinion. I have several of Pat Warner's books, CDs,
instructional materials and
products he offered for sale on his
website. I met Pat during a visit
with our Son, Bill, Jr. and his family in Vista, CA in
2008
and had Bill drive me to Pat's home and workshop in Escondido, CA and was a fantastic
and educational visit.
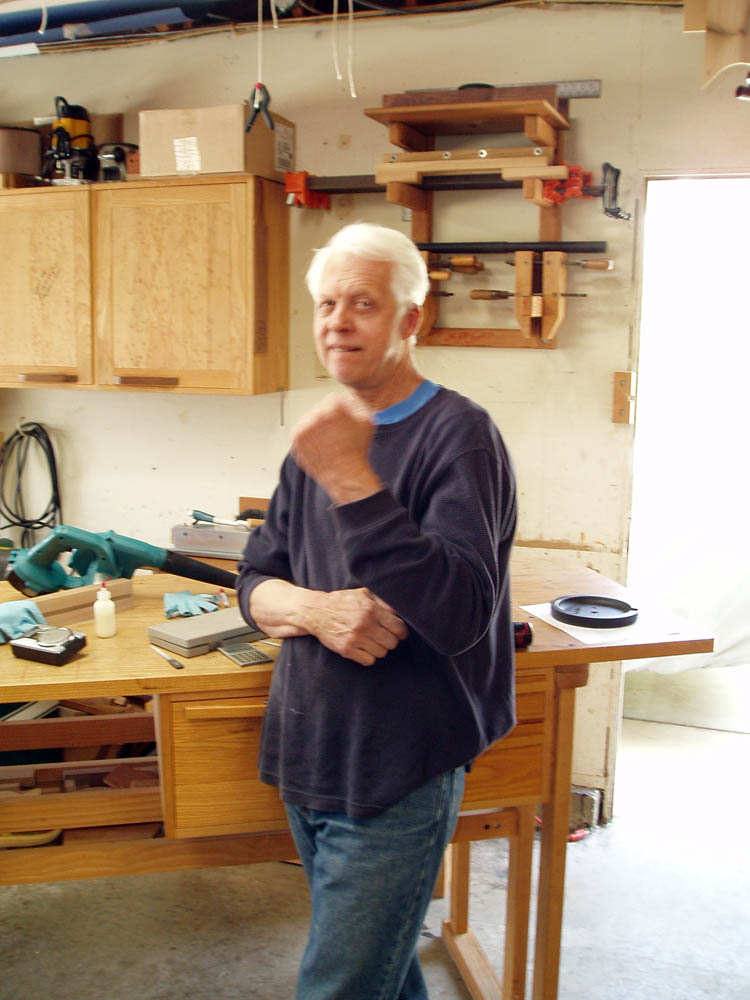
I snapped a quick picture of Pat catching him off guard, of which I will link
here.
Pat died on July 28, 2017 and is certainly missed by his family and loved
ones, the woodworking community and myself as well. Pat Warner was a
perfectionist for sure and produced First Class All-American made products!
His work was flawless to say the least.
Pat Warner's website is no longer running, but there are images of his
mortise jig, books, woodworking articles, etc., on Google, of which I pretty much made a carbon copy of his jig,
except for the size.
He later, offered a set of plans for sale for the jig and sorry that I did not
purchase a set from him.
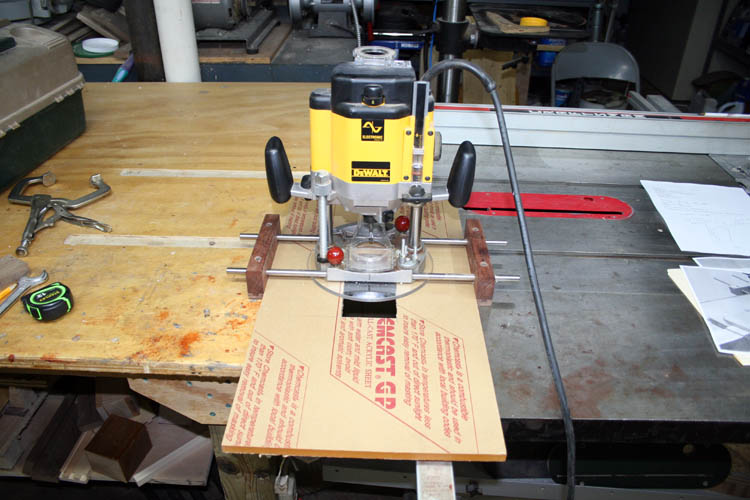
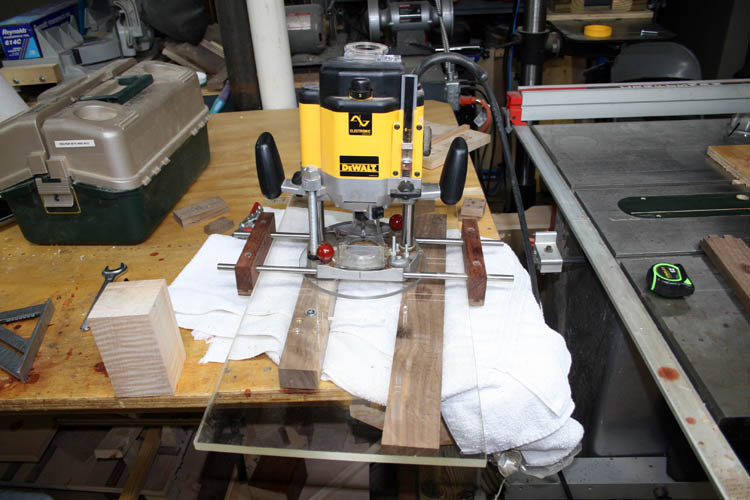
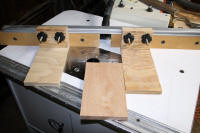
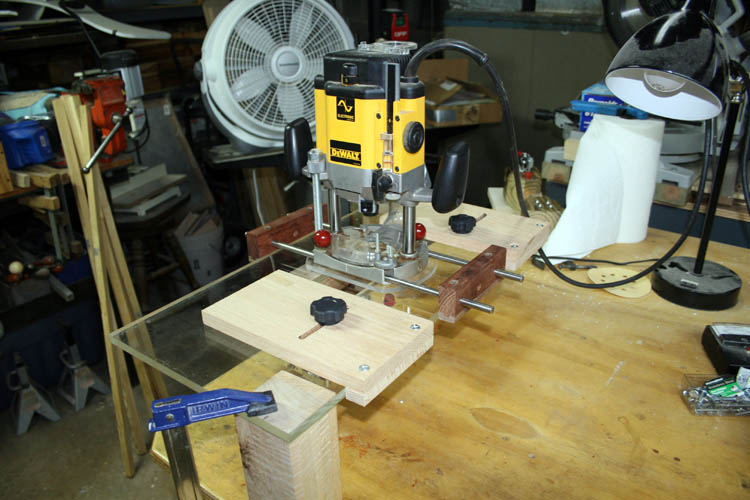
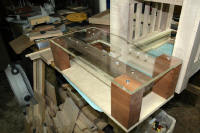
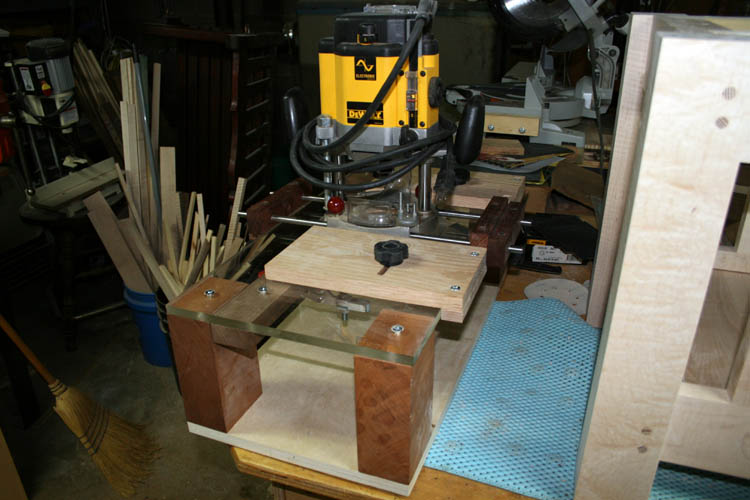
Below is pix of my version of Pat Warner's design mortise jig with the
DeWalt DW625 3 HP router:
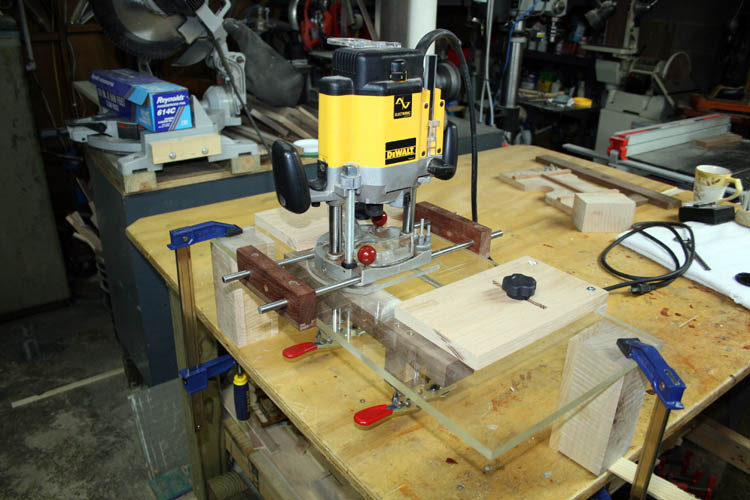
Base added to the mortise fixture on 05-31-18. The top can be removed
from the base when changing the spacer blocks underneath the DeStaCo 225U
toggle clamps for different thicknesses of wood not within range of the
clamp holding pressure pads. Depending on your material size, you can
also clamp the material from the side versus the bottom using bar clamps.
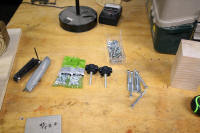
MATERIALS REQUIRED
I already had a piece of 24 x 36 x 1/2 inch thick Plexiglas on hand and cut
a piece 12 x 24 inch from it, of which is much larger in size than Pat's jig.
I am guessing that Pat's mortise jig was around 10 inches wide at the most. You will also need a couple DeStaCo 225-U toggle clamps, spacer blocks for
the toggle clamps depending on how thick the stock you plan on putting a
mortise into and appropriate length bolts. You will also need eight (8) 1/4 x 20 tpi hex head bolts
to match what thickness spacer blocks you will be using. Since I plan
to mortise three inch square legs for the end tables, I will use 3 inch
length hex head bolts. The guide rail support member is 1.25 inches
thick x 2 inches wide x 14 inches in length which holds the
DeStaCo 225-U
toggle clamps in
position. Two 1/4 x 20 tpi flat head bolts x 1.5 inches in length is
required to secure the guide rail to the Plexiglas base member. I used
eight (8) E-Z Lok threaded studs with internal threads of 1/4 - 20 tpi
which required a mounting hole diameter of 25/64 inch in hard woods.
You need to
fabricate two adjustable stops for the North to South (longitudinal) travel of your router, either
permanently mounted to the Plexiglas base member or just clamped into
position. I plan to fabricate the stop blocks and have them mounted to
the Plexiglas base member which are also removable.
In additional to the above, you will need a plunge router 1.5 to 3 HP and
adjustable edge guides to position your router for East to West (lateral) orientation.
I plan to route a 1/2 inch diameter mortise and already have a spiral up-cut
solid 1/2 inch diameter
carbide two flute bit with a 2 inch cutting length and 4 inch length
overall shank length.
You will need a table saw and accurate fence to cut the Plexiglas to width and length and a
router and/or jig saw to cut a large 3 x 6 inch access window through the Plexiglas
base member.
This jig will cost between 75 to 100 bucks to build with most of the cost
in the Plexiglas and the two DeStaCo 225-U clamps.
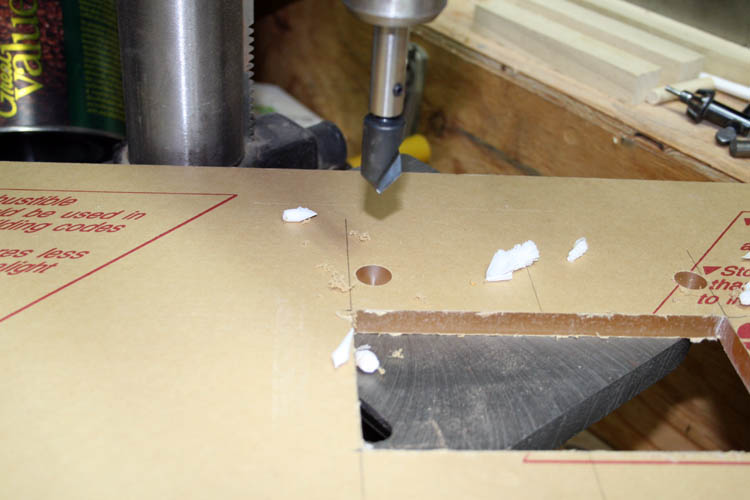
LETS GET STARTED
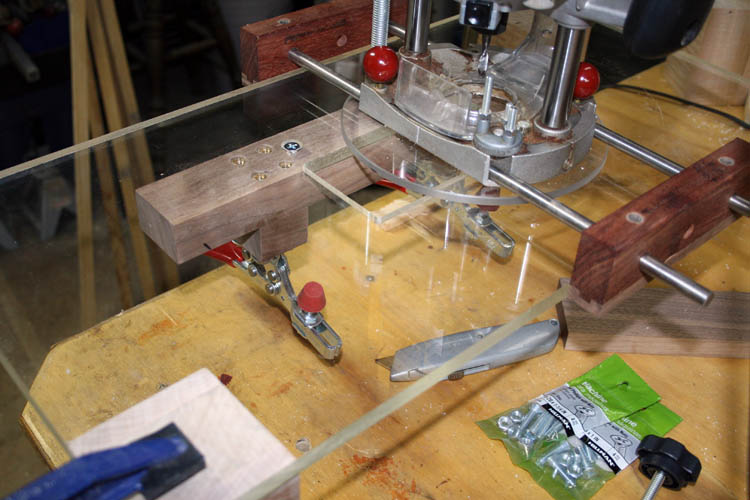
I cut the 1/2 inch thick Plexiglas as stated to 12 x 24 inches using my table saw with a
crosscut blade. I used my 3 HP DeWalt plunge router and a 1/4 inch
diameter spiral up-cut solid carbide bit to make the two 6 inch length cuts
for the access window. I used a jig saw with 3/16 inch blade to connect the
two cuts made. I could have used the East to West (lateral) movement of the router
on the 3/8 inch diameter stainless steel guide rods to make the connecting lateral cuts by loosening
the red knobs and improvised a temporary stop between the router Plexiglas
sub-base and the inside of the edge guides, but wasn't thinking ahead that far.......grin if you must!
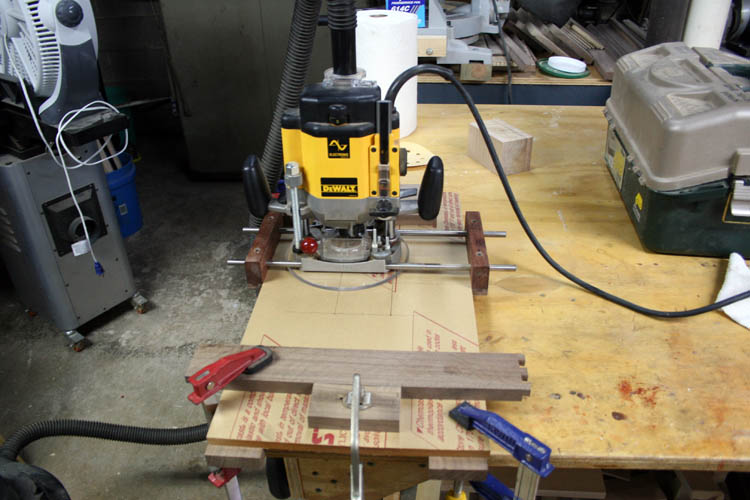
I laid the 3 x 6 inch window out
centered into the Plexiglas and have the plunge router adjusted where the
East to West (lateral) travel is restricted by the edge guides and also temporary stop blocks that
controls the North to South (longitudinal) movement of the router. Pat Warner has his
access window more toward the right hand side of his jig than my version.
I am sure he had a good reason for the positioning of the mortise window on
his mortise jig.
It is imperative that your table saw fence
is parallel to the saw blade to obtain a
very accurate width on the Plexiglas base member, otherwise your router will
bind when moving North to South (longitudinal) on the jig. After the left six inch length slot
was cut, I moved the router over by loosing the red knobs on the router base
casting and sliding the router to the right and positioned the 1/4 inch diameter router
bit to the edge of the layout line. The red knobs were tightened down. As stated earlier, I finished the
cut on the ends using a jig saw and fine tooth blade about 3/16 inch width.
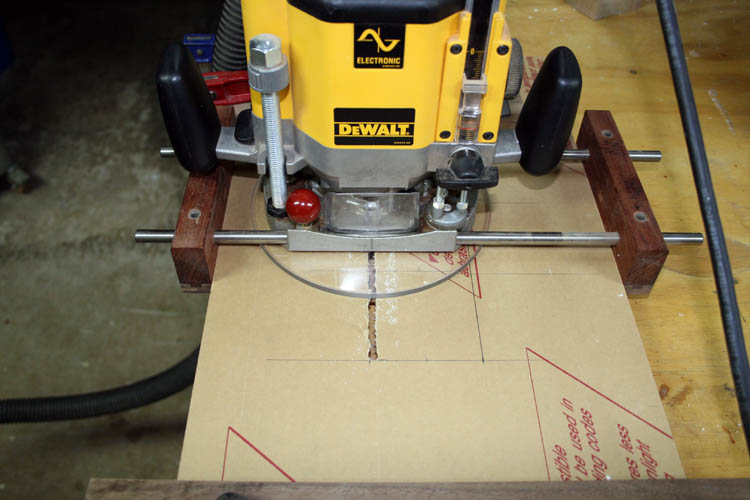
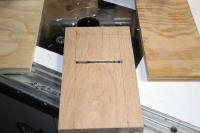
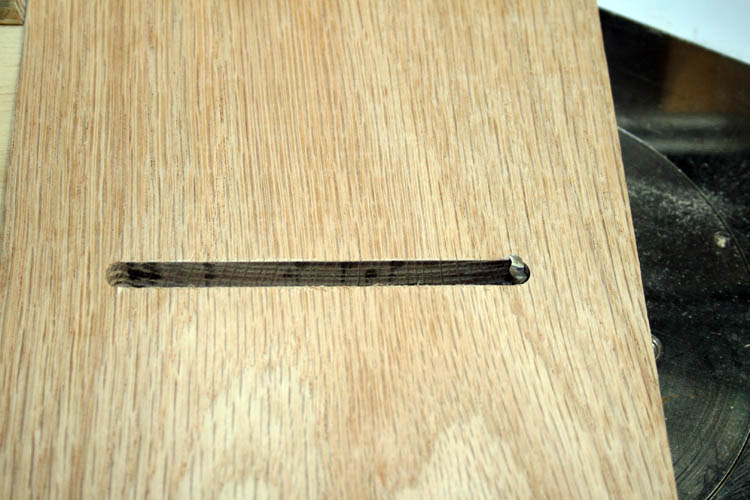
The routed slot is smooth, however
the paper backing is ragged looking in the pix above.
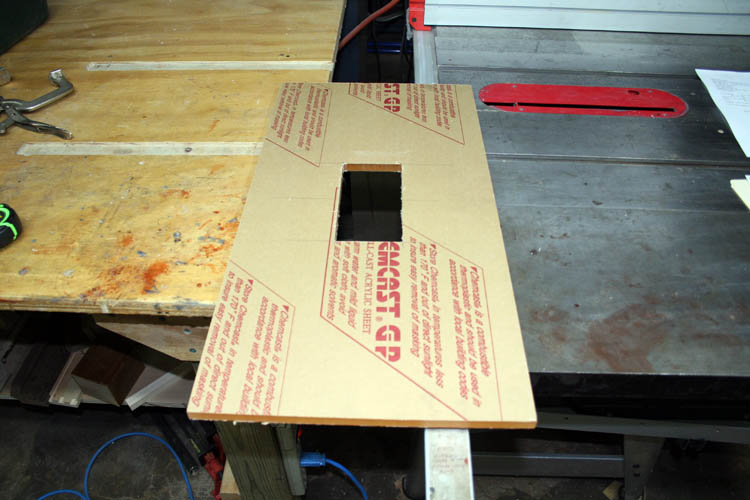
Finished 3 x 6 inch access window in the Plexiglas. I doubt I will be making a mortise that
wide, however longer mortises can be made by repositioning the stock
underneath the access window.
Beginning to look like a
mortise jig now.
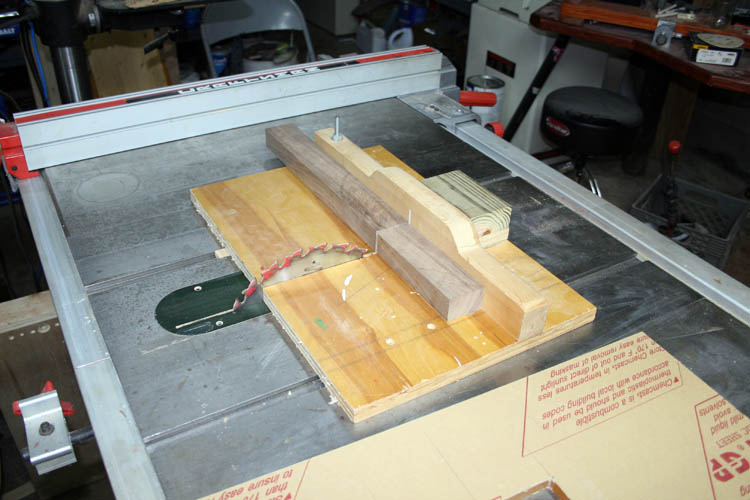
I used the table saw and small sled
to cut a piece of walnut stock to size: 1.250 x 2 x 14 inches length, of
which I later sawed the thickness to 1 inch.
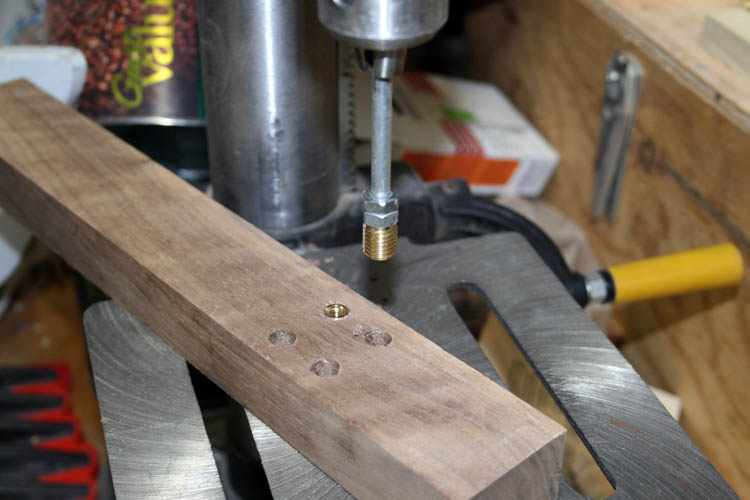
I used the base of the DeStaCo 225-U
toggle clamp as a pattern for the hole layout. As many fixtures that I
have made in the past few years using DeStaCo 225-U toggle clamps, I need to make a dedicated
drill fixture plate with
hardened 1/4 inch inch inside diameter drill bushings for the DeStaCo 225-U toggle clamps. I keep
"robbing"
several of those clamps from fixtures not in usage.....grin if you must!
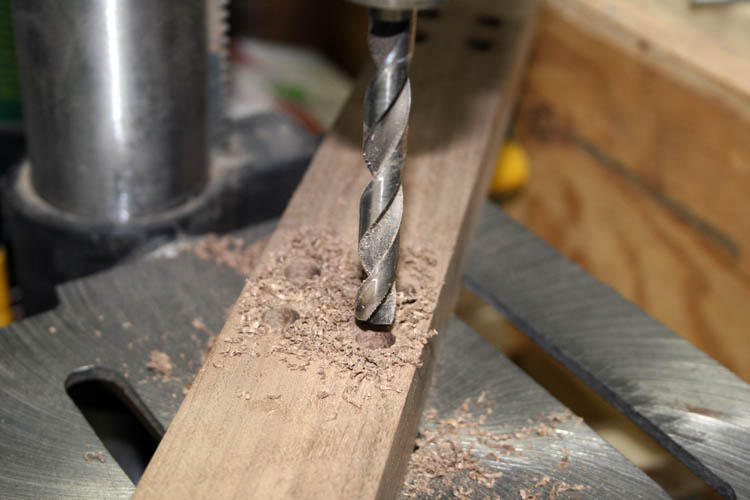
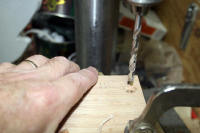
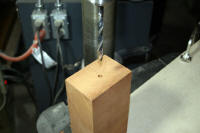
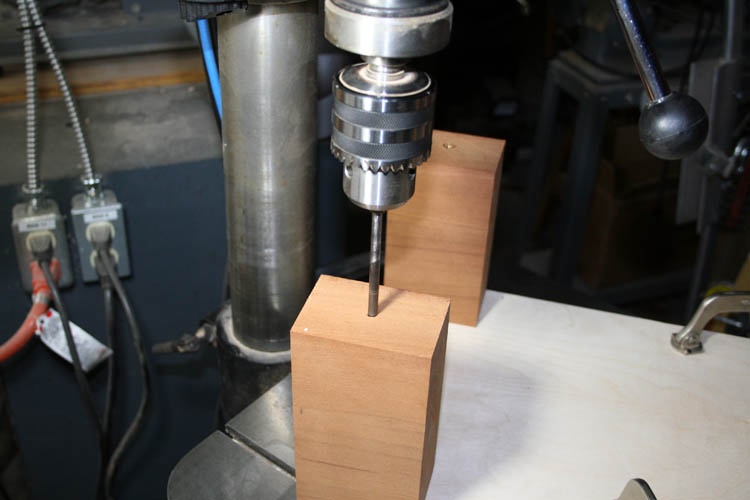
I used three different size drill bits ending up with 25/64 inch which is
correct for the E-Z LOK brass threaded inserts in hard woods and 3/8 inch
diameter for soft woods.
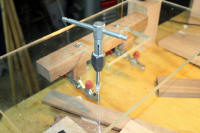
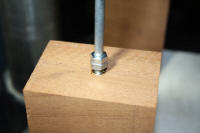
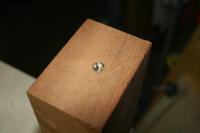
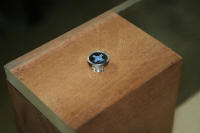
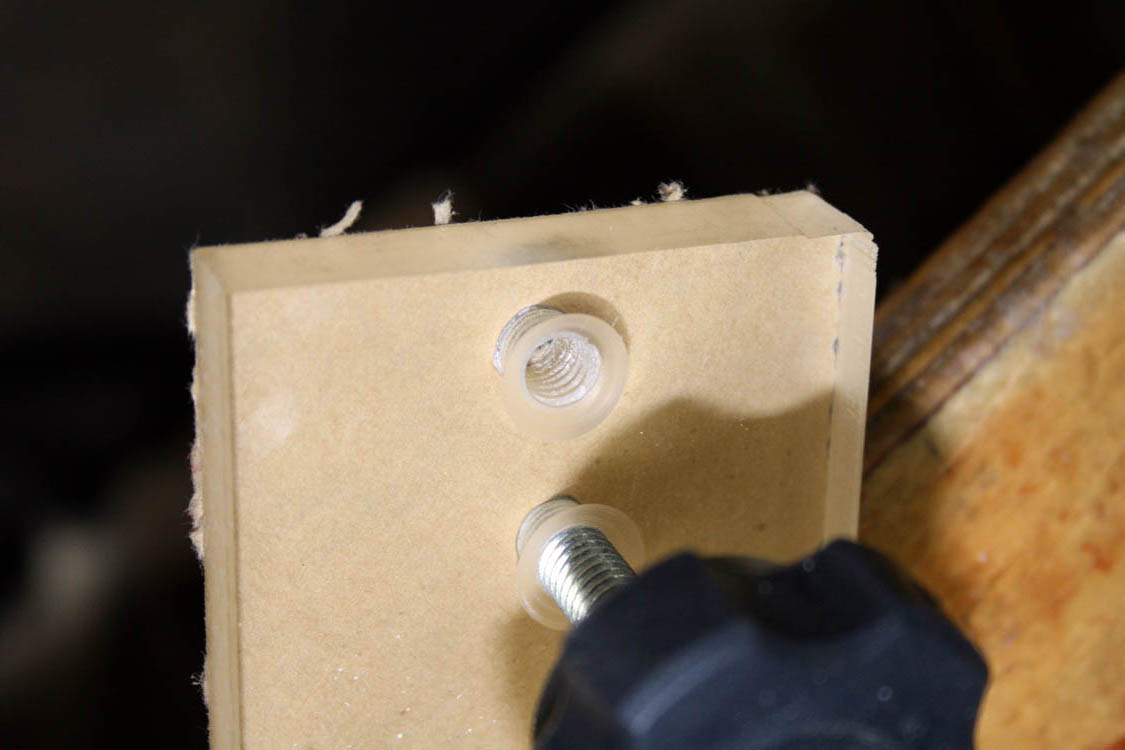
I
used a home made tool fabricated from a 1/4 x 20 tpi bolt (sawed the hex
head off) to install the brass inserts and screwed them in using the
drill press. You need to be fast and cut the drill press off when the
brass insert is flush or below flush with the wood. Pat Warner also
made the countersink tool holder below which saves you from having to keep
moving your drill press table height when switching from the countersink to the
drilling since countersinks are much shorter in length than a standard
jobbers length drill bit.
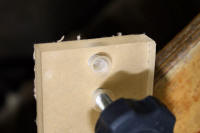
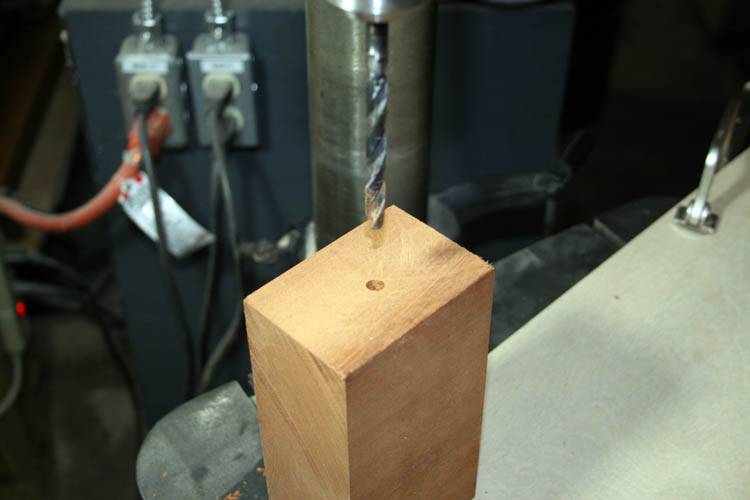
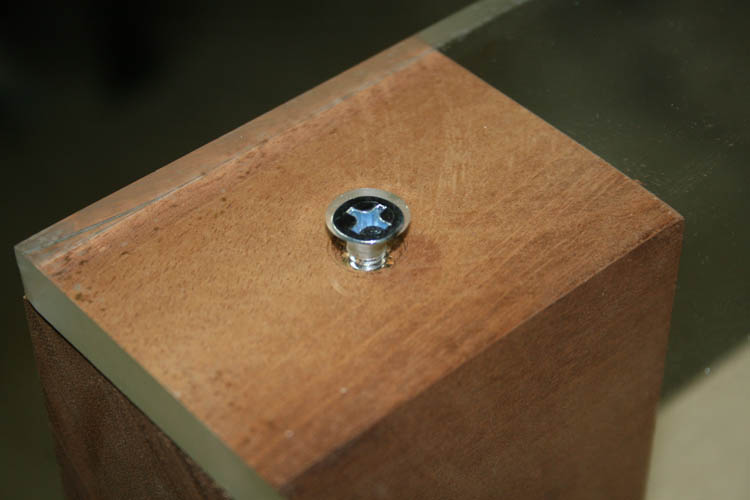
After center punching the hole layout,
I used an 82 degree countersink for the 1/4 x 20 tpi flat head machine screws, drilled them deep enough where the head would be below the surface of
the Plexiglas member.
I then drilled a 1/4 inch diameter
hole through the countersinked hole for attachment to the guide
rail and clamp member to position the DeStaCo 225-U toggle clamps. I
later added two more 1/4 x 20 tpi flat head machine screws to the guide rail
to prevent any flex created from the toggle clamps.
It took about as long to remove the
paper backing from both sides of the Plexiglas as did the entire project up
to this point......whew! The DeStaCo 225-U toggle clamps and spacer
blocks will be
screwed in from the bottom side of the walnut guide rail with appropriate
thickness spacers. Pat Warner was more high tech and used Plexiglas
custom made spacers on his mortise jig.
After the North
to South (longitudinal) stops are fabricated, I will drill and tap 5-16 x 18 tpi threads into the
Plexiglas for the stop clamps as per Pat Warner's mortise jig.
In usage,
Pat Warner clamped the mortise jig to his workbench and the material to be
mortised to the mortise jig and/or also clamped the overhanging material to
be mortised in his vise with the mortise jig attached. I might make four vertical posts aka stand offs for the fixture and secure them to an auxiliary base, but that might
interfere with a board that is very wide needing a mortise slot. If I
do make the standoffs, it will be easy to remove the fixture from the base
upright posts if
ever the need arises.
Tomorrow, I will make to trip to our local hardware and purchase eight
1/4 x 20 tpi hex head bolts 3 inches in length and several other lengths for
the various height blocks I made.
ADVANTAGE OF THIS
MORTISE JIG
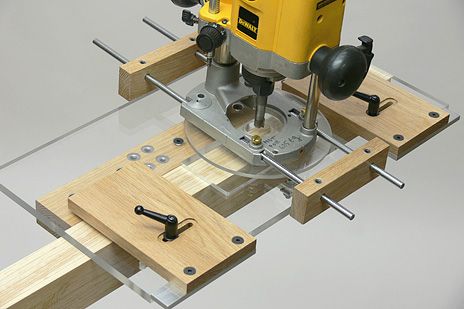
With Pat Warner's mortise jig design, you have
plenty of real estate for the router base to ride on and the router will not
tip over on a narrow board as some of the self-adjusting narrow design jigs could possibly do
creating a serious safety hazard plus ruining your project.
You have repeatable mortise slot lengths once you set your length stops.
By moving the router base East to West (lateral) on the 3/8 inch diameter
stainless steel guide rods, you can easily have the mortise slot
centered in your material with ease and make a mortise wider than your
router bit diameter by moving the router over as needed without sacrificing
accuracy. Pat Warner also manufactured the
1/4 inch thick Plexiglas base plate for the above router, the
guide rods and adjustable edge guides. The set screws in the edge
guides have brass inserts in their ends to keep from scaring the guide rods. All of Pat Warner's products
were First Class All-American all the way and thoroughly thought out!
Web published by Bill aka Mickey Porter
on 05-28-18.
FINISHED THE MORTISE JIG
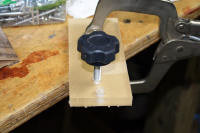
I
made a trip to Lowe's in Rockingham, NC to purchase a pair of knobs with a 5-16 x 18 tpi
threaded rod 1.5 inches in length to finish this mortise jig.
Click on thumbnail pixs for a larger screen view:

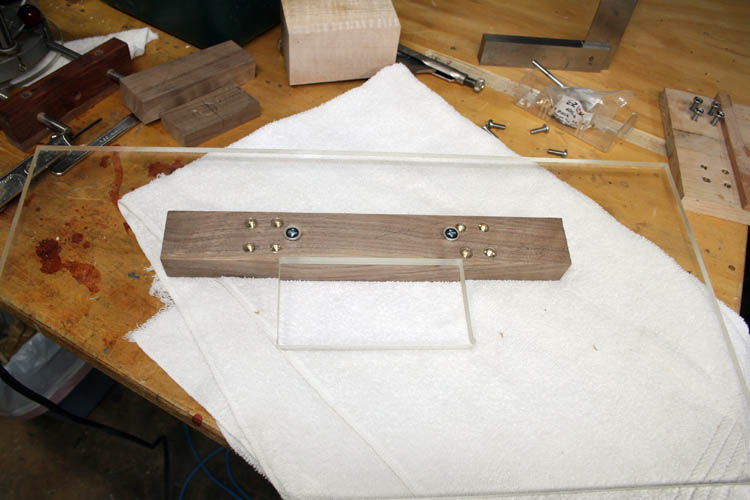
I mounted a pair of DeStaCo 225-U toggle clamps to the underside of the guide
support rail and made several spacer blocks for different thickness boards
that I will mortise. You can mount the spacers applicable to your
largest thickness board you plan to mortise and simply use board spacers on
the back side of your stock to mortise which will accomplish the same thing.

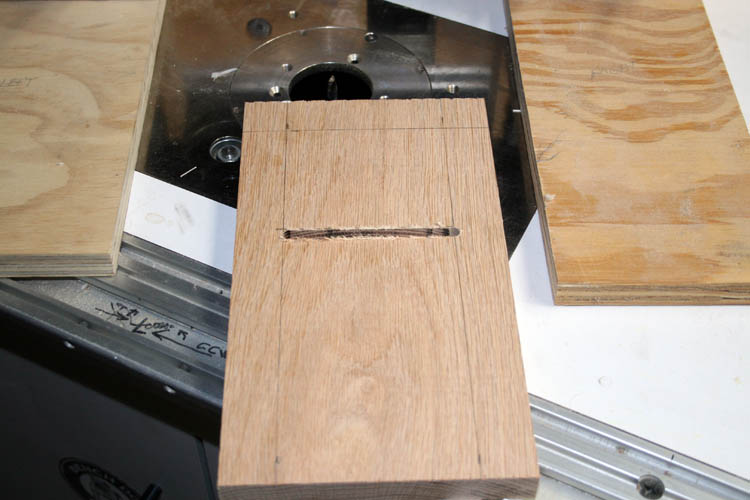
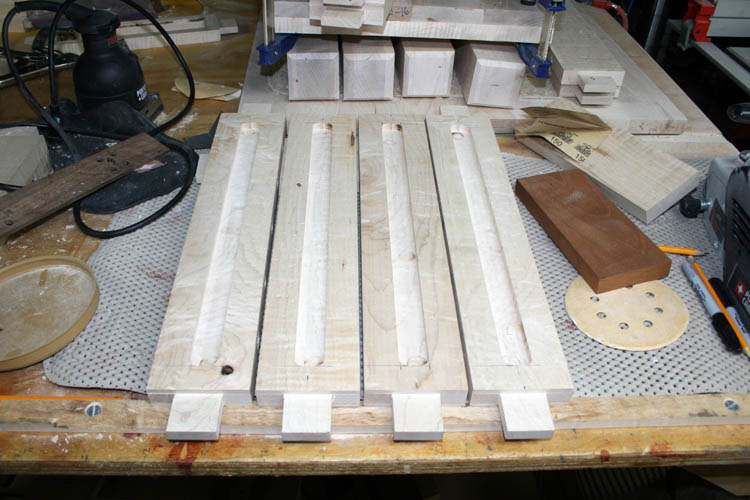
I made a pair of end travel stops from red oak being 5.5 inches wide x 10
inches length x 3/4 inch thick. I blind routed a 1/4 inch width slot
through the board in several passes to within one inch of each side. I needed
a 5/16 inch wide slot for the threaded shaft and moved the router over far
enough on the guide rails to get the slot width that I needed. This would not have been
necessary if I had a 5/16 inch router bit, of which I didn't. I don't
like doing a blind route as above, but it was easier to do than try and set-up stops
across the width of the board and then it might not be straight enough if everything is
not done perfect. The router table with the adjustable end stops is
better as far as accuracy, but there is a potential
safety risk there if you are not careful.
I used a piece of scrap 1/2 x 1 inch curly maple which rides against the
side of the Plexiglas base plate and secured to the side of the end stops with a pair of 1/4 - 20
tpi flat head machine screws.

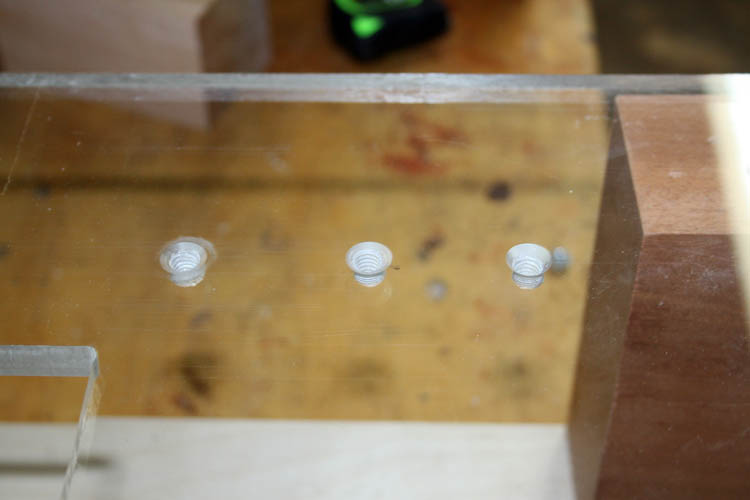
I used the scrap piece of Plexiglas cut-out and tested a couple drill
bits to get at least 75 percent or more thread. I first center punched
the area to drill, drilled a countersink hole of 82 degrees and two other
drill bits and ended up finally reaming with a 1/4 inch diameter drill bit.
A 1/4 inch multi-fluted reamer would be much better than the drill bit. I used my larger drill press which has a much larger table aka real estate
for drilling the Plexiglas base plate. I used the small drill press for drilling the
test holes in the scrap Plexiglas. I hand tapped 5-16 x 18 tpi threads and cut about 3/8 inch
length from the screw length to allow the screw to be slightly below the back side
of the Plexiglas jig platform aka base plate.
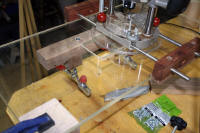
COMPLETED MORTISE JIG LESS BASE
Below, view from the other side of the jig showing the DeStaCo 225-U toggle
clamps.
The mortise jig has a 6 inch travel North to South and if you need a
longer
mortise, you reposition your material underneath the access window and
secure the material to the base of the jig with the two DeStaCo 225-U toggle
clamps and re-set you length stops and complete the long mortise. I added a
third tapped hole in
the Plexiglas to give some additional North to South adjustment for the
length of the mortise.
As stated earlier, I plan to use a 1/2 inch diameter solid carbide up-spiral
double fluted router bit to make the mortises on the curly maple end table
legs
and they will be at least 1.5 inches in depth. The router can travel
North to South and controlled by the adjustable end stops. The router
can be adjusted East to West (lateral) by loosening the two red knobs on the router base
casting which secures it to the 3/8 inch diameter stainless steel guide rods.
Once the edge guides on the stainless steel rods are adjusted against each side of the
Plexiglas mortise jig base, you don't have to move them. Set screws hold
the edge guides in place securely and has a brass insert into the tip of the
set screws to keep from scaring the stainless steel guide rods.
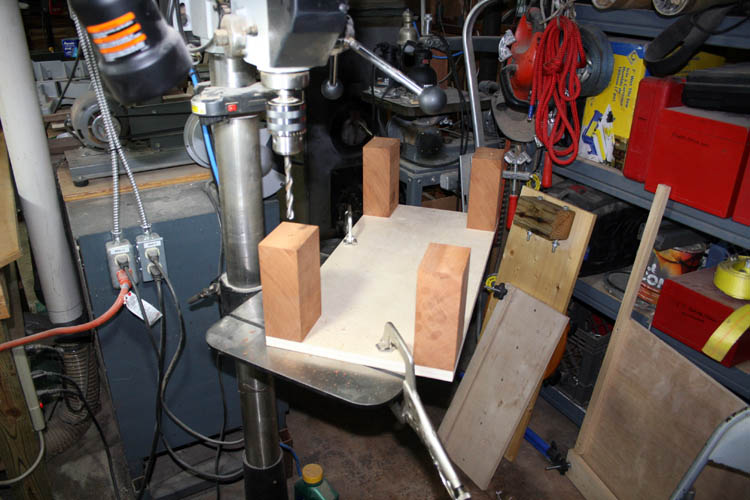
I have the fixture clamped on top of scrap 3 inch square cut-offs from my
curly maple coffee table legs which gives room below the fixture to clamp
your material to mortise to the fixture.
This Pat Warner design mortise jig will definitely get a work out on my
upcoming curly maple end tables. I will no doubt round the corners of the
tenon instead of squaring up the radius mortise ends with a chisel, but will
do a test and see which is easier to do and most accurate.
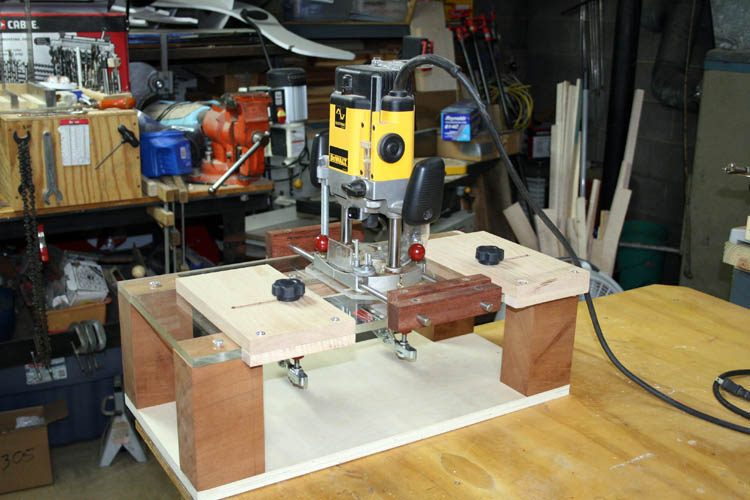
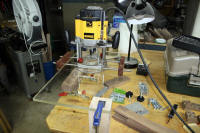
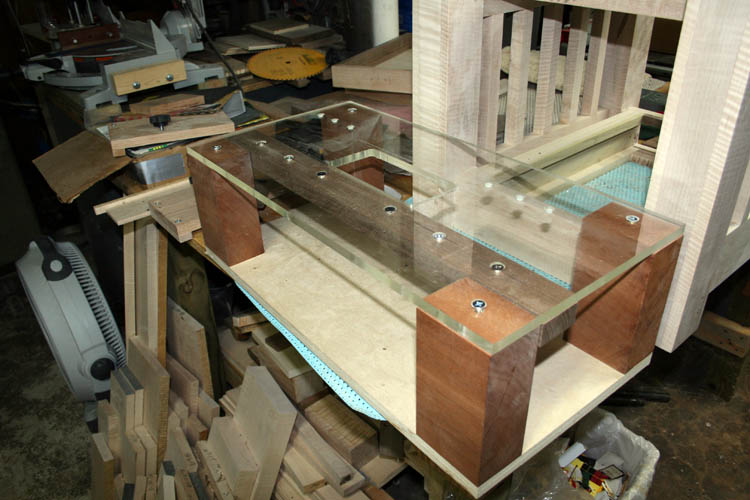
MORTISE JIG WITH BASE ATTACHED
I decided to add a base to the mortise jig and used some
"scrap" aka unallocated
Honduras Mahogany
and Birch plywood. I screwed the blocks to the base using four (4) dry
wall screws in each post and secured the top using a single # 12 x 1.5 inch
length flat head wood screw in each post. If I decide to remove the base
for whatever reason, it will be easy to do. The post are 6.5 inches in
length and doubt I will be mortising a piece of stock that thick. The
height of the post allows room to operate the DeStaCo 225-U toggle clamps
that secures the material you will mortise. Also for repeatability,
you can clamp an auxiliary stop block underneath the mortise jig base plate.
I will show this when doing the mortise on the
curly maple end
table legs.
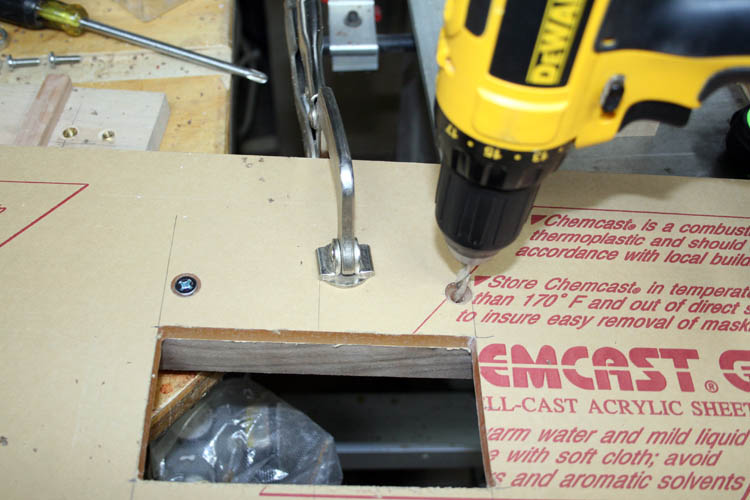
ADDED BRASS INSERTS TO UPRIGHT POSTS
I initially screwed the Plexiglas mortise jig platform to the upright posts
using four (4) # 12 x 1.5 inch flathead wood screws. I later opted to
install threaded brass E-Z LOK inserts for 1/4 - 20 tpi flathead machine
screws. Since the upright posts and the 82 degree countersink holes
were already in place, there wasn't much room for error in
installing the E-Z threaded brass inserts into each upright post. The
Honduras Mahogany wood is fairly soft, but stable and had to think about the
most accurate way to install the four E-Z threaded brass inserts using what
tools and equipment I have. Milling machines and drill presses with
digital readout would be a piece of cake for something like this. I
used old school tool and die makers drilling techniques to get it right the first time.
I removed one # 12 flathead screw from an upright post and predrilled to 1/4
inch diameter using my hand drill through the Plexiglas countersinked
existing hole. I placed a 1/4 inch flathead
machine screw back into the hole just drilled for alignment purposes and
drilled the remaining three holes placing a 1/4 inch flathead machine
screw back into the hole just drilled to keep everything aligned. The purpose for this was to
give me an accurate hole diameter to use a 1/4 inch locator punch in my
larger drill press and align the upright post hole with the centered 1/4 inch diameter
locator punch in the drill press chuck. Once that was done, the entire
fixture base was clamped in place onto the drill press table. I then
replaced the locator punch with a drill bit, drilled the hole using two
drill bits with the last one being 3/8 inch diameter for the threaded brass
insert. The E-Z LOK threaded brass insert was installed using my home made
installation tool and used the drill press to screw the threaded brass
insert into place. You have to be alert and quickly turn the drill
press power off to keep from screwing the threaded brass insert too deep
into the soft Mahogany wood and/or stripping out the threads created by the
threaded brass insert. I have a foot operated on/off safety
petal switch which works great for this application, freeing your hand up
which is occupied moving the drill press quill downward, etc. Click on
the below thumbnail pixs for a larger screen view:


The Plexiglas mortise jig platform was placed back onto the upright Mahogany
posts and the alignment was near perfect without having to do any tweaking
with the flathead machine screws aligning right on target!
NOTE: The past couple years, I have added serial numbers to my
projects, dated and signed them and this project is SN 65.
Web page updated by Bill aka Mickey Porter on 05-29-18 and 06-01-18.
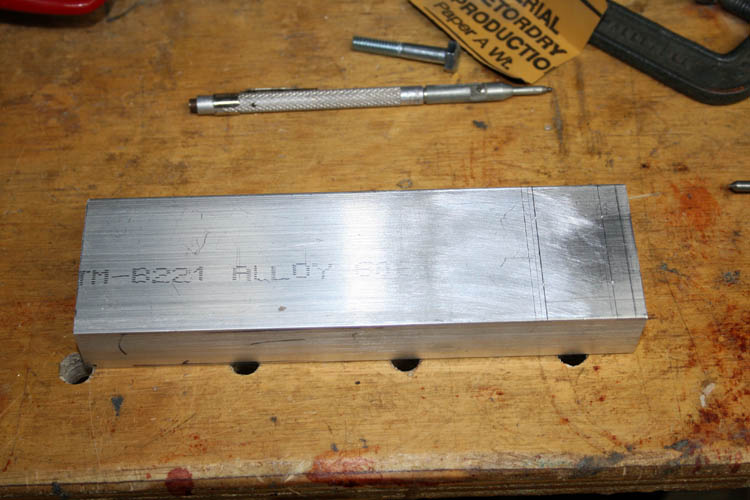
MORTISE JIG MODIFICATION
I decided to lengthen the walnut edge guide underneath the Plexiglas which
holds the two DeStaCo 225U toggle clamps to the full length of the jig.
I ordered four (4) 1/4 inch ID hardened drill bushings and will make a drill
jig to match the base hole spacing on the DeStaCo 225U clamps. I have
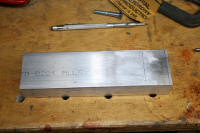
a piece of 1 x 2 x 6 inch length of aluminum 6081 material for the drill
bushings. In all probably, I will have to purchase the appropriate
reamer for the drill bushing OD of 13/32 since the bushings are press fit.
When the bushings arrive, I will get the ole dial caliper out and see what I
need to do.
With the drill fixture, I will be able to accurately drill mounting holes
for the DeStaCo 225U toggle clamps and/or drill appropriate starter holes
for the EZ LOK threaded inserts for 1/4 x 20 bolts for said clamps.
Also, I need to fabricate several sets of accurate spacer blocks for the
mortise jig as well.

Web published update by Bill aka Mickey Porter on 03-11-19.
LEAVING ON A
SPIRITUAL NOTE
If you do not know Jesus Christ as your Lord and Savior, please take
this moment to accept him by Faith into your Life, whereby Salvation
will be attained.
Ephesians 2:8 - 2:9 8 For by grace are ye saved through
faith; and that not of yourselves: [it is] the gift of God: 9 Not of
works, lest any man should boast.
Hebrews 11:1 “Now faith is the substance of things hoped for,
the evidence of things not seen.”
Romans 10:17 “So then faith cometh by hearing, and hearing by
the word of God.”
Open this
link about faith in the King James
Bible.
Romans 10:9 “That if thou shalt confess with thy mouth the
Lord Jesus, and shalt believe in thine heart that God hath raised him
from the dead, thou shalt be saved.”
Open this
link of Bible Verses About Salvation,
King James Version Bible (KJV).
Hebrews 4:12 “For the word of God is quick, and powerful, and
sharper than any two edged sword, piercing even to the dividing asunder
of soul and spirit, and of the joints and marrow, and is a discerner of
the thoughts and intents of the heart.”
Romans 6:23 “For the wages of sin is death; but the gift of
God is eternal life through Jesus Christ our Lord.”
Romans 3:23 “For all have sinned, and come short of the glory
of God;”
Micah 6:8 “He hath shewed thee, O man, what is good; and what
doth the LORD require of thee, but to do justly, and to love mercy, and
to walk humbly with thy God?”
Philippians 4:13 "I can do all things through Christ which
strengtheneth me."


