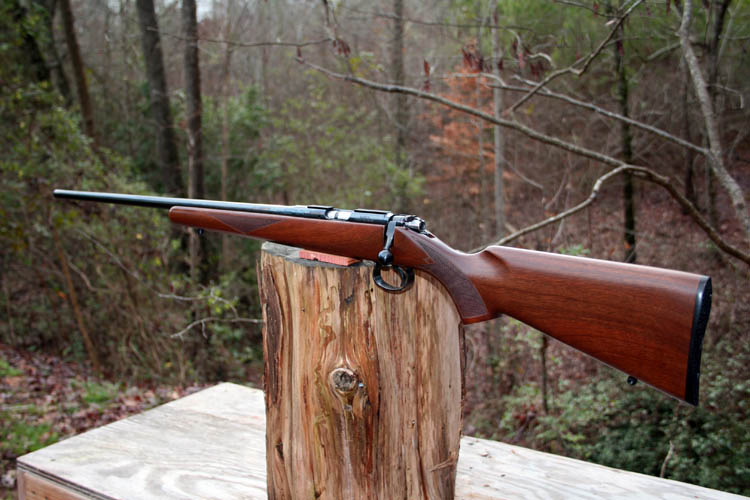
CZ 452 AMERICAN LEFT HAND .22 CALIBER RIMFIRE RIFLE
REVIEWAfter getting all the accuracy from a
Savage Mark
II BTVLSS which has taken a couple years of trying everything, I
finally decided to purchase a CZ 452 American .22 caliber rimfire rifle in a
left hand model. Initially, the CZ 452 American left hand was my first choice but no one
could deliver one in a timely manner and went with the Savage Mark II
BTVLSS. The Savage Mark II BTVLSS is a dang good squirrel gun but leaves a lot to be
desired for when punching holes in paper. I did everything to it
except pour molten lead or concrete into the void spaces in the factory stock to
replace all the missing wood......grin if you must! So here goes
another rimfire odyssey..........
PERSONAL SAFETY AND LIABILITY ISSUES
My goal will be to keep Safety
paramount because hand and power tools can do serious bodily harm and death
if not used properly, therefore these pages are solely for
entertainment purposes only from
a personal liability standpoint. Please read the
Legal Stuff
page for additional information concerning liability issues
before going any further. Safety glasses and hearing protection is a must,
although I do forgo the hearing protection many times; my bad!
GETTING STARTED
I placed an order with our local pawn and gun Village
Pawn & Gun Shop LLC and they were able to get me one this time
from one of their wholesalers Davidson's Guns aka gallery of guns in Prescott, Arizona and I
received the rifle on 12-17-15. Their price was pretty much in line with
most of the retailers selling that firearm via the internet but they are
still scarce as a hen's tooth to find at times....the demand far exceeds
the supply since the 452 is being phased out and
reborn as a
455 of which I personally do not like some of the changes; e.g., barrel
tenon held
in place with two set screws versus the screw in barrel. Those changes
in my humble opinion are not to produce a better quality rimfire rifle but
to reduce their manufacturing cost. The long term will determine if it
is an effective strategy for them since consumers ultimately control the
demand.
I will add pixs along the way to document what is being done to this
rifle.
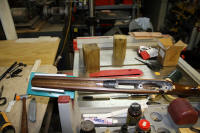
The first order of business is to acquire a
Basix Trigger and
a pair of BKL
scope rings for
it via the internet and do some test firing before I have the barrel
threaded for my suppressor. Pillar blocks and bedding will be next on
the list but wanted to shoot it prior to the installation of pillar blocks
and glass bedding to have a reference point or standard to
start from as far as the initial accuracy.
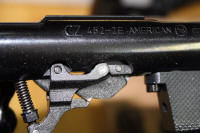
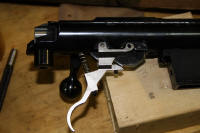
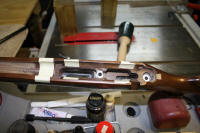
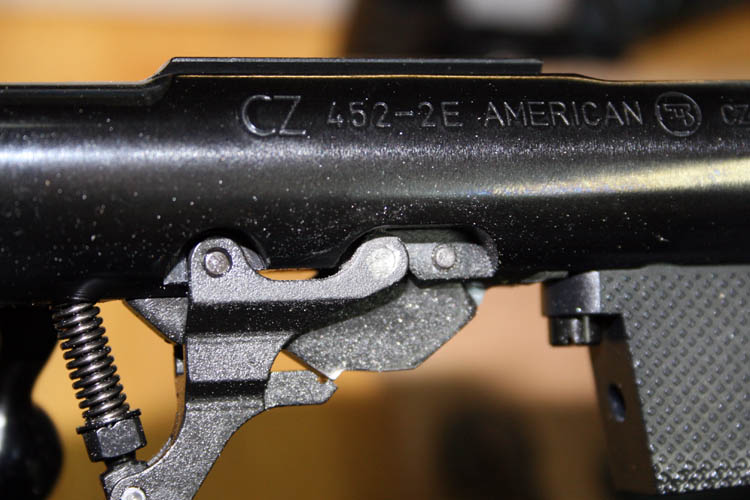
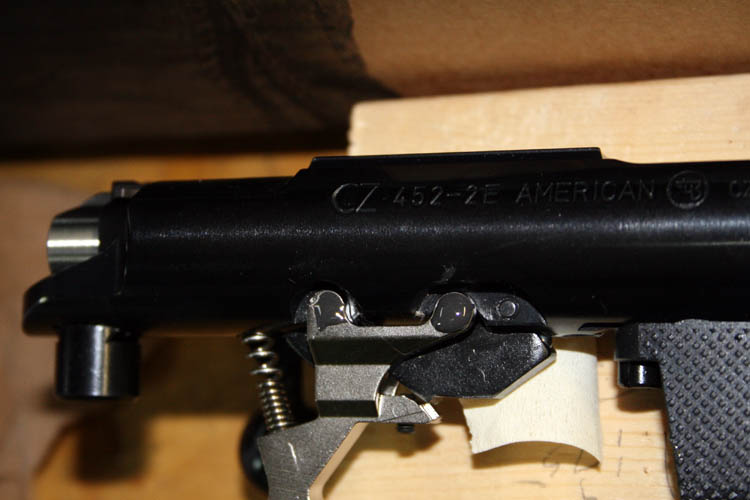
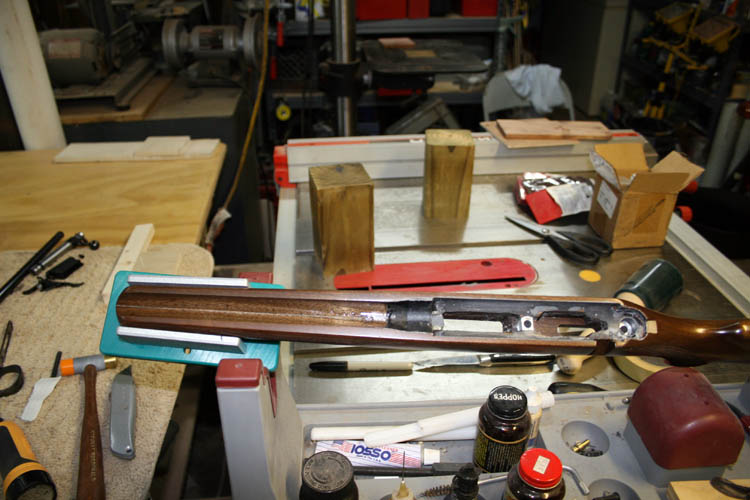
My first impression of the gun was; it is well made, excellent metal to
wood fit, nicely polished blue steel, machining on the exterior of bolt and receiver was
very good. You get the feel that this rifle is a high powered rifle
instead of a rimfire. The cheapest looking component on the CZ 452 American is
the trigger guard which is a single piece of flat stamped
sheet steel that is formed
with an additional flat stamped plate for the trigger sandwiched between the
trigger guard and the stock. It will definitely be replaced with an aftermarket one that is machined
from a solid billet of steel and one is currently on backorder. As stated above, the trigger guard will be the
replaced as soon as
DIP has them in stock again.
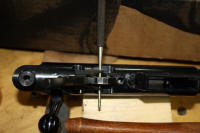
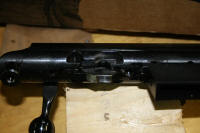
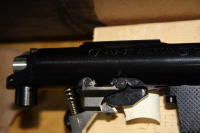
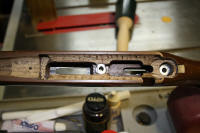
When I removed the action/barrel from the stock, the rear action screw was
tightened to 30 inch pounds and a Gorilla was on the assembly line who had an extra serving of
bananas for breakfast must have tightened it as the
front action screw took only 18 inch pounds to release it. There was
also an indentation several thousands of an inch deep into the rear stock at
the receiver tang caused by the extra torque. When I
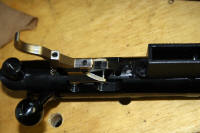
replaced the action back into the stock, I set both actions screws at 18 inch
pounds and realized why the rear one was pulled down so tight. There
was a slight binding between the barrel and the last inch or two of the
stock forend and they tightened the rear action screw down to apparently pull
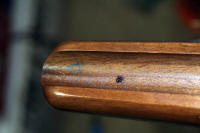
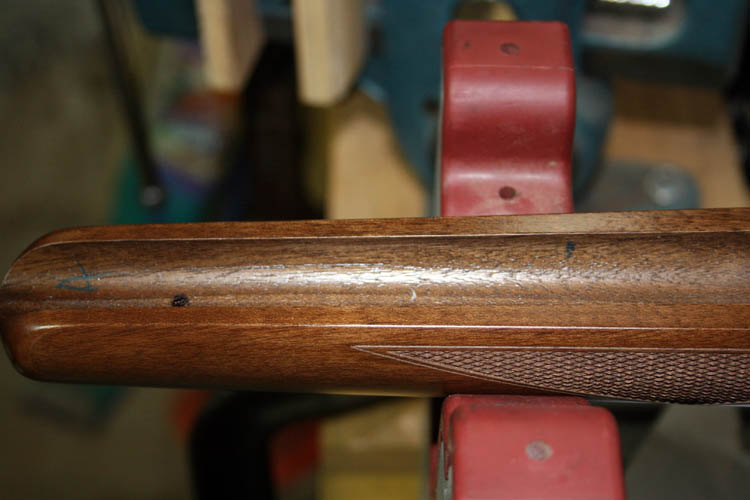
the barrel up off the stock. Someone at the factory had placed an ink
mark on the wood stock near the forend where it was binding and apparently
didn't go back and remove any wood but left the action torque as I found it
which is a good guesstimate.
Web published by Bill aka Mickey Porter on 12-18-15 and updated on
12-24-15.
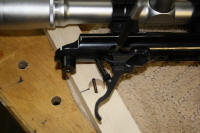
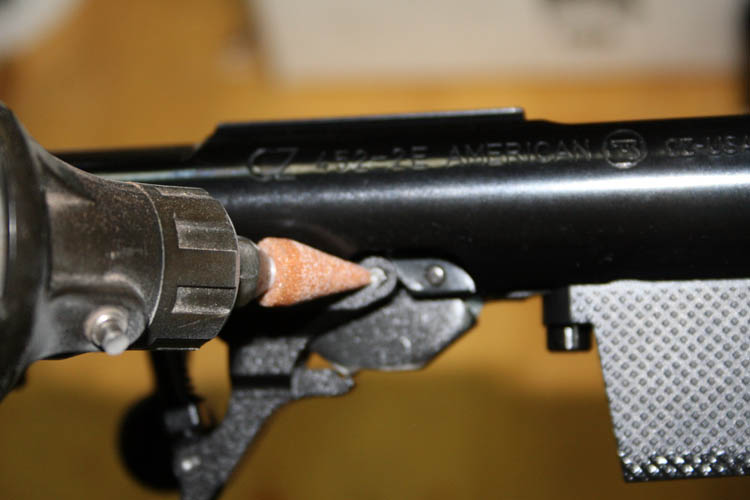
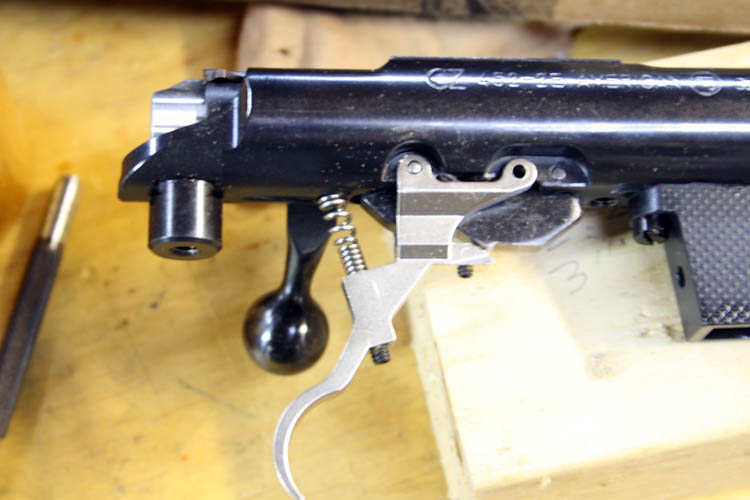
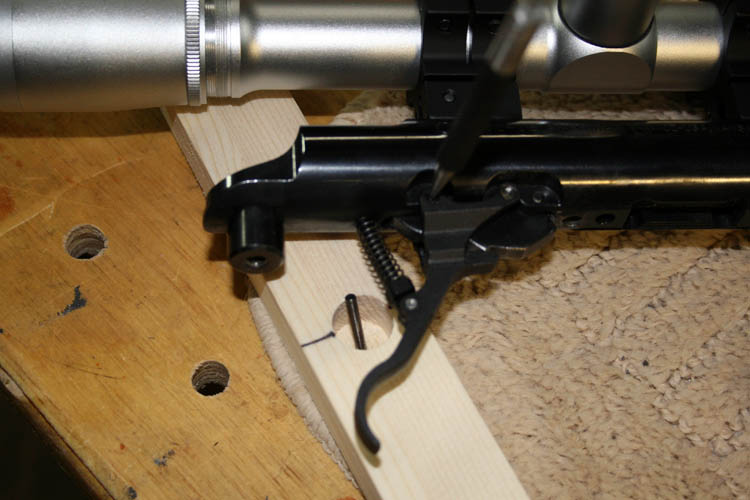
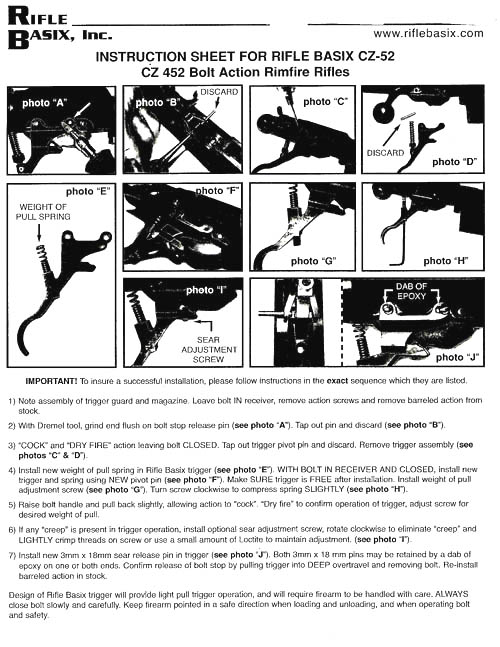
RIFLE BASIX TRIGGER INSTALL 12-25-15
With some down time today after Christmas, I installed the Rifle Basix
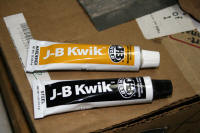
Trigger assembly. You will need a Dremel type tool, a small pointed
abrasive stone, epoxy cement, drive pin punch and a small brass head hammer to
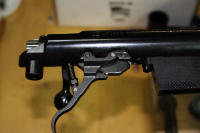
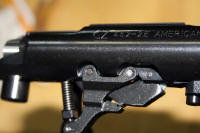
complete the job. Inserted a few sequence pixs below and not to
re-invent the wheel, scanned the rifle Basix, Inc.
instruction sheet
for the CZ 452 Bolt Action Rimfire Rifle.
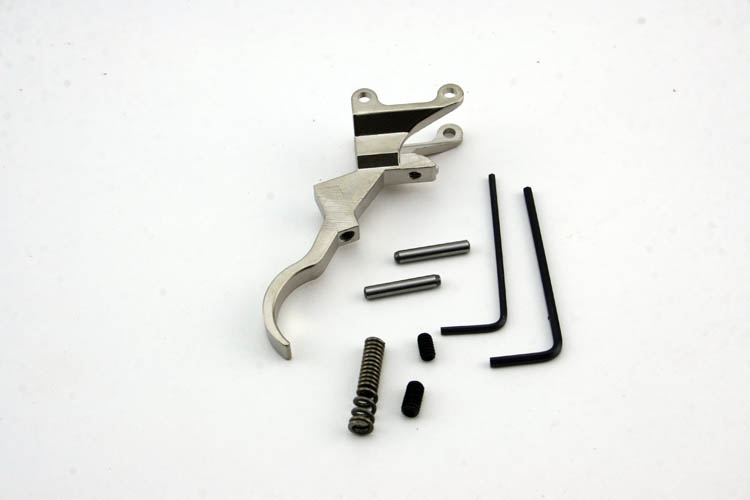
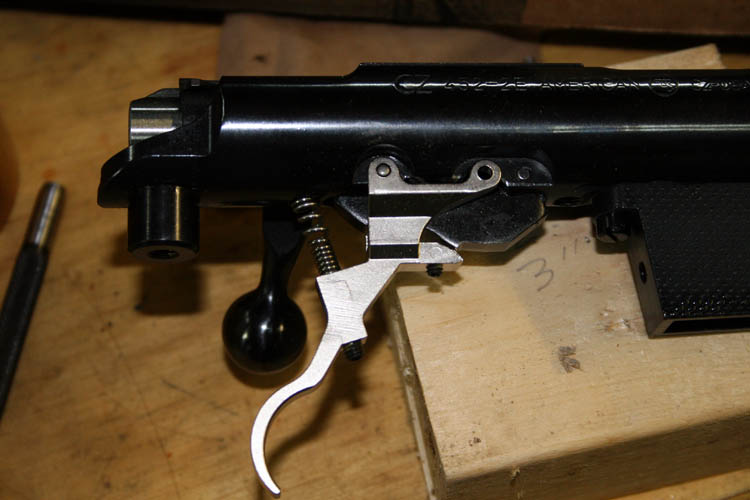
Above is what you receive along with the instruction sheet.

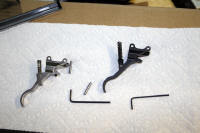


The forward pin on the trigger assembly has a small dimple punched into
each end to keep the pin from sliding out of the trigger requiring you to
grind away enough material to allow it to be punched out. It will be necessary to secure
the new pin
with a dab of epoxy glue. A .098 diameter slotted spring pin or
roll pin would work just as well in my humble opinion. I let the J-B Weld set up for a few hours
and adjusted the trigger pull to around 1 lb. 7 oz., however it will easily
go down to 12 ounces but not pass my bump test for the trigger and sear
engagement.
I did notice when inserting the set-screw into the trigger for the
trigger spring adjustment, it was an extremely tight fit; much tighter than most
other similar applications. I don't know what the torque was but it
was difficult to turn with the small Allen wrench supplied and the set-screw was
definitely not crossed threaded either!
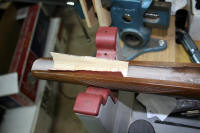
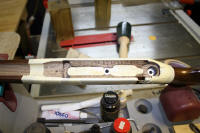
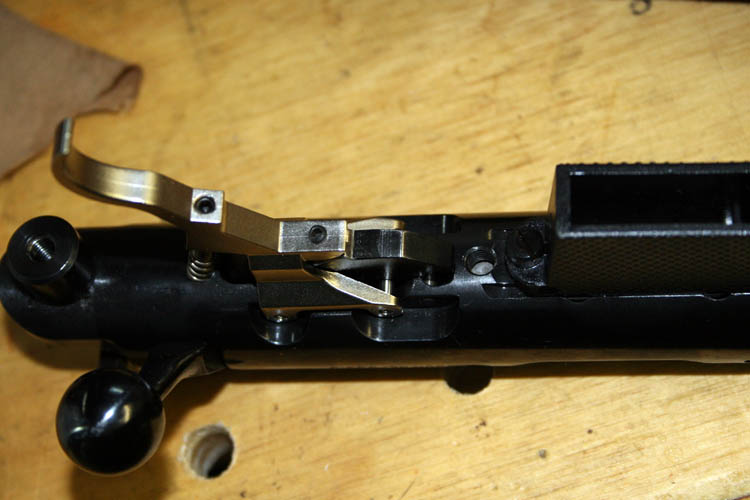
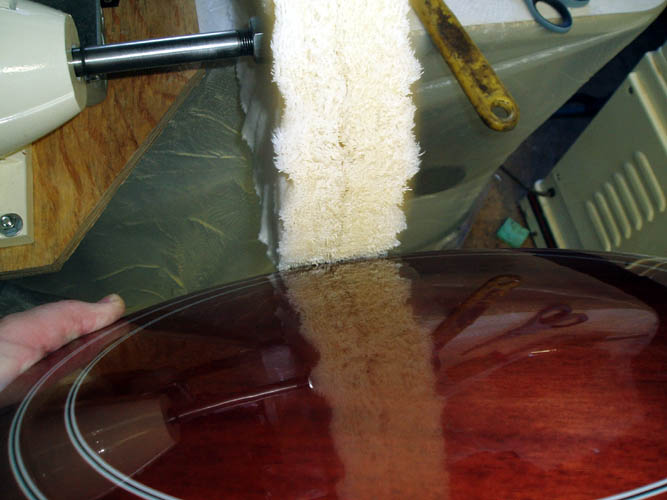
While I had the receiver and barrel removed from the stock, I used 80
grit abrasive paper and sanded down the portion of the stock forward of the
receiver since it had the slight bind on the right hand side of the wood stock
when the action screws were at 18 inch pounds of pressure. After
testing, I will later come back and seal the stock.
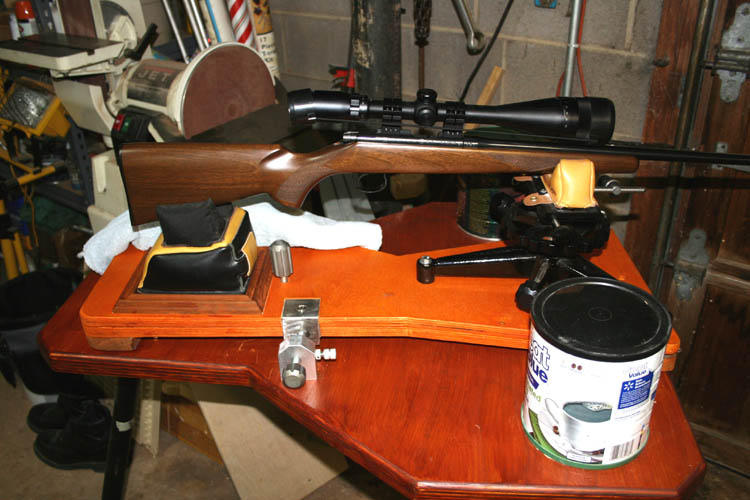
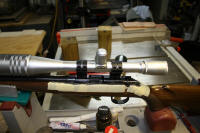
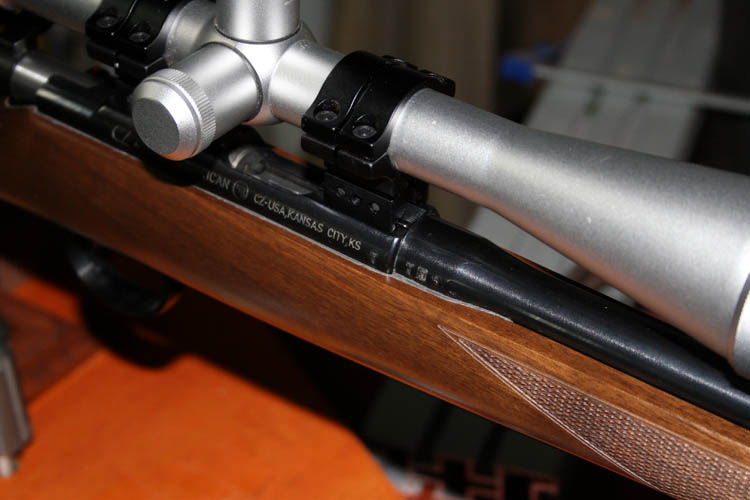
I planned to install the BKL # 276 rings for the
Bushnell 6x18x50mm Banner model scope
but the mounts were way to high since the barrel has a good taper to it past
the receiver and it was just too high for my personal taste. I will
acquire a smaller height set of rings ASAP. The BKL # 276 High
rings were
approx. .980 inches from the bottom of the scope tube to the bottom of the
dovetail ring base. The dovetail groove machined into the receiver of
the CZ 452 American is a
standard 3/8 inch dovetail versus the 11mm metric dovetail that is on the 455 and
other 452s, etc. The CZ 452 American dovetail measures .500 inches
across the top of the dovetail and the CZ 452 trainer measures .433 across
the top of the dovetail and many scope rings will fit both receivers.
NOTE: I went ahead and installed the BKL # 276 rings and
will see if "they grow on me" as
far as liking them since I am antsy to go ahead and give this rifle a test
ride.......grin if you must! The extra height of the rings may be
necessary for the bolt handle to clear the rear scope ocular lens housing
and will find out if a lower scope ring will work. Nope, they didn't
grow on me!
I plan to test fire the rifle with various brands of subsonic ammo to
ascertain if the rifle is worth the extra expense to have the barrel threaded for
my suppressor and possibly have it pillar blocked and glass bedded at the
same time if needed.
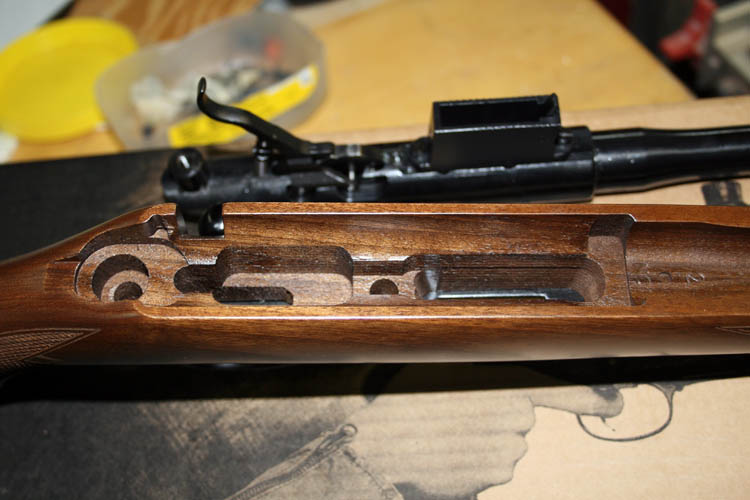
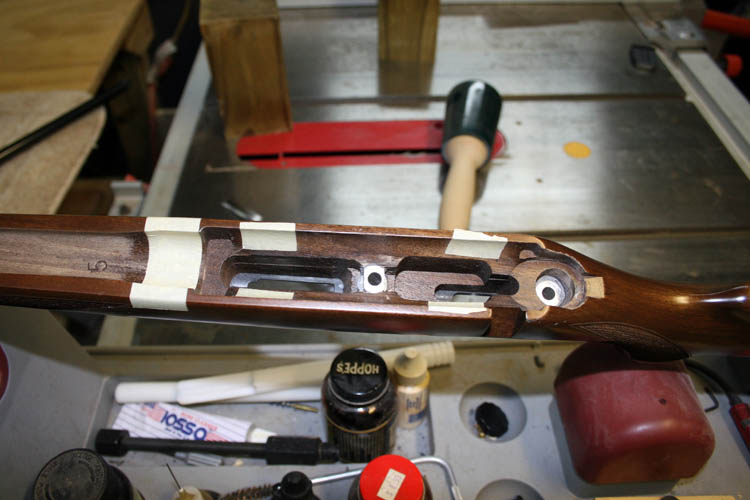
I took a few pixs of the stock and there is plenty of wood real-estate that surrounds
the receiver making it a good candidate for pillar blocks and glass bedding.
You definitely can see quality engineering in the construction of this
rifle.
Remember, Christ is the Reason for the Season
but he is also the reason for every day of our lives and he deserves our
praise, honor and glory in all things!
Merry Christmas and a Happy New Year!
Web published updates by Bill aka Mickey Porter on 12-25-15.
CHANGED HORSES IN MIDSTREAM
I initially decided to transport the CZ 452 to a
gunsmith
in Blanche, NC for
the barrel threading but
changed my plans and will ship the
barrel/receiver to Accurate Ordnance, LLC
in Winder, GA to have the barrel threaded. I had them thread the
barrel of my Savage Mark II BTVLSS a couple years ago
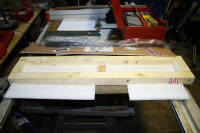
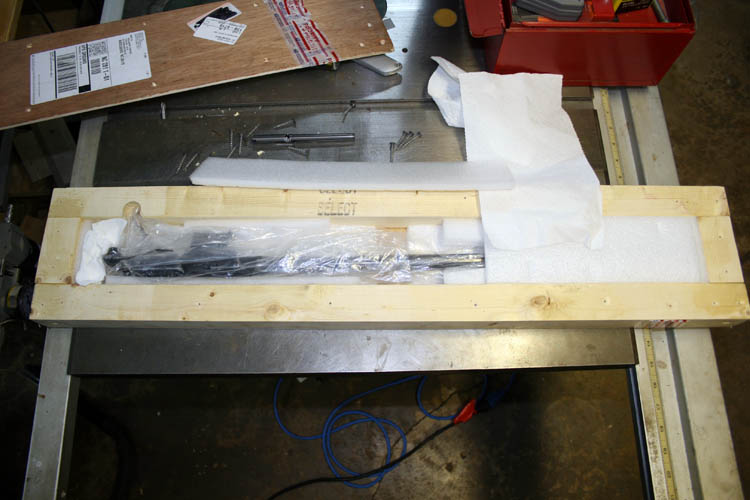
and very pleased with their First Class All-American work. I saved the
shipping box I made which was an overkill to say the least and got the
barrel/receiver boxed up this evening and ready for the USPS tomorrow
morning.
I emailed Accurate Ordnance and they still remembered the overkill on the
shipping box and we got a grin out of that for sure. Below a few
thumbnails taken:
NOTE: The hyperlink to Accurate Ordnance, LLC was removed,
due to the website no longer active or their contact links and/or telephone
number.
Quoted from Marks Facebook page January 2, 2020: "We
want to sincerely thank everyone who has supported and encouraged us the
last few (9+) years. We greatly appreciate you. Unfortunately,
we have decided to close the shop. I am dealing with a parent in
Hospice care and my attention needs to be elsewhere at the moment.
Jason is retaining the CNC lathe and tooling with intentions of setting up a
new shop. We'll make sure the word gets out there when that happens.
We're contacting the few remaining customers with projects to make
arrangements to make sure they are satisfied. So, if you are one of
those customers, please be patient and I promise we'll reach out to you.
We appreciate everyone's understanding and wish you and your families a
happy and blessed New Year.
Mark Kuczka"
Web page updated by Bill aka Mickey Porter on 07-07-2020.
Our weather lately has not been conducive to doing any serious rimfire
rifle testing due to an abnormal wet and windy winter so far and a few more
weeks of waiting will not make much difference anyway.
When I receive the barrel/action back from Accurate Ordnance, LLC, I will
start test firing and then go to plan B if I think the action needs pillar
blocks and glass bedding of which it might not. The stock has enough
room to install my own fabricated 1/2 inch diameter
pillar blocks for both the rear and
forward action bolts but the forward pillar will need to be reshaped for the
magazine well housing screw and the forward portion of the sear. I am not impressed with the
lamp tubing type pillar block installation
but they apparently work fine.
My friend Robert Webster of Hamlet, NC traded for a
CZ 452 trainer and he shoots excellent 50 yard
groups using both cheap
(Winchester Wildcat) ammo and
mid-range priced ammo like the Wolf Match Target along with several other
brands of low to mid priced ammo. He only lightened the trigger pull
on his CZ 452 Trainer and it made
a big difference in his grouping.
Web published update by Bill aka Mickey Porter on 12-29-15.
USPS MANIFESTED THE ACHILLES' HEEL IN THE RIFLE BASIX
TRIGGER
I got an email from Mark Kuczka at Accurate Ordnance, LLC in Winder, GA
on 01-04-16 and the
subject line simply stated, "Ouch".
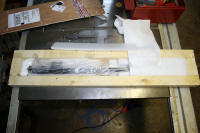
I opened the attachment and a picture of the wood shipping box they opened with the trigger
now in two (2) separate pieces. Pix below:
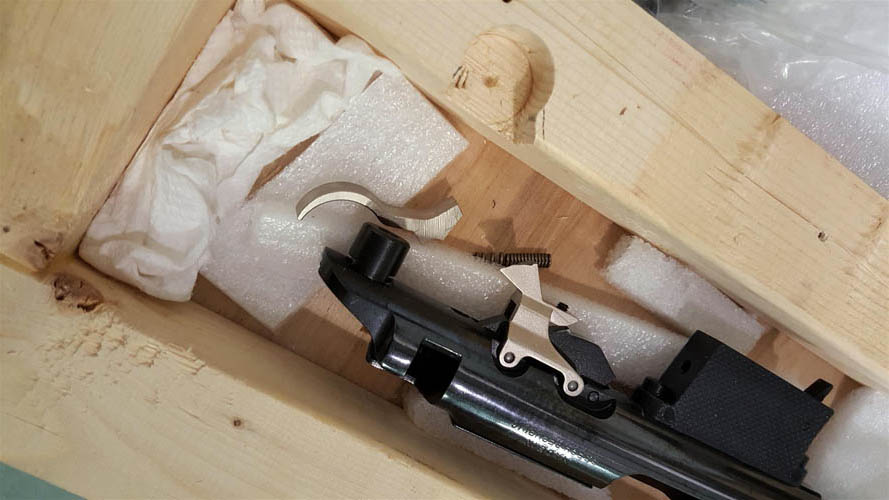
I never would have believed a part could get broken in that wood shipping
box but I was totally wrong. Apparently, the box was thrown a good distance
at some point in transport allowing it to stop suddenly and the
kinetic energy generated allowed the entire barrel and receiver
assembly to move
rearward and/or forward inside the box slamming the trigger into the wood cutout wall, whereby breaking the trigger at its weakest area.
There should have been adequate padding on each end and all around the
receiver/barrel assembly to prevent such a mishap but definitely wasn't the case.
Maybe the same Gorilla that applied torque to the rear action screw at the CZ
factory assembly line is also
working part time for the USPS here in the USA.
Murphy's Law
never sleeps; "Anything that can go wrong
will go wrong!"
The next time I ship a barrel/receiver out, it will
be in a four-point
restraint system.......grin if you must!
PLAN "B" FOR THE TRIGGER REPLACEMENT
When I receive the barrel/receiver assembly back
from Accurate Ordnance, LLC after threading for the suppressor, I will
probably install the original CZ trigger and lighten the spring tension by
either replacing the spring with a weaker one and/or cut a couple coils off
the original trigger spring. The Rifle Basix trigger has very little
material on the sides of the trigger where the hole is drilled and tapped
for the weight adjustment set-screw and definitely is this trigger's
Achilles' heel
as evidenced by the picture above.
I called our local Post Office and will file a claim in the morning for
the cost of a replacement trigger.
My Savage Mark II BTVLSS might have a
voodoo doll that looks like my CZ 452
American and sticking pins in it to keep me from using the new
rifle......grin if you must!
Web published update by Bill aka Mickey Porter on 01-04-16.
USPS CLAIM FILED FOR DAMAGED TRIGGER
NOTE: Filed the claim online since the
USPS no longer uses
the older hand written PS Form 1000 per our local Post Master of which I
believe he didn't want to get involved with the paper work which is fine by
me since a few clicks of the mouse and uploading a couple supporting
documents is all that it took. The USPS website has provisions to mail
you a form if you do not have access to on-line filling which sounds like an
oxymoron! If you can access their website, you most certainly can file
the claim on line. Only in America! 01-05-16.
I checked online on 01-26-16 and noticed the USPS denied my claim on
01-21-16 and awaiting a letter for their reason for the denial. The
USPS has over a 100 billion dollar debt
of which 87 billion in unfunded liabilities for postal retiree health and
pension benefits and other deferred payments overdue. I can see why
they don't want to reimburse me $ 91.00 dollars for the damaged
part.....again, Only in America! The internet and email has
drastically cut into their revenue from the sale of stamps, etc. and they
might end up like the
Pony Express in due time.
Web published update by Bill aka Mickey Porter on 01-06-16 and 01-26-16.
DENIAL LETTER RECEIVED FROM USPS ON 01-27-16
I received a letter on 01-27-16 from the USPS Domestic Claims Accounting
Services which stated, "Based on our investigation, your claim has been
denied because the parcel contained prohibited items. The US Postal
Service prohibits mailing of certain types of items including, but not
limited to, alcoholic beverages, certain firearms, and hazardous substances.
Pistols, revolvers, and other firearms capable of being concealed on a
person can only be mailed between authorized dealers as stated in 18 USC
1715. The responsibility for mailability rests with the mailer, not
the US Postal Service.
If you wish to appeal this decision, send a copy of this letter and a
written appeal focusing on the basis of the claim denial within 30 days from
the date of this letter".....
I submitted an appeal on line and uploaded the following pix:
I attempted to explain that this item does not fit the criteria of 18 USC
1715 and is not a pistol, revolver or other firearm capable of being
concealed on a person and the above receiver and barrel length is 27.75
inches in length. Also, an individual is allowed to ship a rifle
or shotgun to a registered firearms dealer per their own
mailability rules section 432.3g.
Hopefully, they will understand that this is a rifle without a bolt and
stock and could only be used as a club.....another grin is in order!
Web published update by Bill aka Mickey Porter on 01-27-16.
RECEIVED CHECK FROM USPS ON 02-17-16
The US Postal Service finally approved my claim for the broken Rifle
Basix trigger and I received a check in the mail on 02-17-16 and I
definitely will not purchase another Rifle Basix trigger for sure. I
never did hear anything back from Rifle Basix as to their poor quality
trigger and that is some lousy customer service for sure! All their
fancy advertising is just hype and reminds me of the dung left behind by a
bull in a pasture.
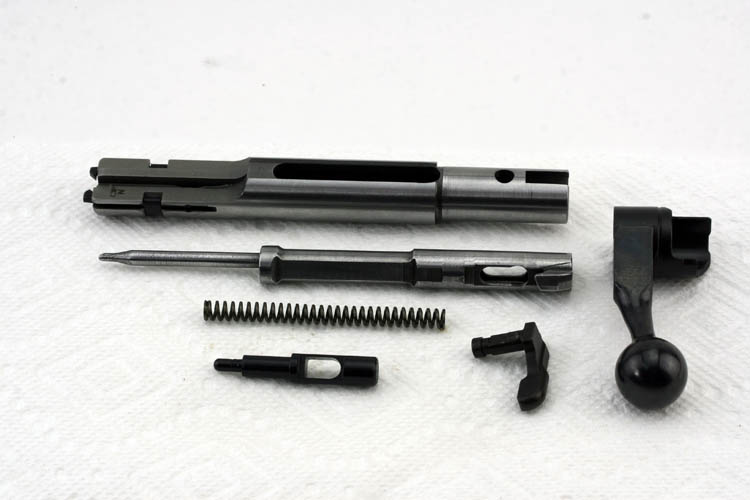
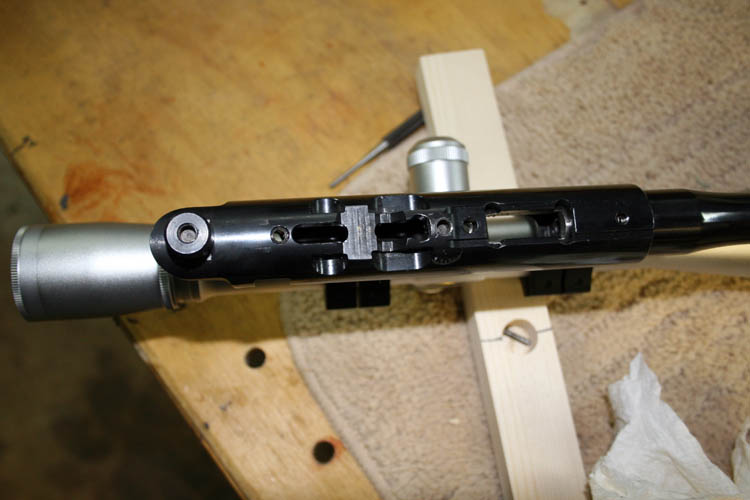
BOLT DISASSEMBLY AND OBSERVATIONS
With some down time on my hands waiting on the barrel to get threaded, I
disassembled the bolt. There are many videos on YouTube showing you
how to take the bolt down which is very simple.
I was a little surprised at all the tooling marks on the firing pin aka
striker and decided
to do a semi-polish on the high spots using 600 wet and dry automotive
paper. It looked like someone with a coarse mill
bastard file fabricated the firing pin by hand......grin if you must! Below a couple pixs of the bolt parts:
Below is a close up of the firing pin aka striker showing the tooling marks:
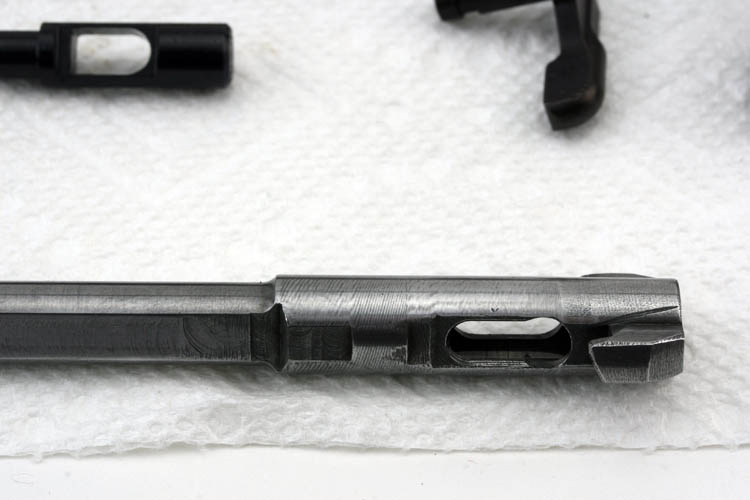
The above pix of the firing pin after using the 600 grit paper....it
would take a lot of work to polish this firing pin out and there might be
too much slop (clearance) when you got through with it. I read one thread where
the writer said it would smooth out after shooting it but I am guessing it
would take a few million rounds to do that.....grin if you must!
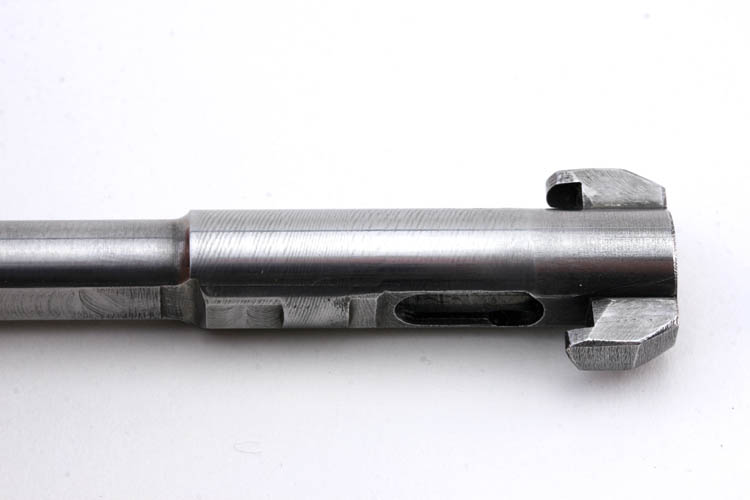
Above firing pin aka striker after I polished it with a small buffing
wheel with red rouge using the Dremel tool. I only wanted to polish
the high spots and not to attempt to remove the deeper tooling marks to
prevent unwanted slop (clearance) between the firing pin and the bolt housing. I
have a large
buffer/wheels and various grades of buffing compound for wood
working projects but didn't want to drag it out and set it up.
Other than the tooling mark issue which apparently isn't a big deal since
my friends rifle has about the same tooling marks on his CZ 452 Trainer and
his shoots great. This is a very well made bolt and the firing pin doesn't
travel that far anyway. The exterior of the bolt is machined and
polished pretty good. It is imperative that you
do not change the
angle or alter the shape of the sear engagement area on the sear and the
trigger to sear engagement not depicted in the above pix.
I only lightly polished that area.
Web published updates by Bill aka Mickey Porter on 01-08-16.
RECEIVED BARREL/RECEIVER ASSEMBLY FROM ACCURATE
ORDNANCE 01-19-16
I received the barrel/receiver assembly back from Accurate Ordnance today
and got a chance to check out the broken Rifle Basix trigger to ascertain
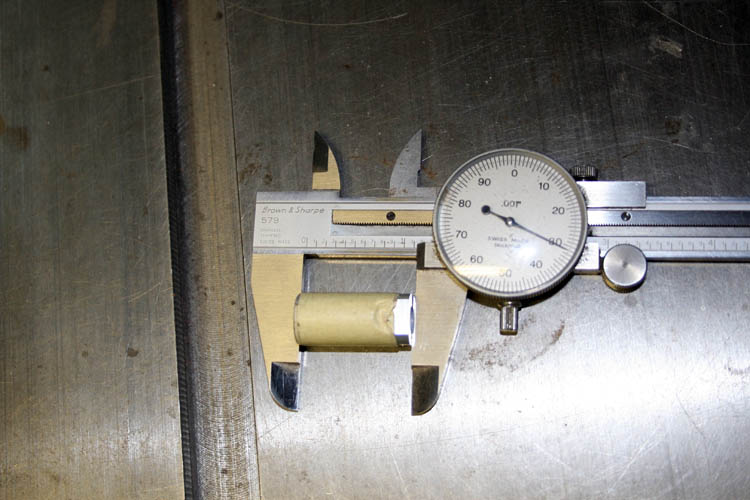
why it broke so easily inside of the wooden shipping box. I super
glued the Rifle Basix trigger back together in order to get a few
measurements with the Brown & Sharp caliper and it was easy to understand
why the trigger broke at its
Achilles' heel area. The
trigger width was .250 with a .200 whole drilled in it to contain the lower
portion of the trigger spring and the hole was drilled way off center.
One side measured around .013 to .015 and the other thicker side measured
.035 inches. As the ole cliché, "A
picture is worth a thousand words", see below:
If this is state of the art CNC machining, I will stick with the old way
of doing machine work. I know I can freehand drill without a drill
fixture more accurate than what was done on this trigger and can certainly
do much better on the drill press. I sent an email to
sales@riflebasix.com about
their trigger weakness but have not heard anything back from them and
emailed them this latest close-up pix which speaks for itself. I
did not
ask Rifle Basix for a refund, since I filed a claim with our Snail Mail
System aka USPS but wanted them to be aware of their
poor quality control as
evidenced by the above pix. Their
service after the sale leaves a
lot to be desired! In my case, there is NO
CUSTOMER SERVICE!
UPDATE: On July 3, 2020, I was
teaching our youngest Grandson Xander McKnight Gonzales to shoot the .22
caliber
rimfire rifle and the next day created a
page for him and happened to open the CZ 452 American page and noticed the
broken Rifle Basix trigger pix and out of the blue sent the pix to the sales
link at Rifle Basix. I wasn't expecting a response, but Jeff of Rifle
Basix replied to my email and wanted my telephone number of which I sent it
to him today 07-06-2020. He called me and I missed his call and he
called back and apologized for not responding way back then. Jeff
offered to replace the trigger, but I didn't want to take the rifle apart
again since it has been shooting very well. Jeff said,
"If there was
any of their products I needed to let him know, which he would send at no
charge." I thanked Jeff and did have a little fun during our
conversation and told Jeff, I thought Rifle Basix was under the Federal
witness protection program and we both got a good grin out of that.
Web page updated by Bill aka Mickey Porter on 07-06-2020.
The trigger is made using
Metal Injection Molding technology (MIM)
by the granular look of the metal composition and also the thin horizontal
line visible on the part indicative of some type of mold used in the casting
process. This trigger is definitely not CNC machined from a solid
billet of steel in my humble opinion and any CNC machining is on the upper
portion of the trigger where it attaches to the receiver/sear! I definitely will not use
another Rifle Basix trigger for this CZ rifle. There is nothing wrong
with MIM parts, since the majority of small parts on many firearms are using
MIM parts along with other product manufacturers to reduce manufacturing
costs.
Accurate Ordnance removed the sear from the receiver and it was a dawg to
get the ball bearing on top of the spring and everything aligned to install
the pin that secured it in place. After a few tries, everything came
together and glad I had the shipping box underneath the receiver to catch
the small ball bearing when I didn't get everything aligned just
right.....grin if you must!
INSTALLED ORIGINAL CZ TRIGGER WITH A DIFFERENT SPRING
I reinstalled the original CZ factory
trigger and replaced the spring with a weaker one from
YoDave
Products (second lightest one) with the trigger breaking
at around 12 ounces to one pound and passed my bump test. You have a
couple options if you just want to change the spring and not the trigger.
You can use a Williams ACE Hardware
# 144 spring or a
Fastenal Product compression spring # 161A
which will give you between 10 to 13 ounce trigger pull or their 162A
compression spring which is a little heaver. My shooting buddy Robert
Webster of Hamlet, NC did the Intel on the Fastenal springs and he is
currently using the # 162 spring in his CZ Trainer. He used the # 162C
which is 1.75 inches in length and cut it to one inch length since the vendor did not have the 162A in
stock which is the same spring but is one inch in length.
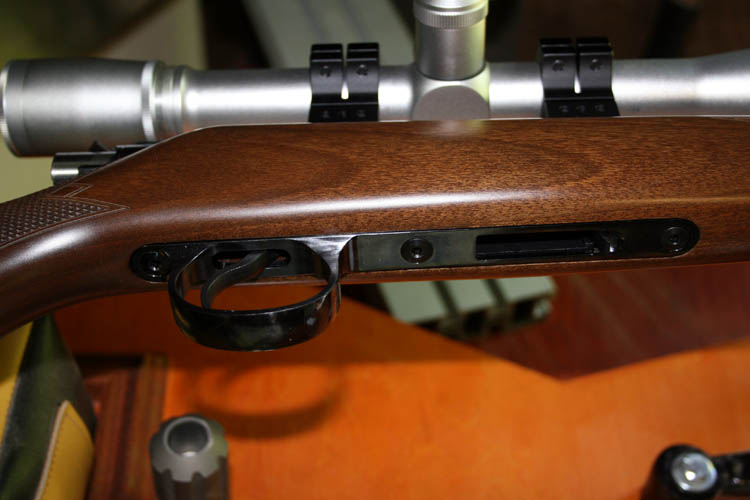
I got the barrel/receiver
back onto the stock and replaced the action screws with new ones from
DIP
that has a # 20 torx head on them. I installed a set of
BKL-263-MD medium
height double strap scope rings and mounted a Bushnell 6 x 18 x 50mm Banner
model scope which has the heavy duplex cross hairs for hunting but will give
it a workout on the target at 52 yards. There was enough clearance
between the barrel and the objective diameter to allow usage of the scope
cover.
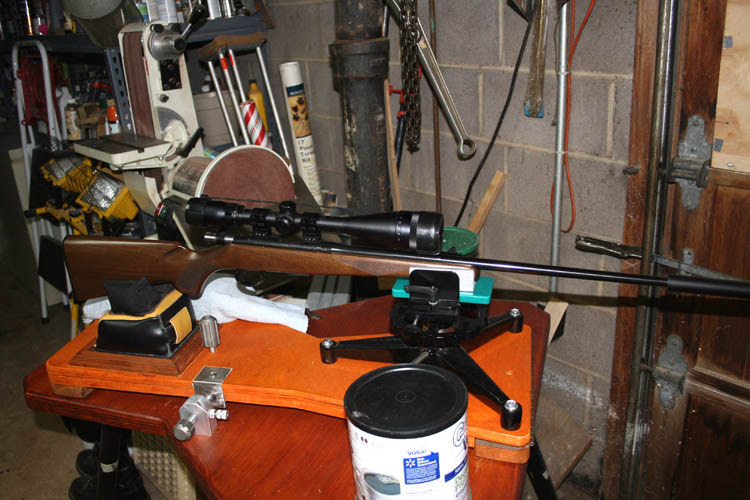
I will post a pix of the rifle tomorrow with the suppressor installed and
if the wind is not too brisk, will start test firing some subsonic rounds.
Web published update by Bill aka Mickey Porter on 01-19-16
RIFLE READY FOR TEST FIRING
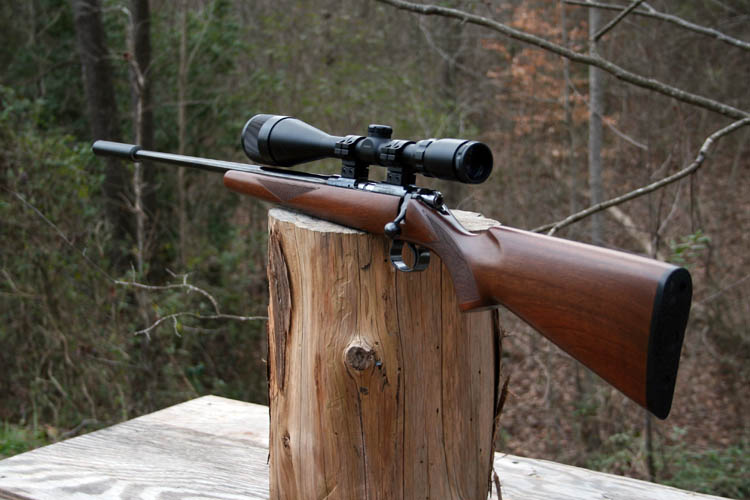
I shot the CZ some this morning but the wind was too brisk and variable
and only getting some trigger time in. I would not want to disrespect
the rifle by posting those groups fired, however I did get a good 5
shot group cluster at 52 yards when the wind was in a brief static state....grin if you must! My
front
rest is far to wide for the narrow forend stock and unable to
pull the side "ears" in close enough and will have to improvise
something to take up the slack as I was getting right to left forend movement.
The front rest is fine for the
wider forend of the Savage Mark II BTVLSS.
I ordered a
Protektor # 1 small owl ear front bag for
my
Sinclair heavy varmint BR windage LH front
rest that fits a
regular width (narrow) hunting rifle which should be the ticket. The
stock sling studs were removed which are not needed at this time.
I am looking forward to shooting this rifle when the climate conditions
are much better whereas I can get a more reliable accuracy test. This
is a far superior made rifle than my
Savage Mark
II BTVLSS and if it shoots better right out of the box, that will
definitely be an extra bonus.
My goal for this rifle is to make head shots
on squirrels at 50 yards; one shot one kill and hopefully, be able to get
some decent 5 shot cluster groups a little more regular than what the Savage
Mark II BTVLSS delivers.
Web published update by Bill aka Mickey Porter on 01-20-16 and 01-26-16.
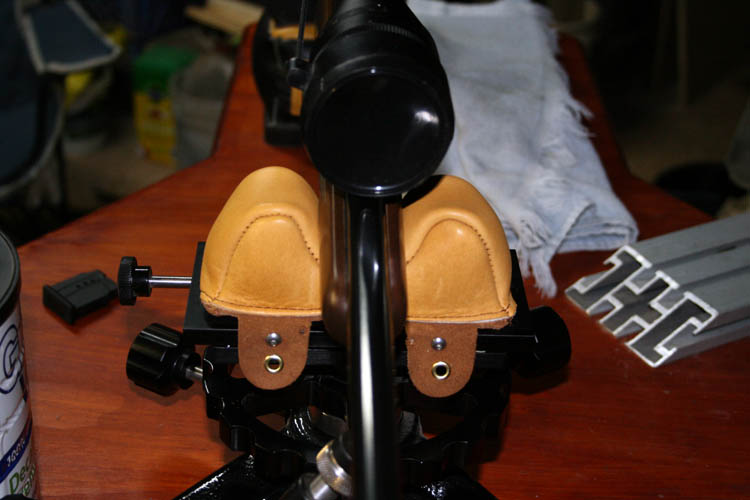
MODIFIED SINCLAIR REST TO SECURE THE PROTEKTOR FRONT BAG
I received the Protektor # 1 small owl ear front bag and removed the
existing Edgewood sand bag that was secured to the windage top with two
horizontal bars and 4 8-32 screws. I had to drill and tap two holes for the 8-32
screws that was on the Sinclair windage plate since two of the holes were
usable. The small owl front bag had four
leather tabs with brass grommets but there wasn't enough room between the
top windage plate and lower plate on the Sinclair windage top to tie it down and it is
now secured with
four 8-32 screws. Below a couple pixs:
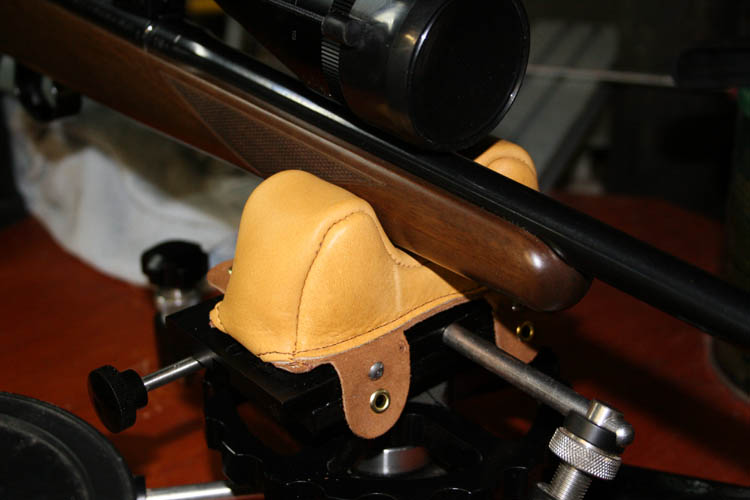
The CZ 452 American forend fits the small owl ear sand bag like a glove. I will
obtain some talcum powder to slick the bag up a little.
I fired a few test rounds but it was extremely windy and will do some
serious testing in the future when the weather is more conducive.
Web published update by Bill aka Mickey Porter on 01-27-16.
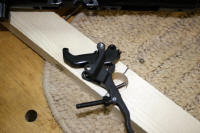
POABOY ONE PIECE GUN REST
I have my version of the
poaboy one
piece gun rest that was inspired by
Robert
Webster of Hamlet, NC. Pix of the rest ready for test firing:
Web published update by Bill aka Mickey Porter on 01-28-16, 02-14-16 and
02-19-16.
ADDED SINCLAIR FOREND BENCHREST ADAPTER
I added a Sinclair
forend benchrest adapter to the CZ 452 American and it
works real well. I shot a few groups but the wind is still too
variable to do any serious grouping. Pix below of adapter:
Web published update by Bill aka Mickey Porter on 02-19-16.
UPDATE TO THE BENCHREST ADAPTER
I later removed the Sinclair benchrest adapter and put the Protektor # 1
small Owl bag back on the rest. I couldn't tell any difference as far
as accuracy and the Protektor # 1 small Owl bag is far more versatile than
the Sinclair benchrest adapter set-up and works far better than the Edgewood
sand bag that came with the Sinclair benchrest.
CZ ACCURACY TESTING ON HOLD AT THIS TIME
Due to starting a
woodworking project for our youngest Grandson Xander McKnight
Gonzales I started on 02-19-16, I put the CZ project on hold at this time.
Also, the weather conditions hasn't been great for doing any serious rimfire
shooting.
Hopefully, I will get back in the mood to get some testing done but I
already have seen the CZ is a keeper.
Web published update by Bill aka Mickey Porter on 03-12-16.
TRIGGER GUARD ARRIVED ON 04-23-16
The aftermarket DI Products Steel Trigger guard Item Number 19030 came in
on 04-23-16 and installed it the next day. The trigger guard is very
impressive, not like the factory piece of junk that came on the rifle.
It took four (4) months to get the trigger guard but well worth the long
wait!
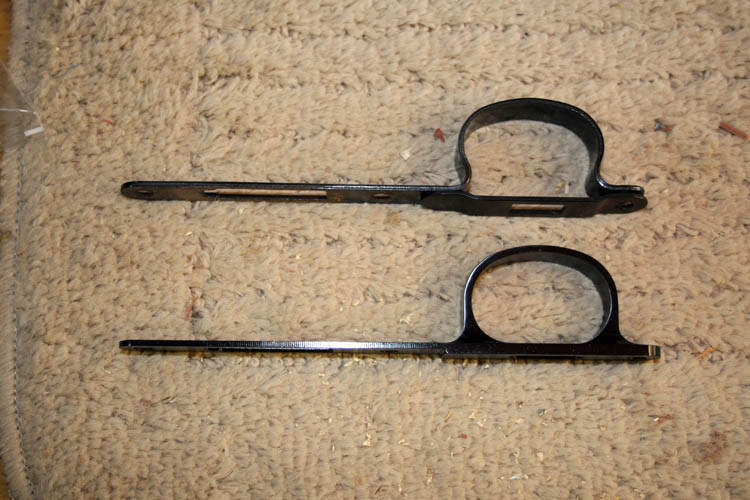
The DI Products steel trigger guard is made from a solid billet of steel
and not like the stamped and bent one from the factory which uses two pieces
of stamped steel.
The CZ factory could have done much better on their trigger guard but had
to go and cheapen it up with that stamped piece of metal that came on the
rifle.
Web published update by Bill aka Mickey Porter on 04-25-16.
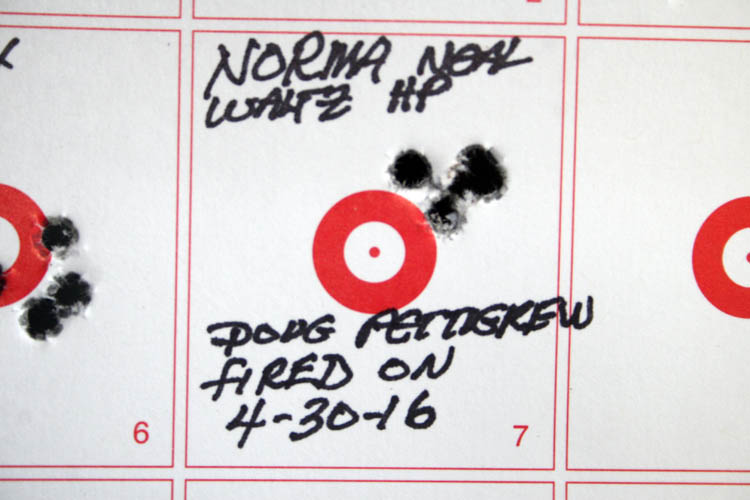
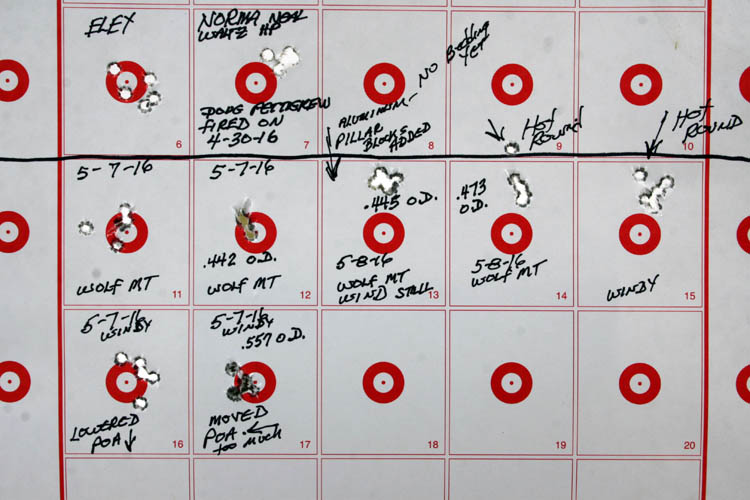
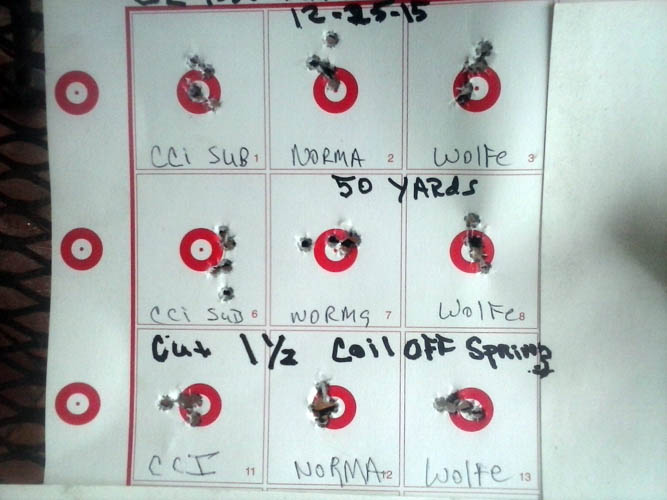
NORMA USA TAC-22 HOLLOW POINTED BULLETS TEST FIRED AT
52 YARDS
The past couple weeks, finally got around to running some Norma USA
Tac-22 bullets through the
Neal Waltz die and my No. 1 Brother-in-Law,
Douglas Pettigrew test fired a few of them this afternoon at 52 yards.
Below is a pix of the target he fired using my left-hand CZ 452 American
rifle and shot a 5-shot group better than I did with my own gun. I
have my shooting benchrest positioned for left hand shooting only and Doug
fired the gun standing up leaning over the rear of the benchrest looking
through the scope...grin if you must.
The NORMA USA TAC-22 rimfire ammo before resizing is: OAL
.969 inches and the bullet driving band diameter is .223 inches in diameter.
After resizing in the Neal Waltz Die: OAL .946
inches with .225 bullet driving band diameter:
I fired several rounds to get the point of aim established shooting
Eley Subsonic Hollow Points bullets which are about 50 feet per second
slower than the Norma USA Tac-22 at around 1100 feet per second. Any of
the above rounds fired so far through the CZ 452 American left-hand is deadly
medicine for Mr. Squirrel at 52 yards. The Norma USA Tac-22 ammo prints high and to
the right of the Eley Subsonic HP bullets which will still harvest a
squirrel. A simple POA (Point of Aim) scope adjustment is all
that is needed.
Web published update by Bill aka Mickey Porter on 04-30-16.
FABRICATED AND INSTALLED PILLAR BLOCKS 05-07-16
With some of my domesticated projects behind me, it was time to get back
on the CZ rifle project of which it was shooting some decent groups early
Saturday morning 05-07-15. However, I decided to install pillar
blocks and had already done internet searching of what others had done to their CZ
rimfire rifles. Most were using thin walled threaded lamp tubing and
other similar tubing so they would not have to enlarge the existing receiver
actions screw holes in the stock. I am sure they work great but I like
something that has more substance to it than the lamp tubing....that is just
my nature as I have been over building stuff my entire life; faulty
DNA I
guess.
I decided to go with the much heavier walled T6 aluminum tubing that was
.500 inches in diameter with a .125 wall thickness which would be just right
for the diameter of the action screws. Commercial pillar blocks are
designed for larger platform rifles and most require a .625 diameter cavity
for them to rest in which is a little more than needed on the CZ in my
humble opinion.
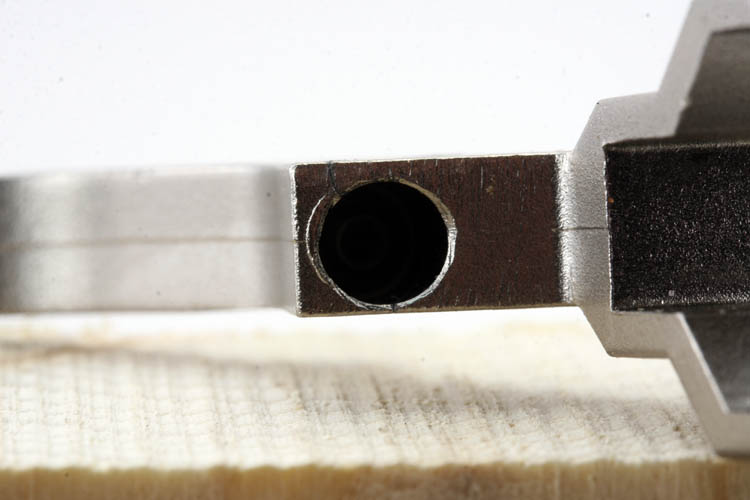
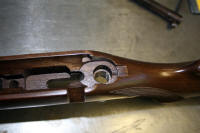
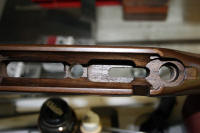
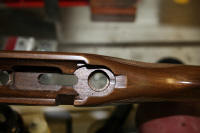
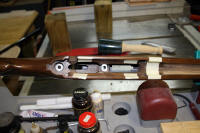
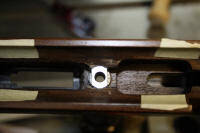
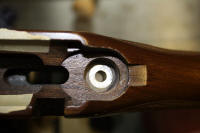
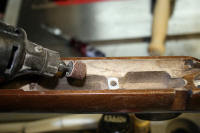
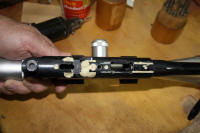
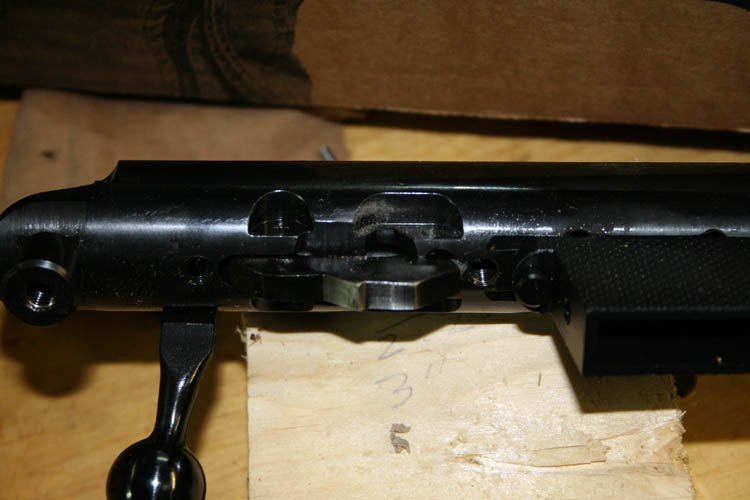
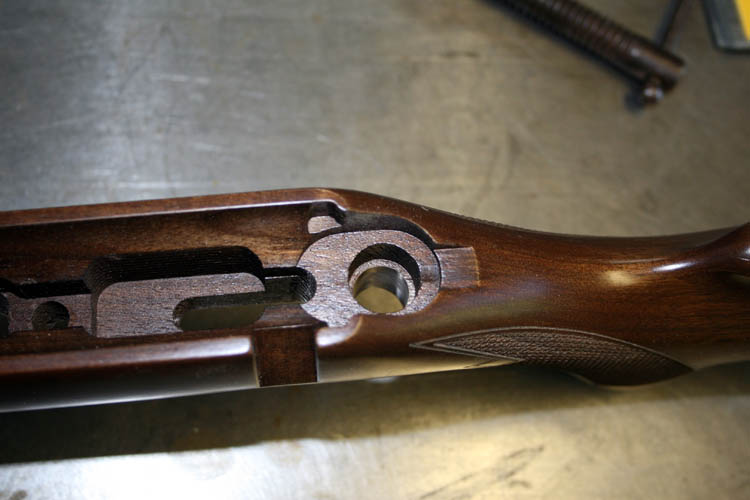
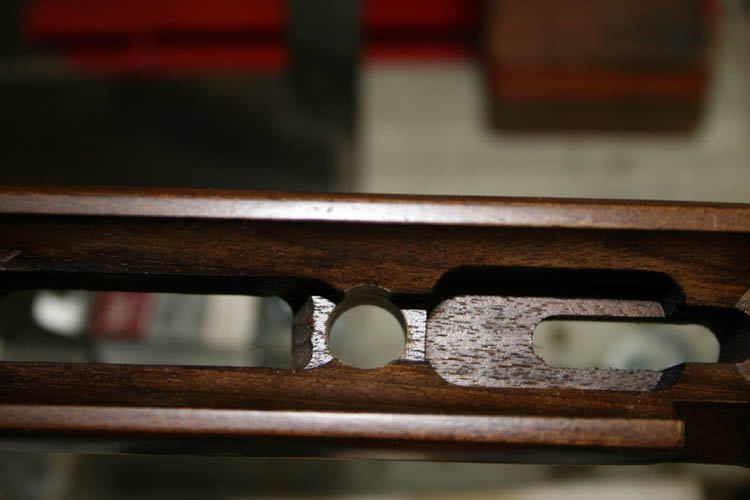
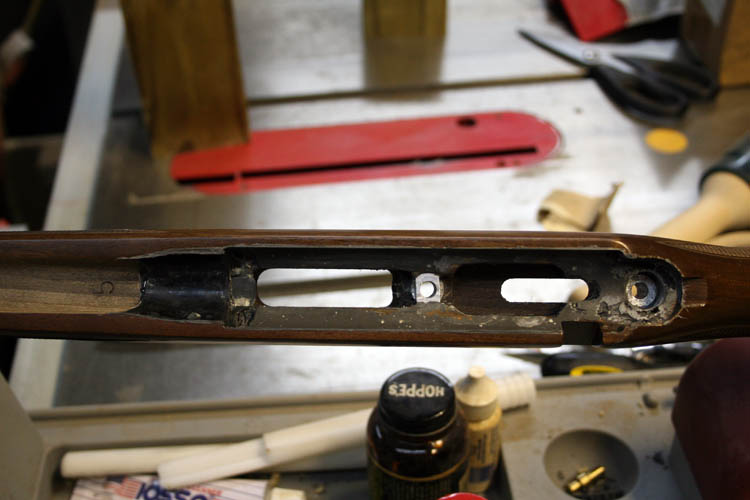
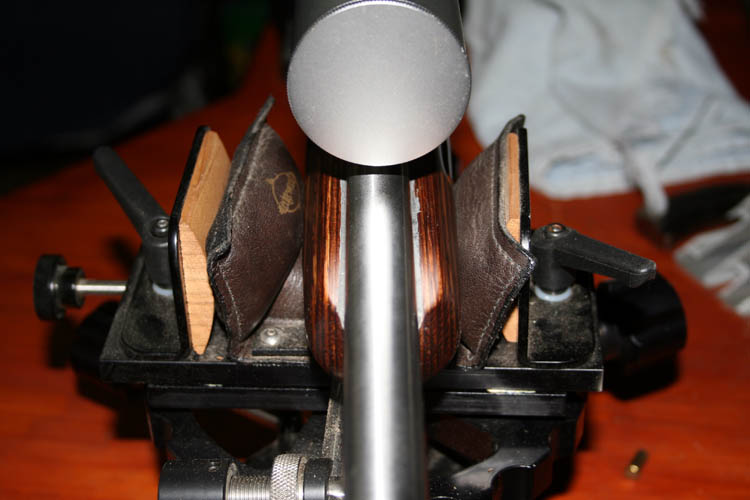
The front action screw on the CZ 452 American has only space between the
stock and receiver and a pillar block would definitely be advantageous for
that one. The rear action lug that is attached to the receiver by
means of a dovetail did not actually touch the wood on my CZ 452 American
and there was a small space between the bottom of the action lug and wood.
The tang or rear portion of the receiver was touching the flat portion of
the stock along with the side radius of the receiver.
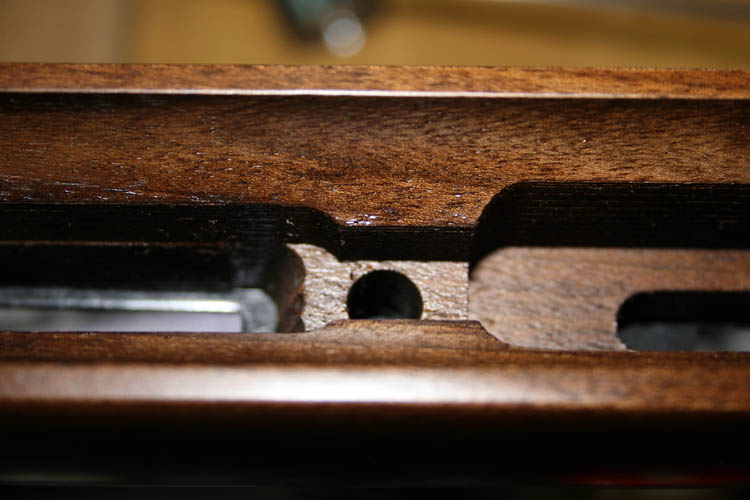
Above pix shows the space between the bottom of the receiver and the wood
stock but there is adequate wood real-estate for a heavy pillar block.
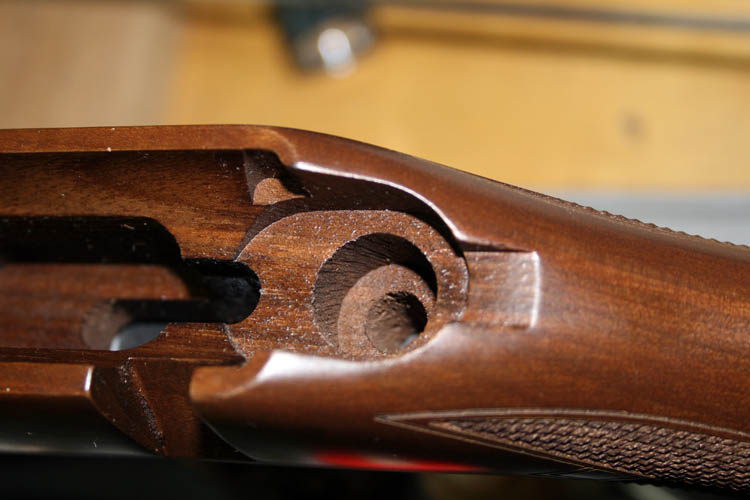
Again, plenty of wood real-estate for a pillar block.
SURVEYING THE SCENE
Unless you just enjoy tinkering and messing with things with a good
success ratio on your projects and somewhat mechanically inclined, it is best to leave pillar blocks and glass bedding to the
pros. Those that do this on a regular basis can make it look extremely
simple of which it is not rocket science but it is very easy to mess up
without proper planning and enough tools and supplies to get it done right.
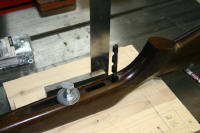
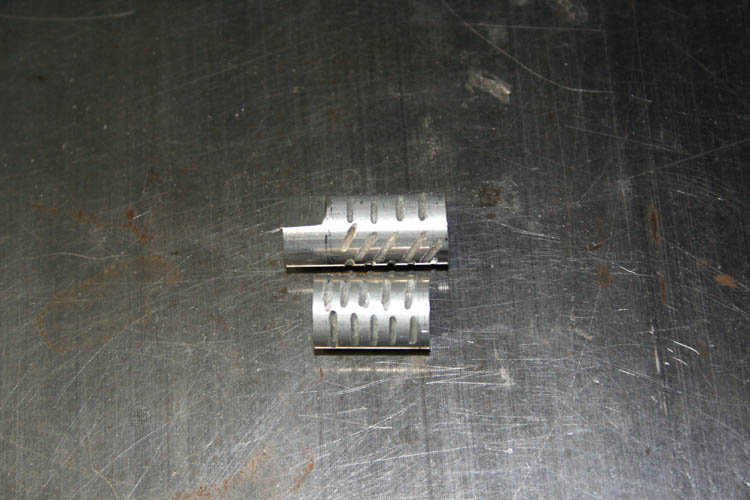
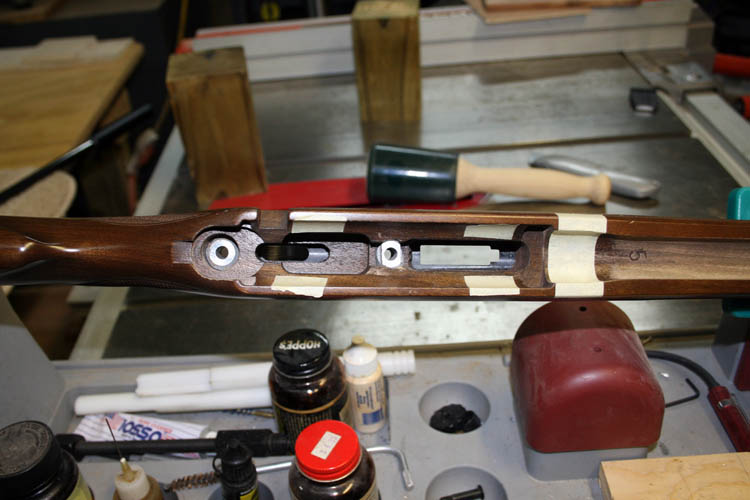
I started off by measuring the length needed for the front and rear
pillar blocks and they were as follows: 1) Front pillar length 1.130
inches,
2) Rear pillar length .808 inches and that depends entirely on the height of your stock which can
vary from stock to stock. I used .005 masking tape at different places
on the stock/receiver fit prior to measuring the length needed for the
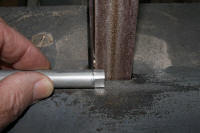
pillars. The ideal machinery would be a
lathe and a milling machine but do not own either and used a hack saw, 1
inch belt sander, dial calipers, 6 inch x 48 inch vertical belt sander and
Dremel tool with a cut-off friction wheel to get where I needed to be with
their length and shape. I cut grooves in the perimeter of the pillar
blocks for better glue adhesion. The flat portion removed from each
side of the forward pillar is to give clearance for the sear and the
magazine well housing.
Click on thumbnail pixs for a larger screen view:

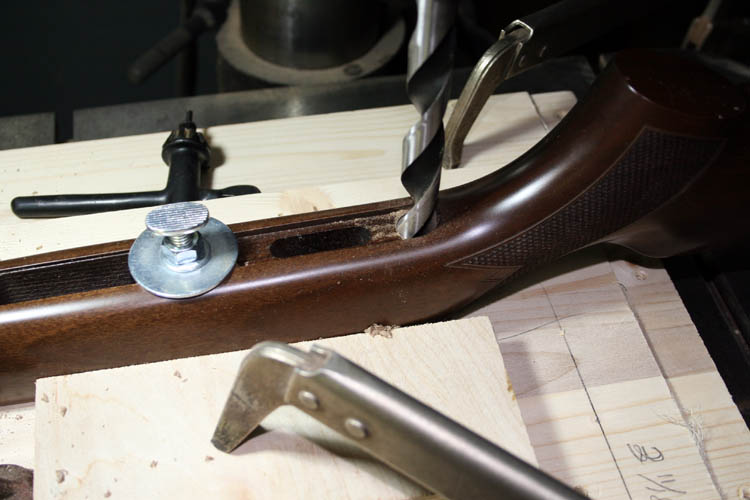
STOCK FIXTURE FOR THE DRILL PRESS
I looked at both vises I have to align the stock action screw holes up
with the drill press chuck center and decided to make a simple fixture to
secure the stock while enlarging the two existing action screw holes to 9/16
inches in diameter.
This will allow 1/32 inch all around the pillar block for the epoxy aka mud
to adhere. There are special pilot drill bits just for this specific task but they are
expensive. Some of them will allow you to use a hand drill but I don't
think I am ready to do this job with a hand drill because
Murphy's Law
never sleeps!
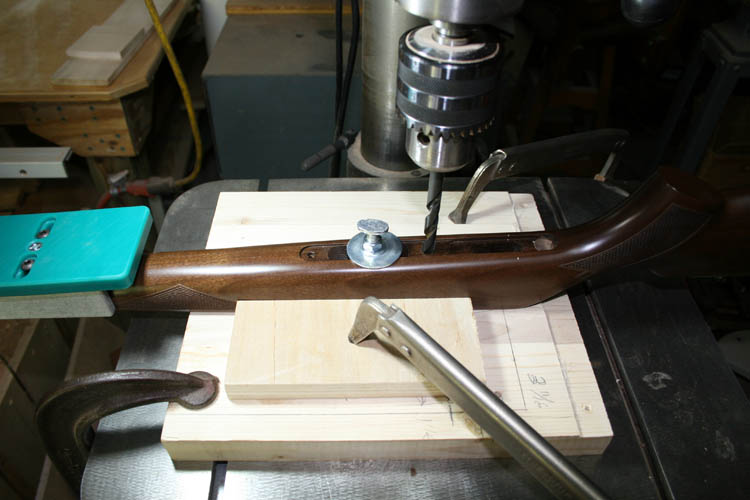
I built a very simple fixture to position the stock action screw holes in
line with my drill press chuck. The existing action screw holes were
.363 inches in diameter and used a # J drill bit which is .358 inches in
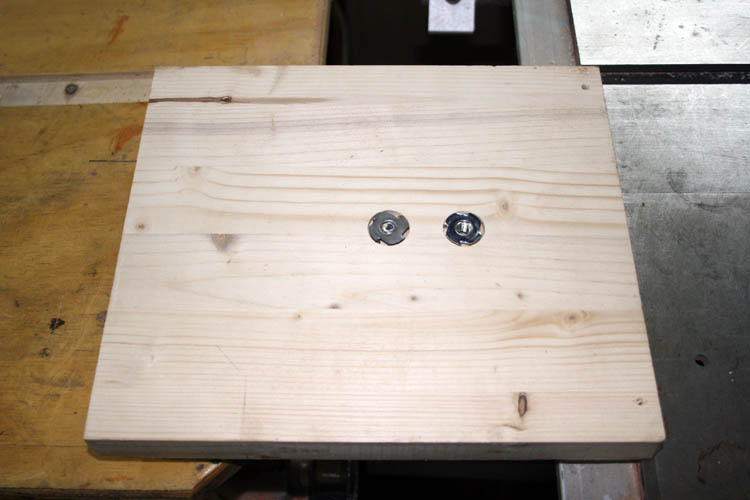
diameter to center the holes under the drill press. The fixture was
fabricated using a scrap piece of 1 inch thick pine board panel and a couple
5/16 threaded T-nuts, fender washer, 5/16 inch treaded rod and nut. If
I were doing many pillar block installations, I would design a much better
and more versatile fixture for the drill press.
Click on below thumbnail pixs for a larger screen view:
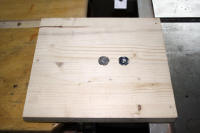
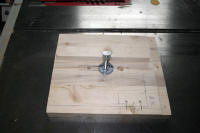

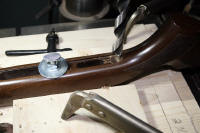
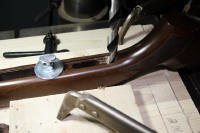
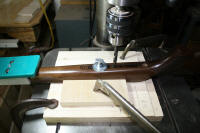
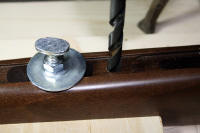
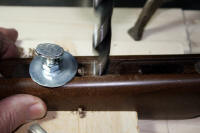

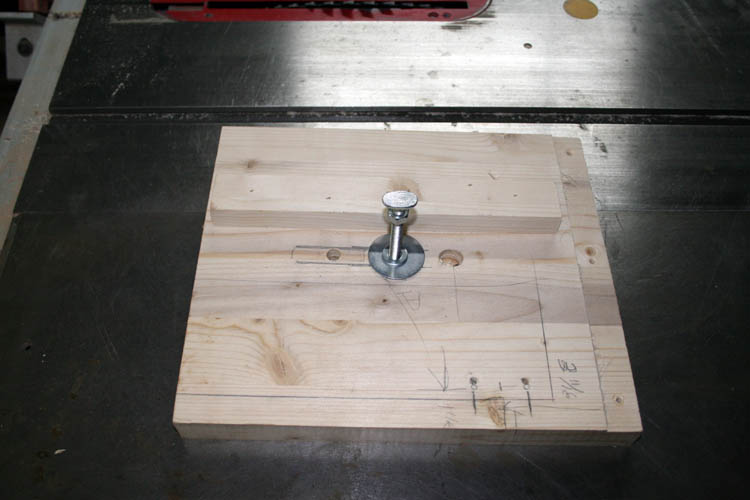
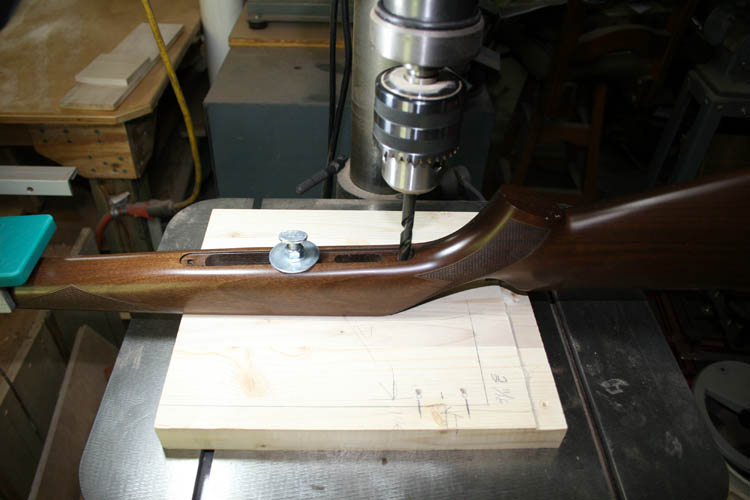
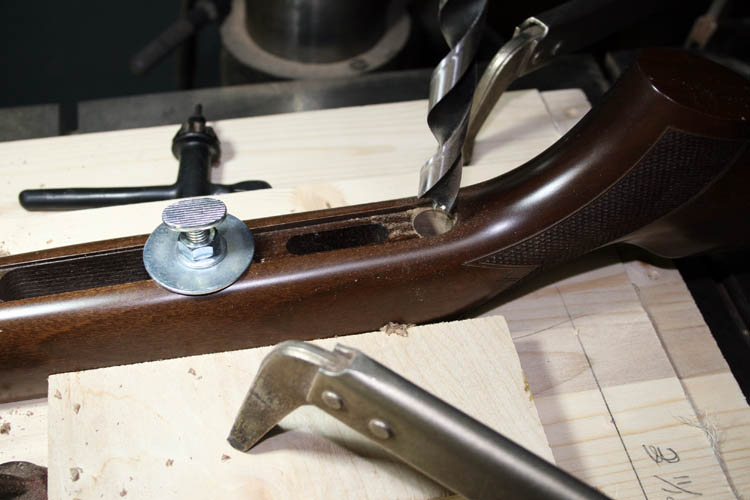
The pixs above shows the fixture in operation. The holes in this
stock was pretty vertical as referenced from the upper portion of the stock
and if not, you would need to adjust your drill press table for vertical
alignment. The stock was secured to the fixture with the usage of the
threaded rod that came up through the cut-out for the magazine well opening
allowing you to reposition the fixture to drill both holes to a 9/16 inch
diameter using a brad point drill bit.
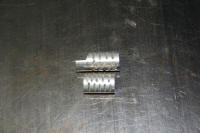
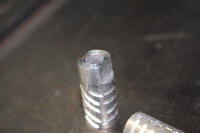
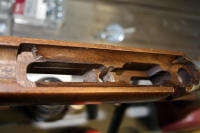
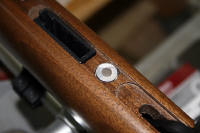
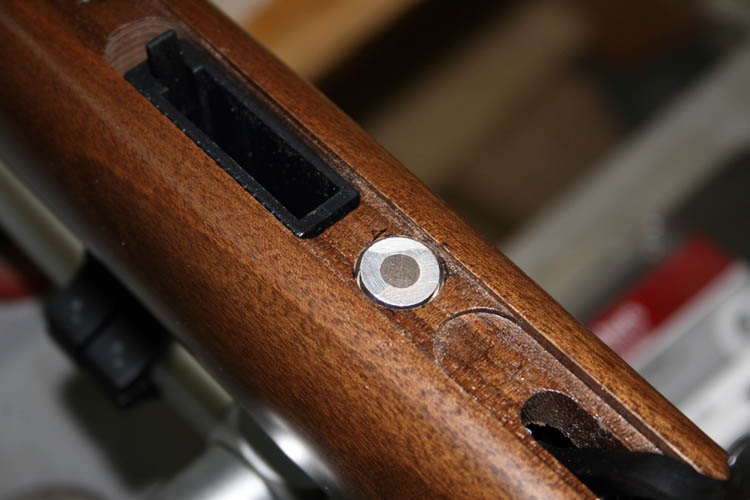
Below pix of the pillar blocks attached to the rifle prior to installing
them using
Devcon 10110. Verify that your bolt can be installed and
removed from the receiver with the pillar blocks in place prior to
installing them into the stock. I didn't do this and it came back to
haunt me after the pillar blocks were installed into the stock; more about
that later on. The pillar blocks were installed in the wood
stock without removing the trigger assembly or the magazine housing, however
they were removed before I glass bedded the receiver.
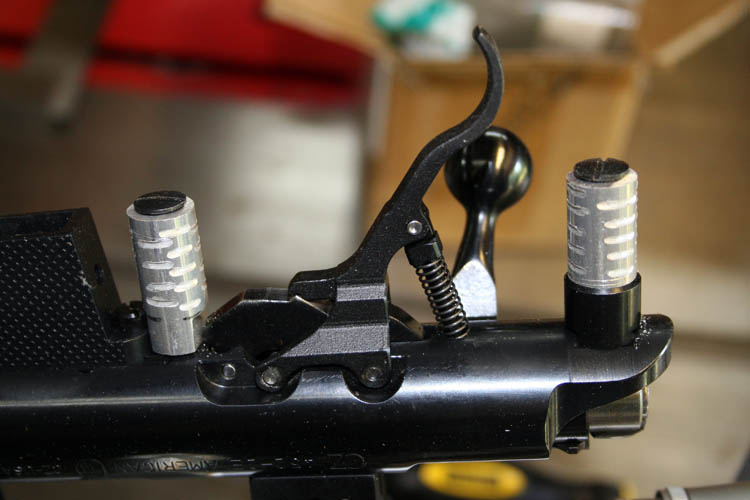
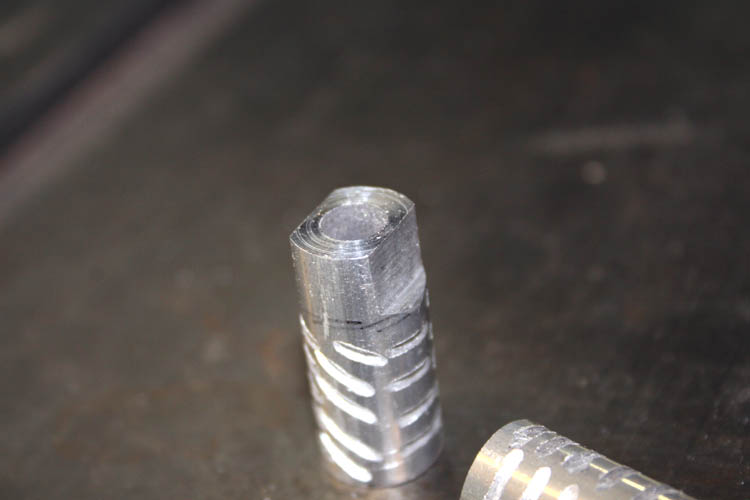
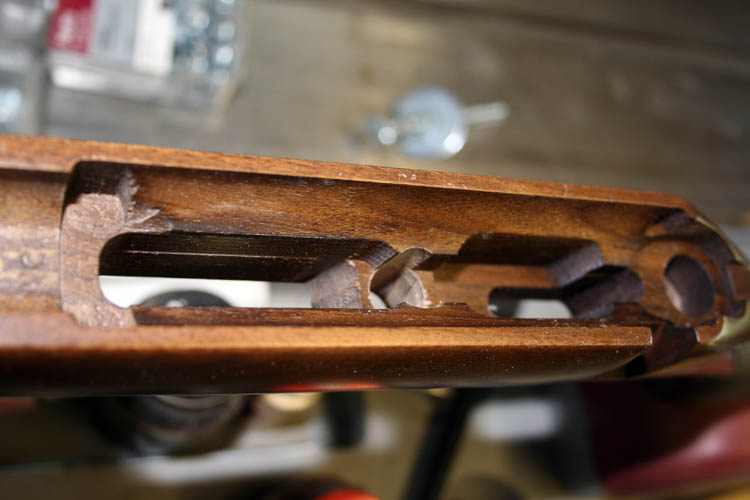
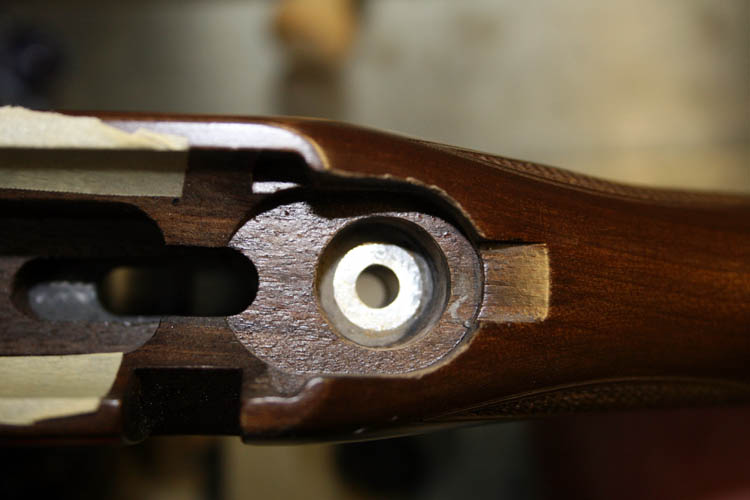
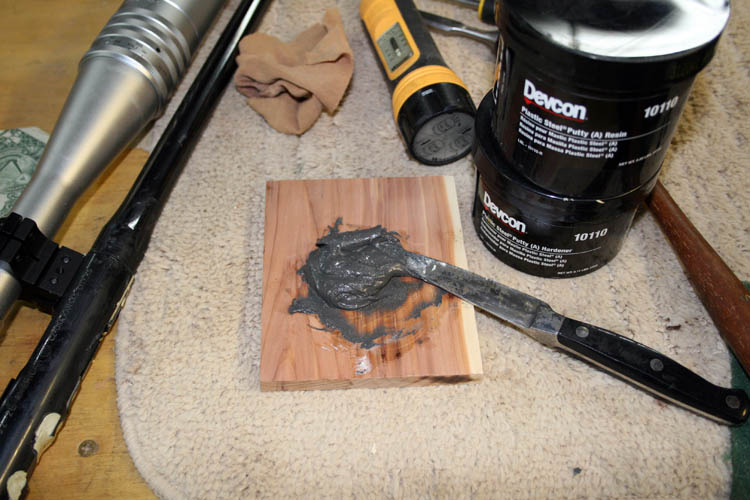
I cut some pretty hefty grooves in the pillar blocks to aid in the Devon
plastic steel putty aka
mud adhering to them and also scored the inside walls of the holes in the
stock for the same purpose. You can see why the front pillar block is
ground down due to the closeness of the trigger sear block which contains
the ball bearing and sear spring and the magazine well
housing. The sear block will pivot on the front sear pin when the trigger is
pulled.
MIXING THE DEVCON PLASTIC STEEL PUTTY AND PILLAR
INSTALLATION
The Devcon product 10110 requires a ratio of 2.5:1 of the resin to the
harder. I had placed .005 thickness masking tape around the stock where
the receiver will rest to give me that much clearance to make certain the
pillar blocks will be making full contact with the receiver and the trigger
guard aka floor plate versus the stock. I believe all the pixs below were taken after
the pillars were installed and cleaned up.

The installation of the pillar blocks went without a glitch and test
fired the rifle the next day and getting some good one hole 5-shot cluster
groups at 52 yards depending on the luck of the
draw of the ammo and the wind conditions, however the rifle was shooting good one hole clusters before the
pillar blocks were installed but not as tight and as often.
My biorhythms were doing pretty good but after the pillar block
installation and test firing, everything went down hill from then on.
Seems like everything I touched, I either dropped it or knocked it
over....not the best of days to say the least...that is when you need to
take a break, get away from the task at hand and come back at a later time or day!
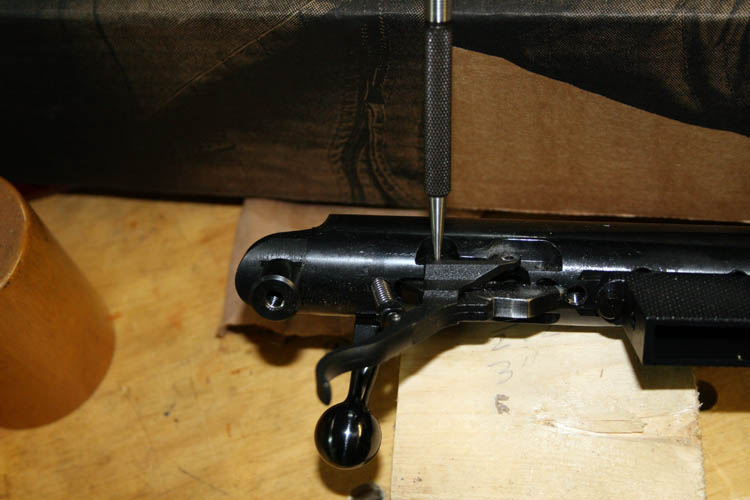
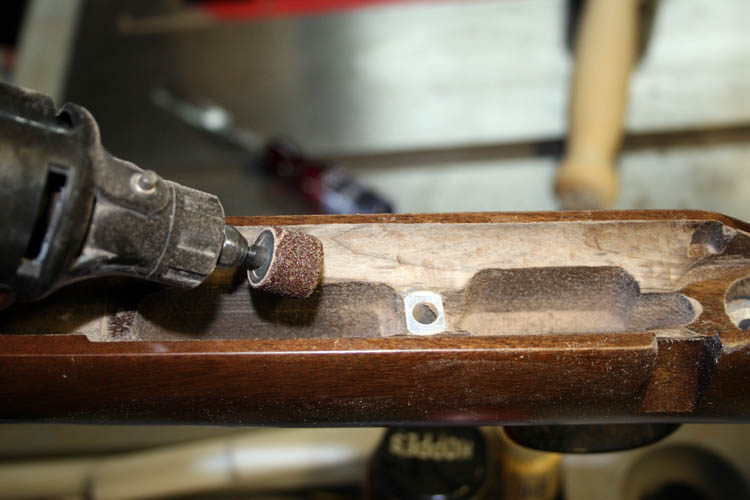
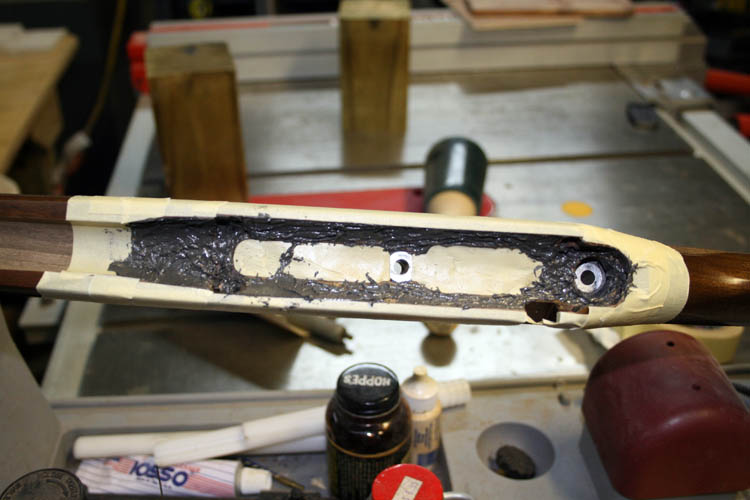
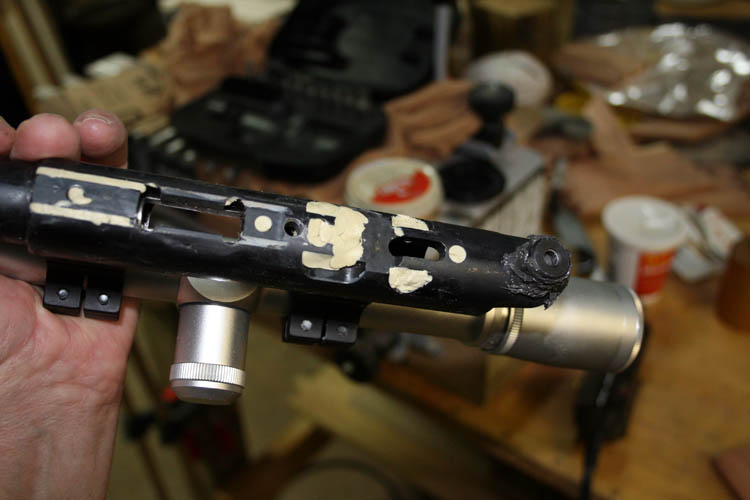
GLASS BEDDING THE RECEIVER
Prior to glass bedding the receiver, I took the trigger group assembly
and the magazine well from the receiver and used plumber's putty to fill up
any area that might cause an epoxy lock-up between the receiver and the stock.
I used the Dremel tool with a 3/4 inch diameter sanding drum to rough up and
remove some material from the stock where the receiver/barrel makes contact.
I also used a solid carbide cutter to score the stock for additional epoxy
adhesion which no doubt is an overkill on my part but I have seen good epoxy
not adhere to a slick smooth service from my musical instrument making days
and roughing the area up has worked the best for better adhesion. After all the prep work, etc., I mixed up the Devcon 10110 and I believe it
was much thicker than the last time I used it and on the box, the
instructions were to use before 12-09-2018 which is well within that time
frame but the containers had been opened and last used on/or about
01-28-2014 prior to the pillar installation above. I noticed that the white hardener did not mix as smooth as
it should with the resin and did not spread well. I did not spread enough under the
barrel where it tapers down from the receiver which needs support and maybe
to help diminish barrel vibrations and harmonics. A good
shelf-life estimate after the product is opened is at least
one year but
couldn't find anything definitive as to once the product is opened. I
have used Epoxy 330 that was over 30 years old still unopened and it worked
as good as the day when I purchased it. Back then, I purchased glues
in quantity and apparently shelf-life wasn't an issue since the glue was
used up fairly rapidly.


With the rear action lug totally surrounded by the epoxy mud, you can
only remove the action/barrel by pulling on it vertically. Initially,
I had to install a longer action bolt 1/2 x 20tpi and give the bolt a few
good whacks with a small musical
fret hammer using the brass head portion to free
the receiver from the bedding. I was apparently
"brain dead" since I could have inserted a wood dowel
in the receiver and used it to get some additional leverage to remove the
action from the stock. The receiver to wood stock fit like a glove
around the rear action lug with no horizontal or side to side slop.
Several have commented on different rimfire threads that the rear receiver
lug in the dovetail could move around and it is possible depending on how
tight the lug is mounted into the dovetail slot. The bedding around
the lug should solve any potential problem in that area.
I must say that I had the most trouble trying to get the small steel ball
bearing between the spring in the sear to the receiver. I was all
thumbs with my dexterity gone South for sure with the ball bearing going
airborne like a rocket through the air and luckily did not
hit the concrete floor and wander off into obscurity. I am guessing it took
me a good 30 to 45 minutes and I don't have a clue as to how many times I
put the ball bearing in place to have it come out before I could align and drive the
pin through the trigger frame and the sear. I know I didn't have the
barrel/receiver supported in the proper orientation to make it easier. It just wasn't one of
those days but I kept going until I got it right. I saw one set of
instructions from DIProducts using a metal pin to wedge and/or hold the ball
bearing inside the sear but it didn't work for me.
BALL BEARING SUPER GLUE INSTALLATION METHOD
NOTE: My Brother-in-Law purchased a CZ 452 American and I
sent it to Accurate Ordnance, LLC to have them thread the barrel. When
I received the receiver/barrel back, I installed the trigger group and after
several tries of trying to get the sear installed with the same difficulty I
had as above, the idea of using Super Glue to hold the ball bearing in place
against the spring of which I tried it and it worked flawless.
Installed the spring/ball bearing on the first try after my Super Glue
technique. Everything worked as it should with the sear. Many
use a heavy grease between the ball bearing and the last coil of the spring
to help hold it in place. The factory uses this method since grease is
inside the spring at the end adjacent the ball bearing.
The finished job doesn't look too bad, but under the hood, it could use a
make over! In all probability, I will go back at a later date and apply a skim coat of
epoxy to the areas that needs it more or less just for eye appeal. This
definitely was not one of my better jobs, but it is fixable!
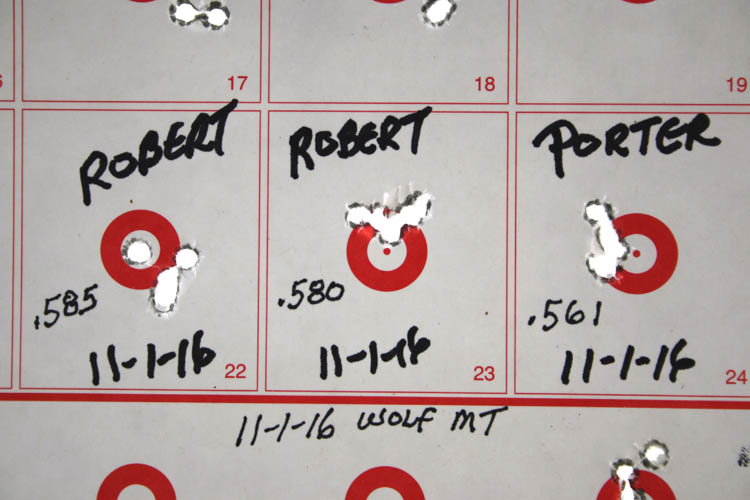
After the clean-up on the stock and action, the wind was fairly calm and
shot about 35 rounds. The first ten (10) rounds were horrible and
thought I had surely messed the rifle up and have to go back and grind the
glass bedding from the stock and start over. After the first ten rounds were fired, the
rifle started holding it's POA and was pleased to see it come around with
the Wolf Match Target ammo. The Wolf MT ammo is good but you will
still get an occasional flyer.
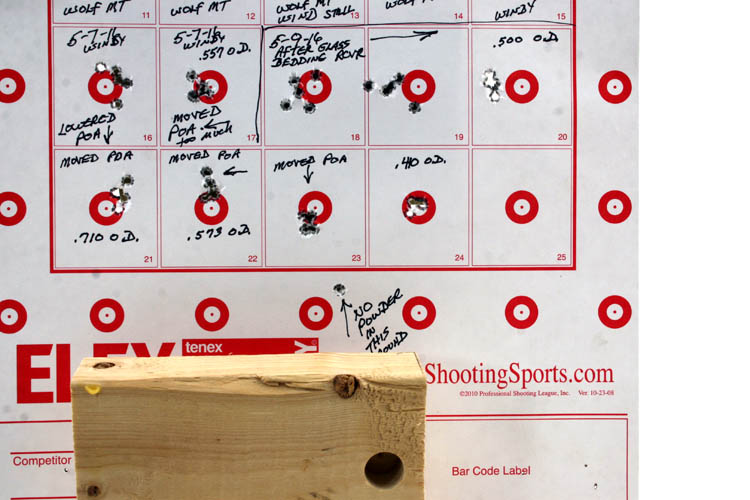
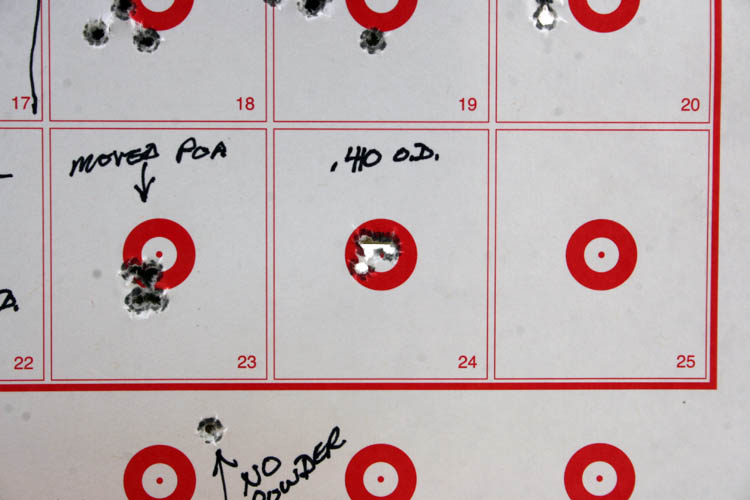
Target # 23 had one round that printed extremely low and the muzzle
report was hardly audible with the suppressor. I moved the point of
aim (POA) up after firing target # 23 and as evidenced by the 5-shot group
fired on target # 24, the CZ 452 left-hand American is coming around.
Web published update by Bill aka Mickey Porter on 05-09-16.
COULD NOT REMOVE THE BOLT FROM THE RECEIVER
I fired a few rounds on the morning of 05-10-16 but the wind was a little
too much, nevertheless, all the rounds fired would easily harvest a squirrel
with a head shot
at 52 yards. This CZ 452 American left-hand is a keeper for sure!
l decided to run a few patches through the bore to remove some powder
residue and noticed I could not remove the bolt from the receiver. I
removed the barrel/receiver from the stock and the bolt could be removed by
depressing the trigger which causes the rear of the sear to move downward
leaving an exit path for the bolt out of the receiver.
CORRECTED THE PROBLEM
I had to regrind the
flat
upper portion of the forward stock pillar block that faces the sear to allow the sear to pivot
downward enough
where the sear inside the bolt would travel downward far enough
to allow the bolt to pass over it and allow the bolt to move to the rear. This probably took at least an
hour of small grinding increments and putting the barrel/receiver back onto the stock and
moving the bolt rearward while depressing the trigger until it would release.
It is best to check the bolt operation with the pillar blocks in place on
the receiver before installing the pillar blocks into the stock.
I test fired at least four rounds at the target outside perimeter bullseye
which are used as a sighter or fowler in a match and 3 of
the 4 were inside the white portion of each individual bullseye shot at which is
around .375 inches in diameter.
Web published update by Bill aka Mickey Porter on 05-10-16 and 06-08-16.
WE WHOOPED 'EM AGAIN JOSEY 11-01-16
The ole CZ has been sitting idle for the most part since the summer
months and time to bring her out again to harvest a few squirrels for a
fried squirrel
and gravy meal.
The past week or two, I have fired some Wolf Match Target rounds through
it and not pleased with the grouping. The Weaver T35 scope was
replaced with a Bushnell Banner 6 x 18 x 50mm scope which is still an
overkill for squirrel hunting but I am prone to do things like that. I tried a few Norma TAC-22, SK
Standard Plus and were getting some hot and weak rounds. With the
suppressor, it is very easy to hear a hot or weak round fired in comparison to a
regular velocity round and printing on the target is the visual aid. I have a chronograph, but didn't want to set
it up which removes any doubt about bullet velocity and helps eliminate some
of the shooter error equation. I like to use the ole saying, "I
couldn't hit a bull in the butt with a base fiddle" to
describe my shooting the past couple weeks as evidenced by the adjacent
targets fired........grin
if you must! I am not sure the Bushnell Banner scope accurately tracks
when going from 6 to 18 power, but it shouldn't be that far off. I
think the wind and bullet variable velocity is the culprit in my humble
opinion.
My friend Robert Webster, retired Captain NCDPS from Hamlet, NC came over
today, whereas he shoots right handed and my
shooting bench
is set up for left hand shooting only, because of the way I have it
positioned and anchored since I shoot left handed. My shooting bench
is ambidextrous, but to reiterate, I have it positioned solely for left handed shooting.
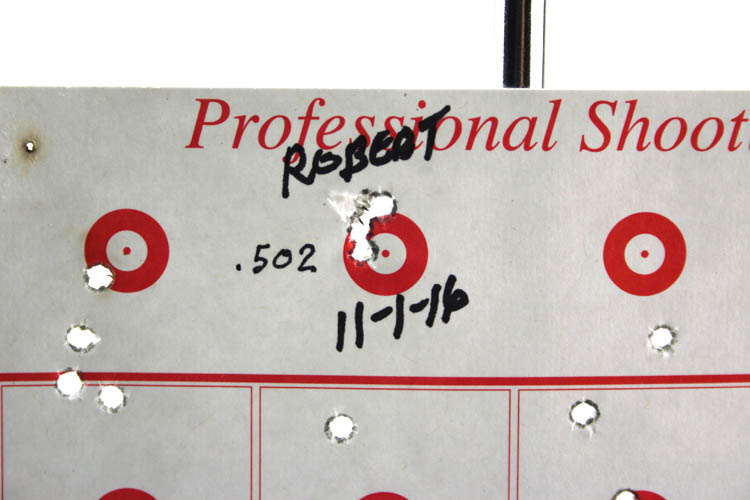
Robert can shoot extremely well either handed and after firing several five
shot groups at 52 yards, he said, "It ain't the rifle, get ready to weep."
The wind was fairly calm and I checked Robert's fired groups and he was
right; the gun is shooting fine. He used one of the lines from the
movie, The Outlaw Josey Wales, "We whooped 'em
again Josey" and we both got a good grin going out of that
one. After Robert shot a couple excellent groups, I fired a 5 shot
group that wasn't bad either, but not as tight as Robert's last group fired, of which I
put the calipers on the groups later.
Below pixs of the groups fired outside diameter:
There was just a little wind, but it didn't seem to affect the bullets
much today. I moved the scope 2 clicks up and 2 clicks left after
target # 22 was fired. The Bushnell Banner scope has 1/4 MOA.
Lloyds of London would be in trouble if they issued life insurance
polices on squirrels around here!
Robert said that I need to fix the shooting bench where a right hander
could shoot and I told him, "If I did, I would have to
sell you my gun."
Some of the ammo fired lately, had a few hot and weak rounds in there and we
both say, "With a good gun, ammunition is the key!
My short story titled,
Biorhythms might shed some light on my shooting; got to have an
excuse, right?
Web published update by Bill aka Mickey Porter on 11-01-16.
A PICTURE IS WORTH A THOUSAND WORDS
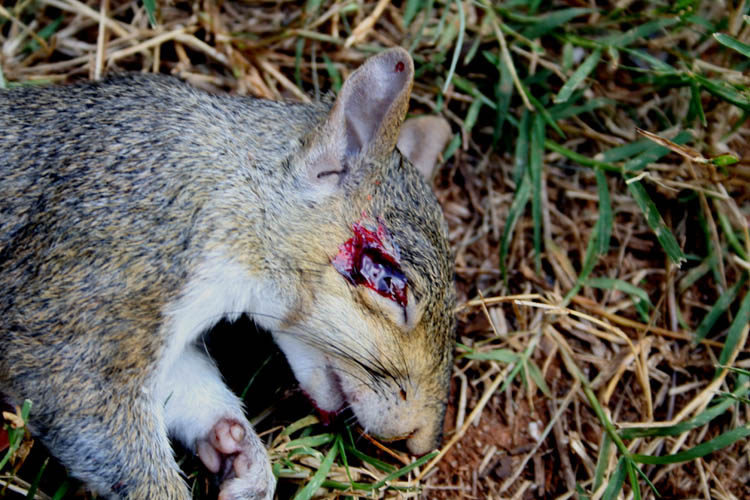
Above squirrel taken at 50 yards and Yes, the eye was the aiming point!
Web published update by Bill aka Mickey Porter on 11-08-16.
SQUIRRELS VISITING DEER FEEDING AREA 11-09-16
Below a few pixs of a couple unlucky squirrels that ventured into my deer
feeding area while I had the little rimfire rifle close by just for the
squirrels:
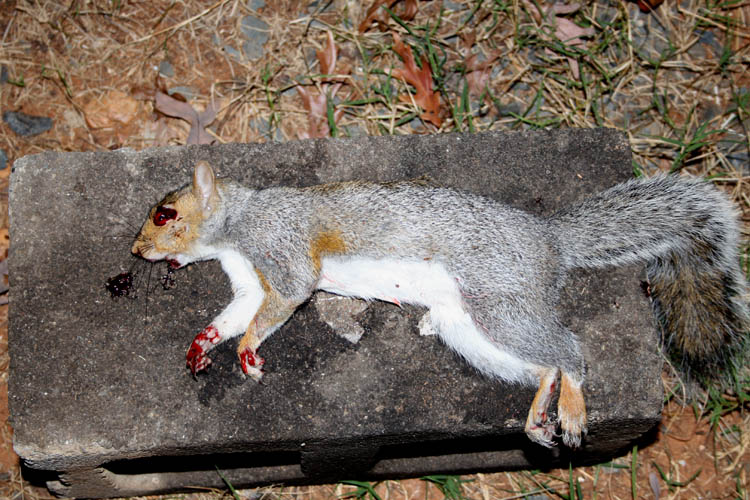

Very little meat wasted with these type of heat shots!

Both squirrels taken at 50 yards. The CZ USA 452 American is
definitely some serious medicine for harvesting those bushy tails!
The Wolf Match Target 40 grain bullets modified to a hollow point
using the Neal Waltz
die is awesome.
In summary, I can't say for
sure that the glass bedding and pillow blocks added much if any accuracy to
this rifle, but it definitely did not hurt any either. As stated
earlier, ammunition is the key factor for accuracy with this rifle and most
other rifles as well.
LEAVING ON A
SPIRITUAL NOTE
If you do not know Jesus Christ as your Lord and Savior, please take this
moment to accept him by Faith into your Life, whereby Salvation will be
attained.
Ephesians 2:8 - 2:9 8 For by grace are ye saved through faith;
and that not of yourselves: [it is] the gift of God: 9 Not of works, lest
any man should boast.
Hebrews 11:1 “Now faith is the substance of things hoped for, the
evidence of things not seen.”
Romans 10:17 “So then faith cometh by hearing, and hearing by the
word of God.”
Open this
link about faith in the King James Bible.
Romans 10:9 “That if thou shalt confess with thy mouth the Lord
Jesus, and shalt believe in thine heart that God hath raised him from the
dead, thou shalt be saved.”
Open this
link of Bible Verses About Salvation, King
James Version Bible (KJV).
Hebrews 4:12 “For the word of God is quick, and powerful, and
sharper than any two edged sword, piercing even to the dividing asunder of
soul and spirit, and of the joints and marrow, and is a discerner of the
thoughts and intents of the heart.”
Romans 6:23 “For the wages of sin is death; but the gift of God is
eternal life through Jesus Christ our Lord.”
Romans 3:23 “For all have sinned, and come short of the glory of
God;”
Micah 6:8 “He hath shewed thee, O man, what is good; and what doth
the LORD require of thee, but to do justly, and to love mercy, and to walk
humbly with thy God?”
Philippians 4:13 "I can do all things through Christ which
strengtheneth me."


